
Proctoring with Examity
The university expects faculty using virtual proctoring to adhere to guidelines found on the Proctoring Options page. Please review these guidelines before setting up a proctored exam.
Instructor Checklist
- Review university guidelines for online proctoring.
- Add proctoring information to course syllabus.
- Create test in Blackboard and make test available.
- Visit Examity from your course (see Blackboard Setup below for options)
- Wait 24 hours. (Test and test-taker data is transferred between Blackboard and Examity overnight.)
- Set up test in Examity.
Questions?
For additional help setting up a test or using Examity in Blackboard, please email OIR@wichita.edu.
Examity Information
You and your students can access Examity in your Blackboard course through the "Tools" menu (Original) or the "Books and Tools" menu (Ultra).
Alternatively, you can add a specific Examity link to your course for easy access. Find instructions for that option below.
Add a link to Examity in the left menu or inside a content area of your course (e.g. Course Materials).
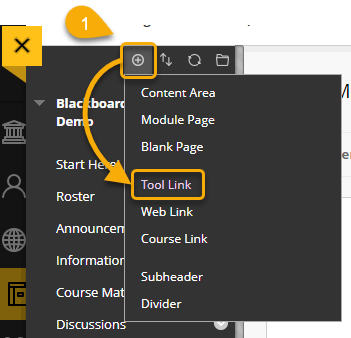
To add a link to the left menu:
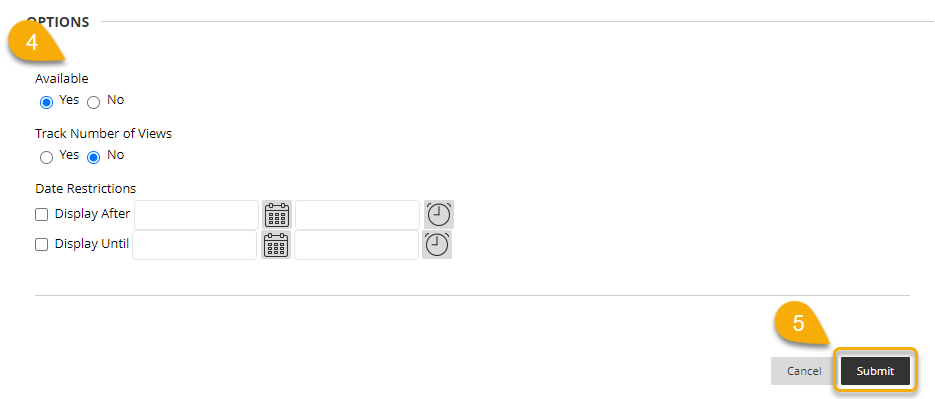
- Select "Add menu item," then "Tool Link."
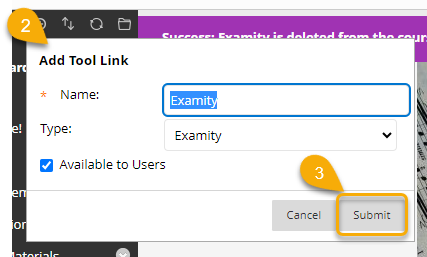
- Add a name for the link, and choose "Examity" from the list of tools. Check the box to make the link available to students.
- Select Submit.
The new tool link will show up at the bottom of your course menu. Hover over the link to move it to another location in the menu.
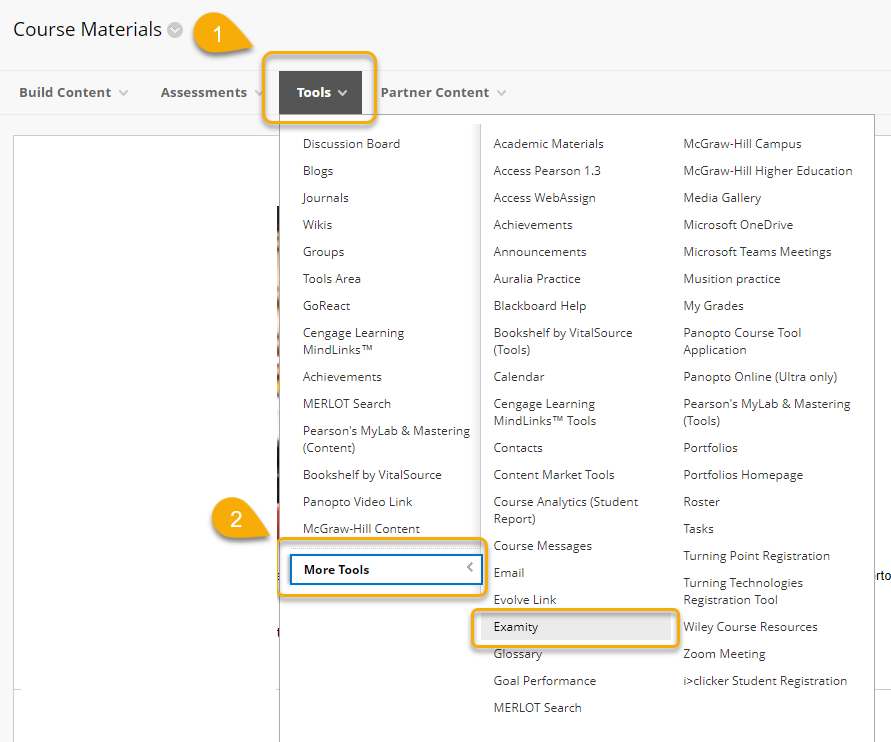
To add a link to a content area:
- Inside the content area, choose "Tools."
- Select "More Tools," and then "Examity."
- (Optional) Type a Description for the link.
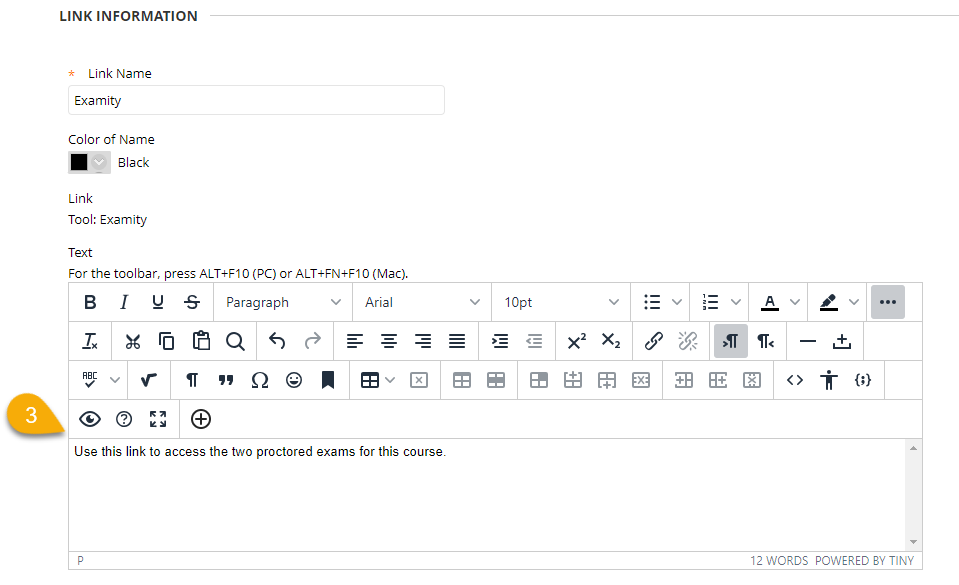
- Choose settings.
- Select Submit.
The new tool link will appear at the bottom of the content area. Hover over it to move it to another location on the page.
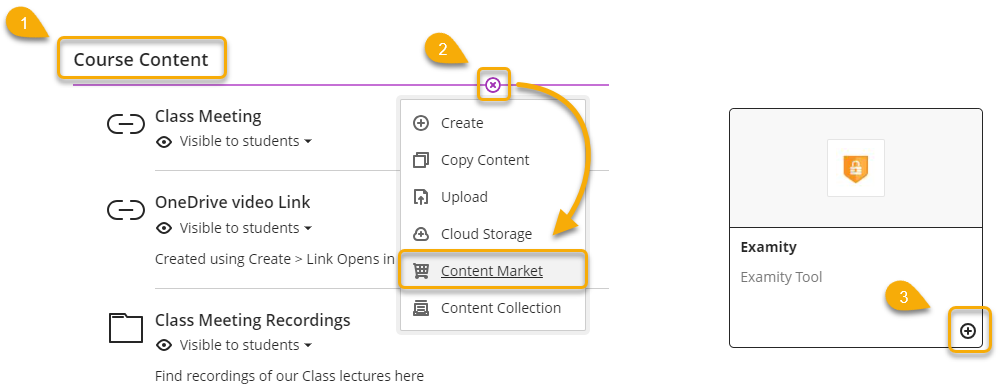
Add a link to Examity to the Course Content section of your course, or inside a folder or a module in the Course Content.
To add a link to Examity:
- Navigate to the area where you would like the link.
- Select the plus sign ("Add Content") and then choose "Content Market."
- Find "Examity" and select the plus sign ("Add Tool Link").
- (Optional) Edit the tool link to add a description
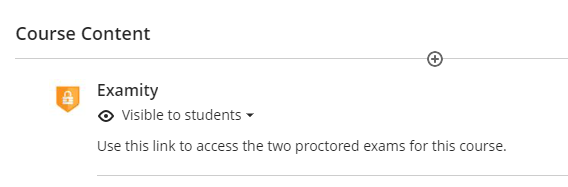
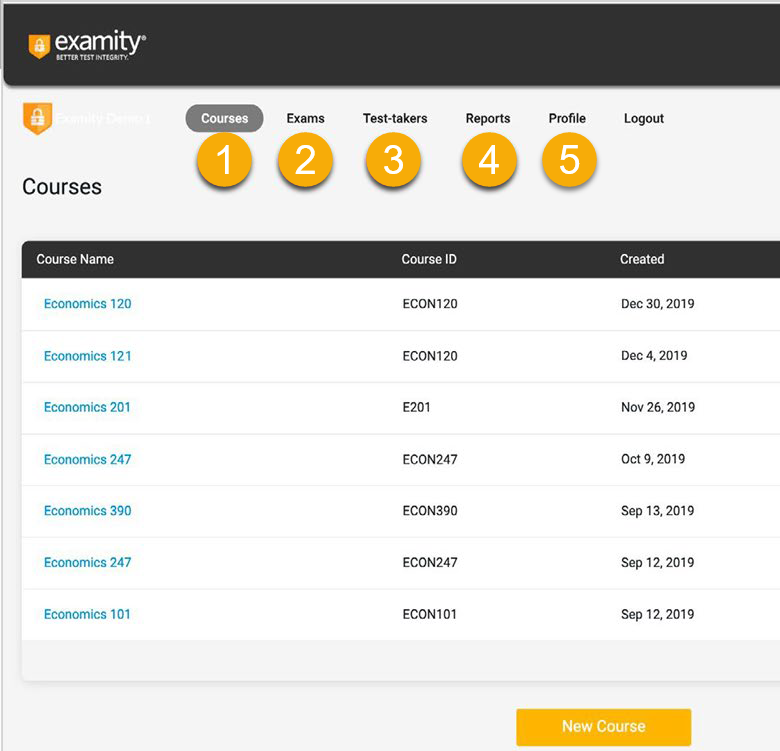
Select the Examity link in your course to open the Examity Dashboard.
The dashboard has 5 main areas:
- Courses: View all of your courses. You may also drill down further to see course details, test-takers, accommodations, and exams. Clicking the column headers allows you to sort by that field. Courses link your exams with your test-takers. Once enrolled in a course, a test-taker will have access to schedule or start appointments for all of the exams within that course.
- Exams: With this view, you’ll be able to see all of your exams across all of your courses. You will be able to see the exam status, modality, and activity.
- Test-takers: Review details on all test-takers enrolled in your courses.
- Dashboard/Reports: Here you have access to testing reporting and analytics. You can see reports such as the "Exam Summary Report," where you can review scheduled, canceled, and unscheduled appointments.
- Profile: This is where you set your time zone that will drive the display in your Examity dashboard, including the exam scheduling window you will set and all reports.
In order to set up Examity proctoring, you must first create your exam and make it available in Blackboard. If you are using Blackboard Original, you must also ensure the test has been deployed (i.e. added to the course content).
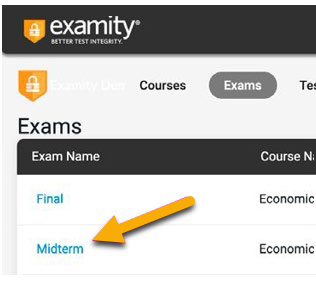
Once your exam is created and available, select your Examity link. To bring up a list of all exams, select the "Exams" tab.

Select the exam name to see exam setting options.
Exam Settings
Most of the data displayed in this section will be pulled in automatically from the settings for the exam within your Blackboard course. These details include the testing window, the exam duration, the exam URL, and the unique password (if set). If you are using third-party or other exams that are outside of the LMS, you will have to add this information manually.
Other options (highlighted in image below):
- Allow test-takers to upload a file directly into Examity
- Block specific instructor-defined extensions in Chrome
- Enable browser lock (close additional tabs, disallow print, copy, and paste functions)
The default setting is "Live Proctoring."
When your settings are complete, select Save Changes.
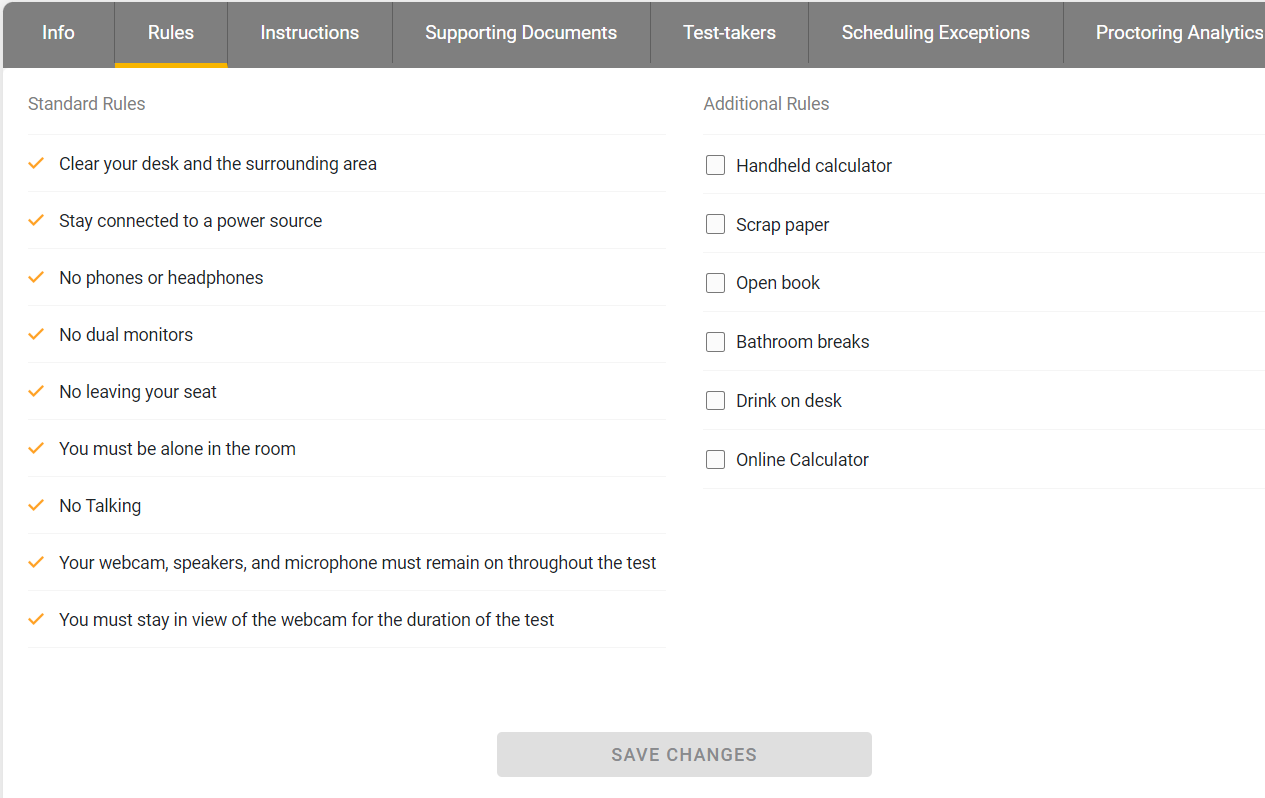
In this section, you will specify the rules for the exam.
Standard Rules
- Clear your desk and the surrounding area
- Stay connected to a power source
- No phones or headphones
- No dual monitors
- No leaving your seat
- You must be alone in the room
- No Talking
- Your webcam, speakers, and microphone must remain on throughout the test
- You must stay in view of the webcam for the duration of the test
Additional Rules (optional)
- Handheld calculator
- Scrap paper
- Open book
- Bathroom breaks
- Drink on desk
- Online Calculator
Be sure to select "Save Changes" before moving to the next tab.
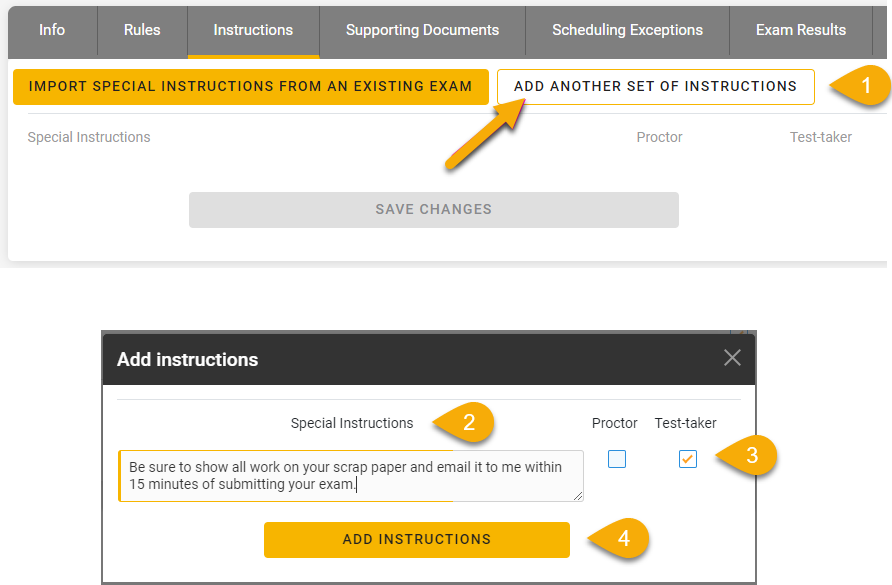
In this section, you have the option to import a set of additional rules or instructions from another test in Examity, or add a new set of instructions.
To add new instructions:
- Select "Add Another Set of Instructions."
- Type your special instructions
- Select whether the instructions are intended for the proctor, the test-taker, or both.
- Select "Add Instructions."
Be sure to select "Save Changes" before you move to the next tab.
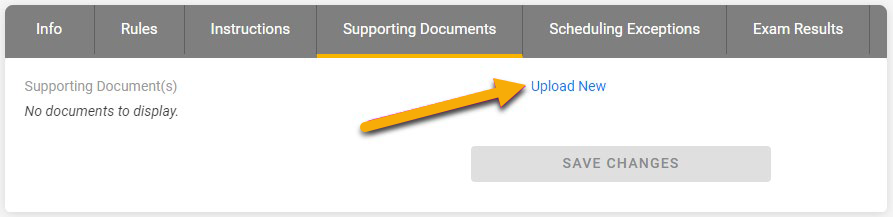
In this area, you can upload any files or documents necessary for test-takers to successfully complete the exam.
To add files:
- Select "Upload New," then navigate to the file on your computer and select it.
- Repeat step 1 to add additional files.
Be sure to select "Save Changes" before you move to the next tab.
In this area (as opposed to the top level "Test-Takers" menu, which has more options), you can see students' scheduling status and send reminders.
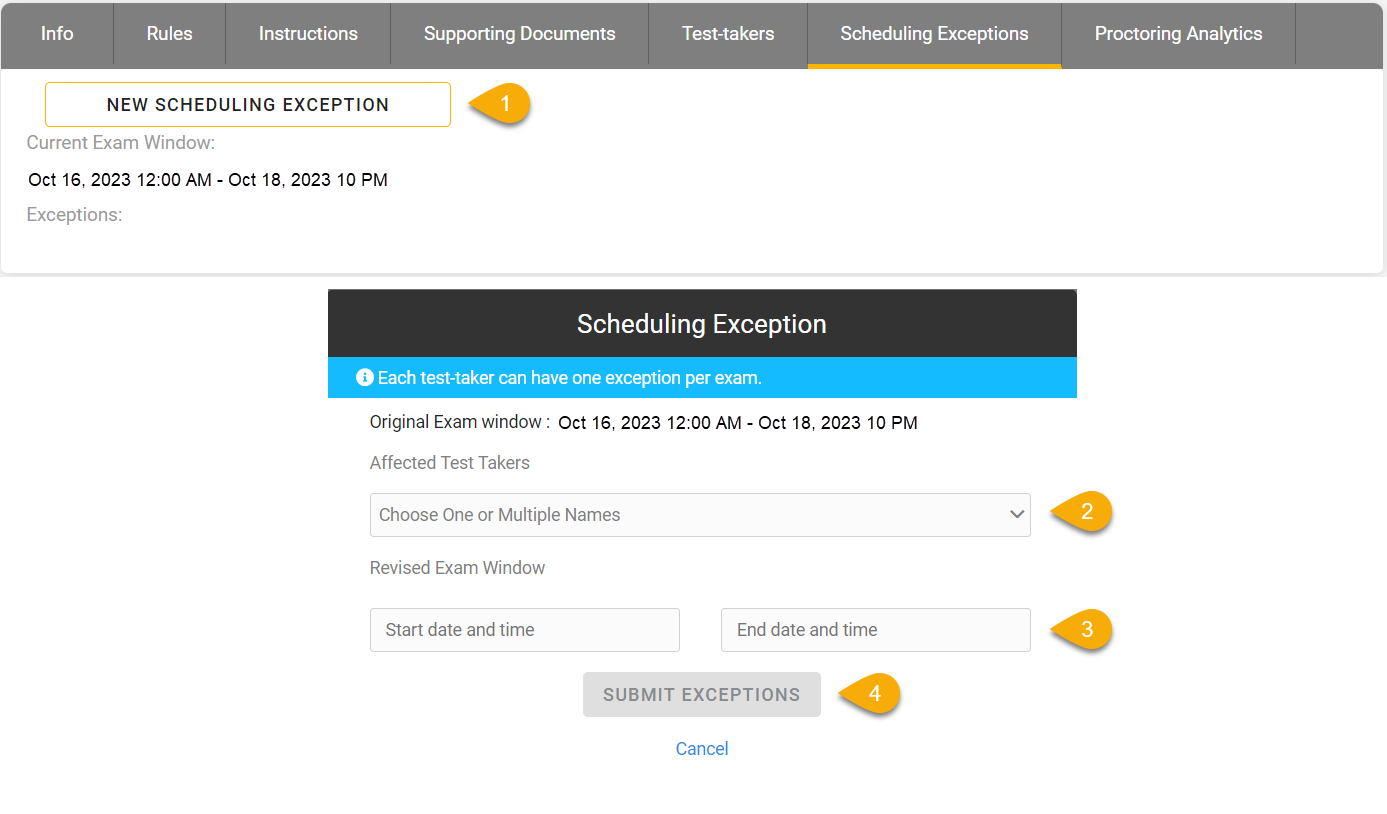
In this area, you can create Scheduling Exceptions for test-takers who need to schedule
their exam outside of the
exam window. Scheduling Exceptions show the test-taker the new exam window assigned
by their instructor
and only allows them to schedule during that time. There can only be one Scheduling
Exception per test-taker
per exam.
To add a scheduling exception to a test,
- Select “New Scheduling Exception” button on the Scheduling Exceptions tab.
- Select the student’s name from the dropdown
- Enter the revised testing window dates and times
- Select “Submit Exceptions."
After your exam is scheduled in Examity, you can view students' scheduling status and send reminders in the "Proctoring Analytics" tab.
Note: Your view may vary slightly from the images below.
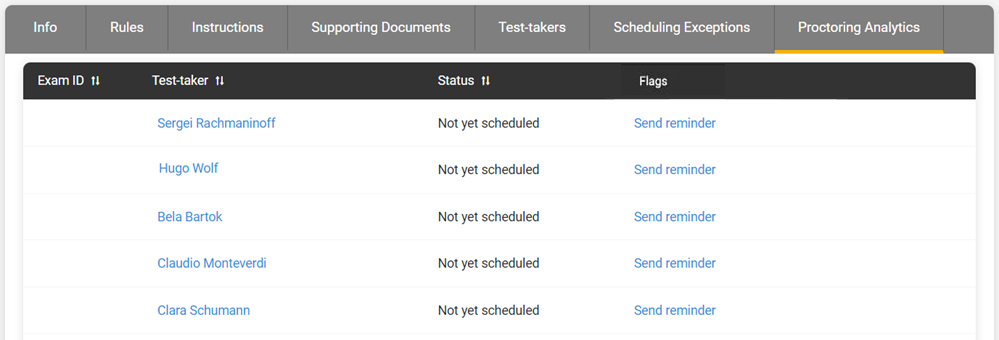
When students complete the exam, this tab will also show their exam ID and any potential violations that may have taken place.
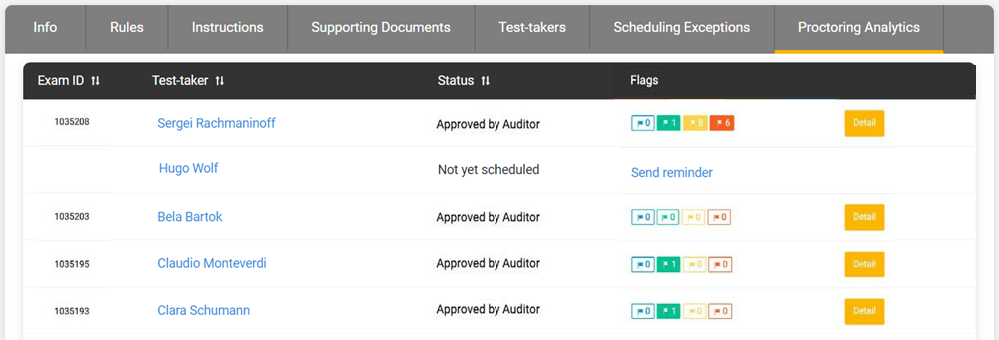
Flag Guide:
- Green flags are raised for significant steps where there is no violation.
- Yellow flags are issued when a rule is broken but cheating does not necessarily take place.
- Red flags are given when the student exhibits clear cheating behavior.
- Blue alerts are reported when a technical issue arises.
To view the results of a specific test taker, click the “Detail” button at the end of the test-taker’s row to view the exam recording and details of any flags.
Adding Student Accommodations
If you have a student who requires special test accommodations (example: extra time to complete the exam), you can make sure proctors are aware ahead of time by entering the information in Examity at the course level. There are multiple ways to get to this setting; below is the most direct path.
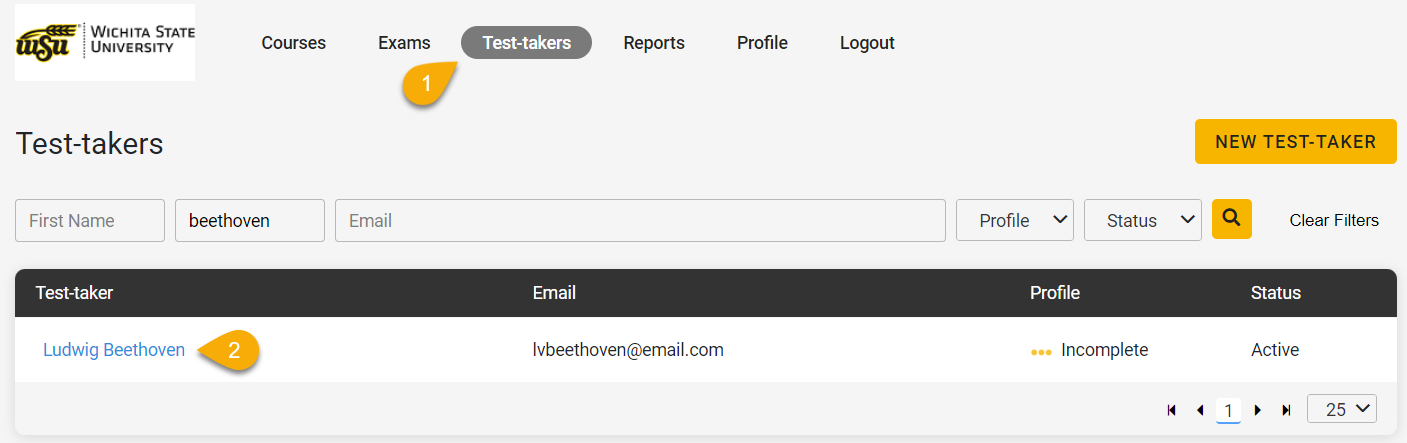
To add accommodations:
- After ensuring your accommodations are set in Blackboard, select "Test-Takers" from the top-level Examity menu.
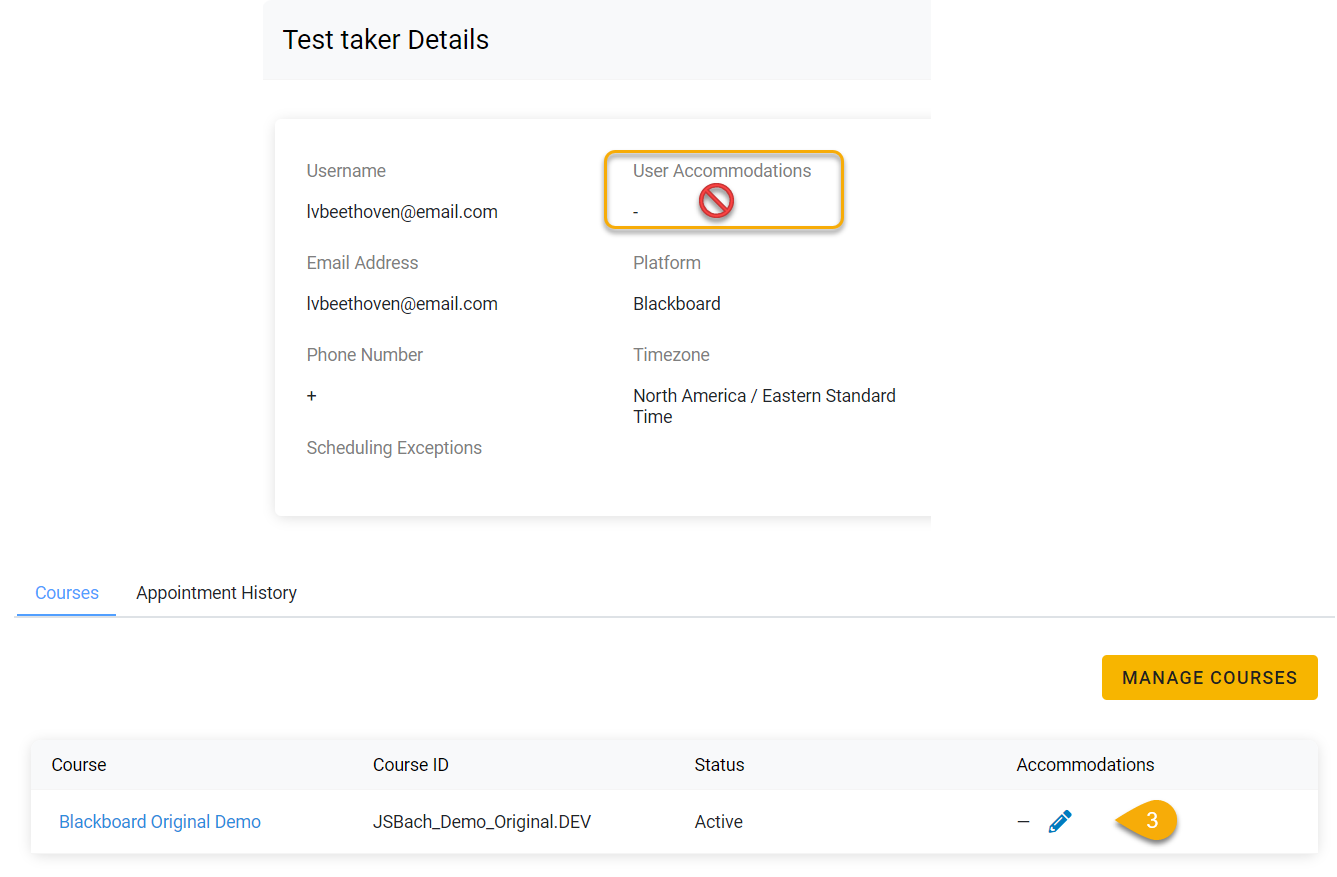
- Select a student's name.
- On the Test-taker Details page, note that you can not add or edit "User Accommodations."
This is because these accommodations are institutional-level, and are set by admins.
Scroll down to the bottom of the page to see the test-taker's courses. Find the correct
course and select "Edit" (the pencil icon) under Accommodations.
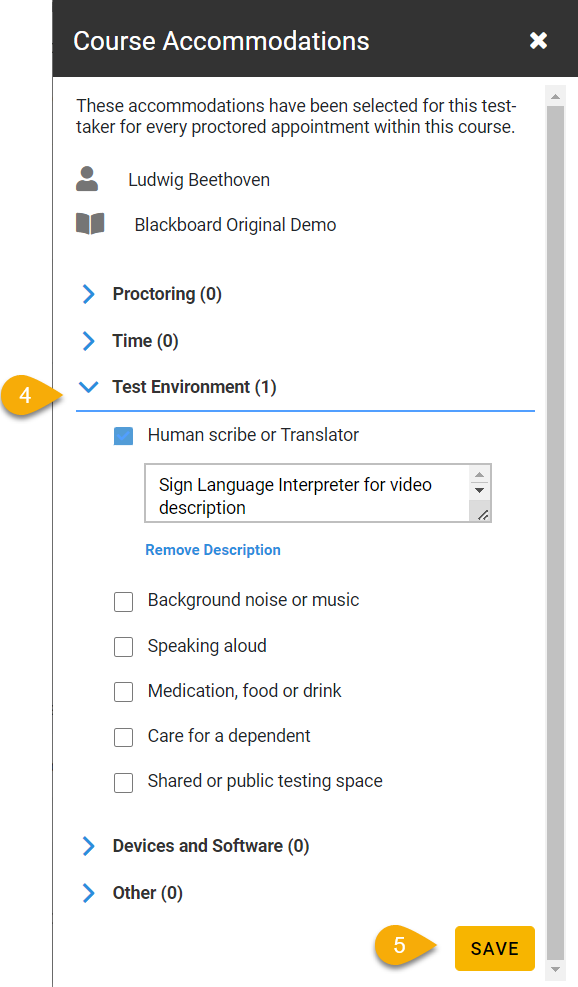
- Add required accommodations.
- Select "Save."
From the Proctoring Options page:
Proctoring Requirements for Faculty
Because of privacy and security risks associated with virtual proctoring, faculty requiring this service in their courses are required to provide:
- Notification in the syllabus and course schedule of estimated fees paid directly by the student
- Notification of students to avoid testing in personal spaces such as bedrooms or other sensitive locations
- To students a detailed inventory of information collected by the online proctoring
solution
- These include name, email, digital signature, challenge questions, ID image, room environment, as well as full access to webcam video, audio, computer desktop environment, and credit card details for live exams)
- Clear instructions on how students remove online proctoring browser plugins once the
exam is completed.
- information is here: test taker system requierments
Sample Syllabus Language
The following is language you can use in your syllabus informing students of the above proctoring options:
Exam Proctoring
This course requires proctoring for the following exam(s):
- [exam type(s), e.g. Midterm, Final, etc.)
Please be advised of the following concerning virtual proctoring:
- Live proctored exams are paid to Examity directly by the student. The costs range between $11-17 depending on the length of the exam.
- Avoid testing in personal spaces such as bedrooms or other sensitive locations, however, testing will need to be in a quiet and secluded area.
- The information collected by the online proctoring solution include: name, email, digital signature, challenge questions, ID image, room environment, as well as full access to webcam video, audio, computer desktop environment, and credit card details for live exams)
- You may cover up sensitive information on your official ID, leaving name and image only showing.
- For those wanting to remove online proctoring browser plugins once the exam is completed please see this link from Examity
- If you have any technical issues with Examity, contact them for 24/7 support.
- Approved alternatives to virtual proctoring are listed below:
Proctoring Alternatives
- In-person group proctored exams administered by WSU faculty/staff with no fee
- [exam type, date and time, place]
- [exam type, date and time, place]
- …
-
- WSU Testing – limited in-person proctoring with a minimal fee. If you want to use this option, contact me so I can arrange to have the exam proctored there.
- Approved in-person off-campus proctor – Please contact me, and I will determine if I will give permission for an individual or an authorized testing center to proctor your exams in person. Test fees and available times will vary by location if using an authorized testing center. Examples could include other faculty or teachers, librarians, clergy, armed services service center staff, etc.
- Faculty-led remote 1:1 proctoring – Using web conferencing services, I may choose to proctor individual students 1:1 with no fee. You will be allowed to protect the privacy of your location, like with other virtual proctoring.
For Instructors