Teams in Ultra
Blackboard Ultra's Teams integration tool allows you to create a Team for your course, which is automatically populated with the students enrolled. Teams and Blackboard complement each other to enrich the learning experience.
Jump to Section
Why should I use Teams in my Blackboard course?
"...learning awakens a variety of internal developmental processes that are able to operate only when the [student] is interacting with people in his environment and in cooperation with his peers."
Lev Vygostky, Zone of Proximal Development
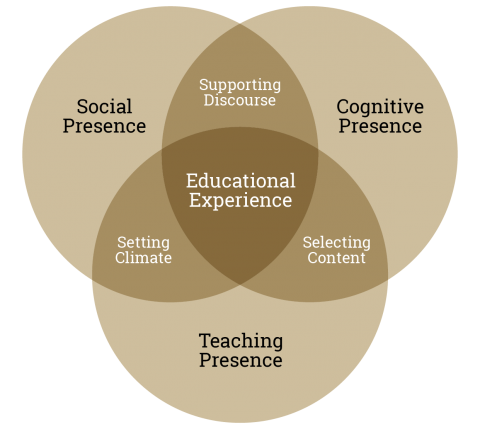
According to D.R. Garrison's Community of Inquiry Framework, three independent elements are involved in creating deep and meaningful learning experiences: social presence, cognitive presence, and teaching presence.
Teams supports Social Presence, which is "the ability of Participants to identify with the community, communicate purposefully in a trusting environment, and develop interpersonal relationships by way of projecting their individual personalities." Social Presence must be developed before Cognitive Presence and Teaching Presence can occur.
- It facilitates community building
- It fosters group work and collaboration
- It connects students and instructors in real time
At this time assessments, submission of assignments, and grading should be done in Blackboard. While tools to complete these tasks exist in Teams, the current integration with Blackboard does not include communication regarding these items.
Blackboard works best for online activites that are sequential and asynchronous.
Teams works best for online activities that are continuous and synchronous.
Blackboard should be used for:
- Teaching Materials
- Reading Lists
- Assessment activities and realted information
- Summative assignments and submissions
- Grades and feedback
- Quizzes and tests
- Links to Teams spaces
Teams can be used for:
- Whole class or group meetings (synchronous teaching)
- Group work or group projects (facilitated through public or private channels)
- Socialization and community building (continuous discussion on General channel or course home page)
- Group activities
- Student presentations
- Co-creation of Office 365 documents
- Mentoring, tutoring, office hours, one-on-one or group meetings
In Teams, you can foster a social environment for your students that can help them stay engaged and build their motivation and enthusiasm.
- Posts can include images, memes, attachments, and links as well as likes in response to messages.
- Posts can be flagged as important, or as announcements.
- Channels provide opportunities for multiple discussions and interactions, and can be organized any way you want: by group members, by topic, by unit.
- A collaborative space in the Class Notebook allows students to share ideas.
- If your course does not involve Group work, channels can encourage study groups or peer-based meetings and provide a space for students to connect with one another in smaller groups.
Teams is specifically designed for collaboration and group working.
- Through chat and meetings, students and instructors can engage in synchronous, continuous communication. Group work benefits further from the collaborative use of Office 365 documents like Excel, Word, and PowerPoint.
- Channels allow students to chat, share files, and meet live through a scheduled meeting or the Meet Now option.
Blackboard allows you to schedule and access Teams meetings inside your course.
With Teams meetings, you can:
- Share files, websites, and screen views
- Share video and audio
- Create interactive learning experiences (using chat, quizzes, polls)
- Present in PowerPoint
- Use breakout rooms
Teams allows you to schedule meetings ahead of time or use the "Meet Now" feature to conference with the class, a small group, or an individual student.
Articles:
- Being "Present" in your Online Course
from Indiana University's Online Course Development book, a free Open Educational Resource created to facilitate the jump to online teaching during the COVID-19 pandemic, but useful for anyone developing online courses - Student Group Work
from the Dartmouth Center for Advancement and Learning's resources for instructors - Sustaining Community in an Online Environment
from The Derek Bok Center for Teaching and Learning's online resources for instructors - Tips for building an online learning community with Microsoft Teams
by Nick Skelton on LinkedIn - Strategies for Promoting Social Presence in your Online Courses
from the University of Colorado's "Online Design and Development" blog - Critical Inquiry in a Text-Based Environment: Computer Conferencing in Higher Education
by D. Randy Garrison, Terry Anderson, and Walter Archer at the University of Alberta, Edmonton, Alberta, Canada
Books
- Small Teaching Online, by Flower Darby and James M. Lang
- UDL in the Cloud, by Katie Novak, Ed.D. and Tom Thibodeau
To Enable Teams in your Ultra course:
- Open your Blackboard Ultra Course.
- In the Details and Actions menu, look for "Microsoft Teams." Select "Enable Microsoft Teams."

- On the next screen, select "Sync with Microsoft Teams."
This process can take up to 15 minutes to complete. You may need to refresh the page after completion.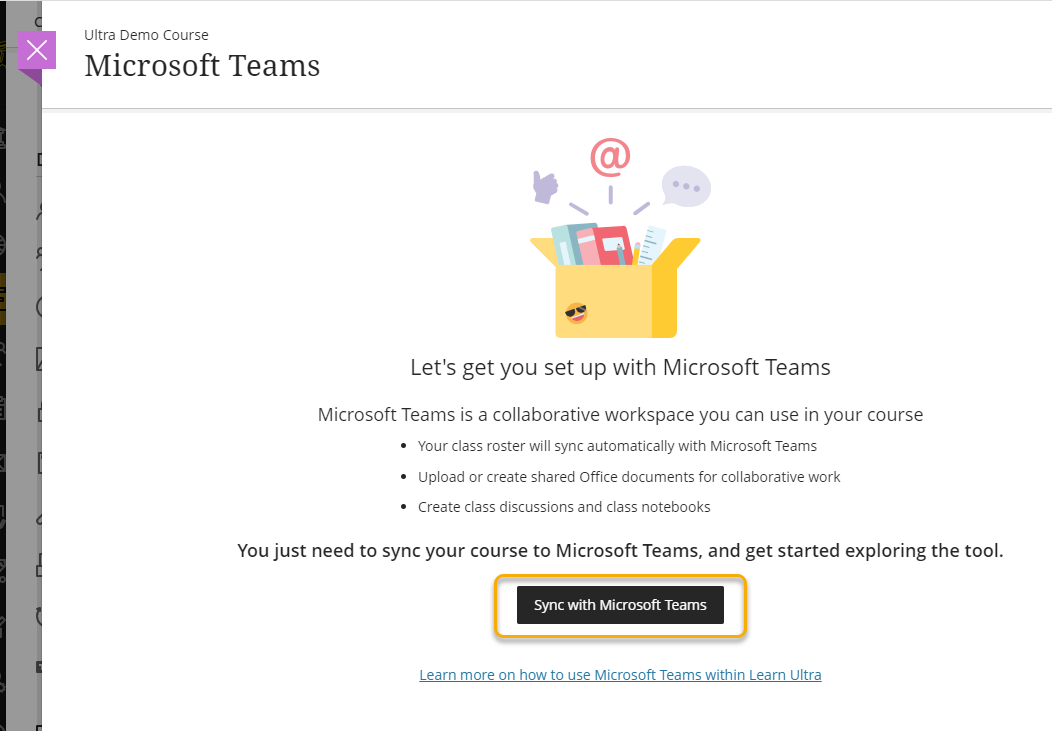

- Once the sync process has completed, you will see "Open Microsoft Teams." If you are
not redirected automatically to open Microsoft Teams, sign in using your institutional
credentials and follow the instructions to connect.

For basic information about Teams Meetings, see Getting Started with Teams Meetings.
In Blackboard, the Teams Meetings tool provides the ability to invite your class to join you in an online virtual call, allowing users to view past and upcoming meetings, schedule individual or recurring meetings, and join the Teams meetings related to the course directly from Learn Ultra. Teams Meetings also interacts with Teams classes in Ultra and will become automatically enabled when Microsoft Teams is enabled in your course.
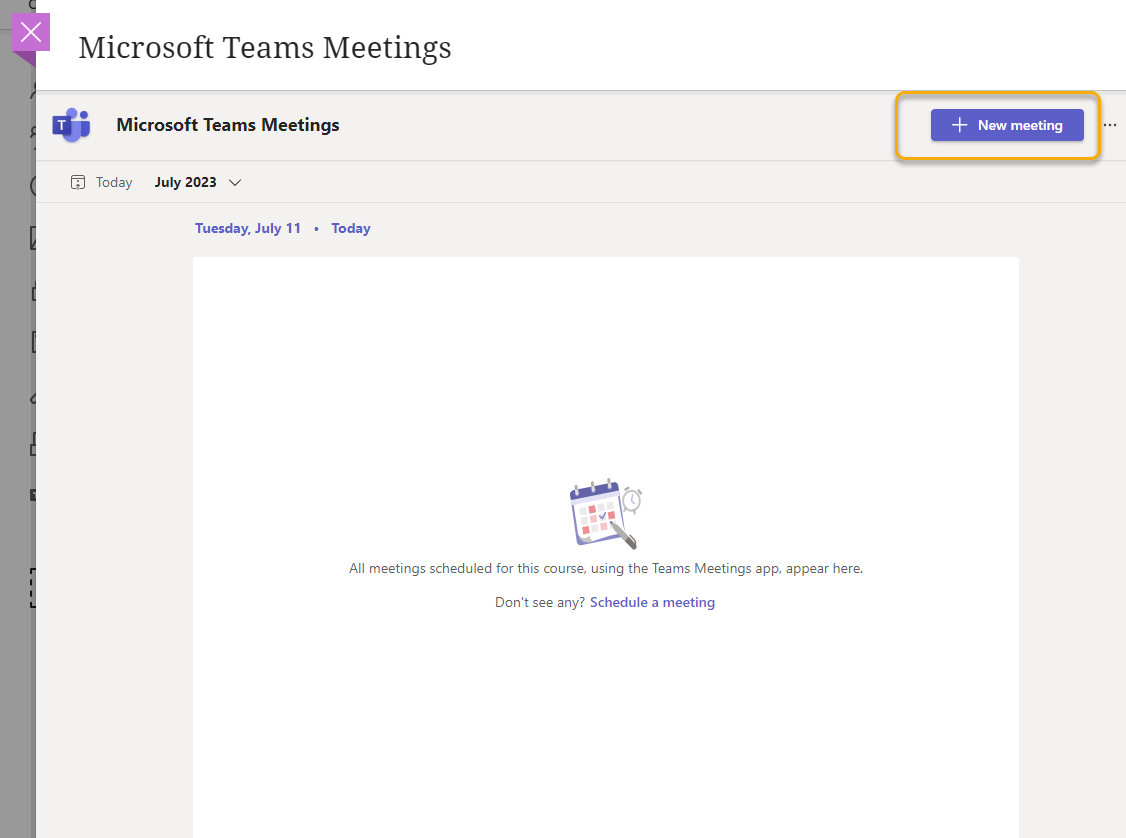
To Use the Teams Meetings Tool:
- Open your Blackboard Ultra Course.
- In the Details and Actions section, find "Microsoft Teams." Select "Open Microsoft Teams," and then "Open Microsoft
Teams meetings."
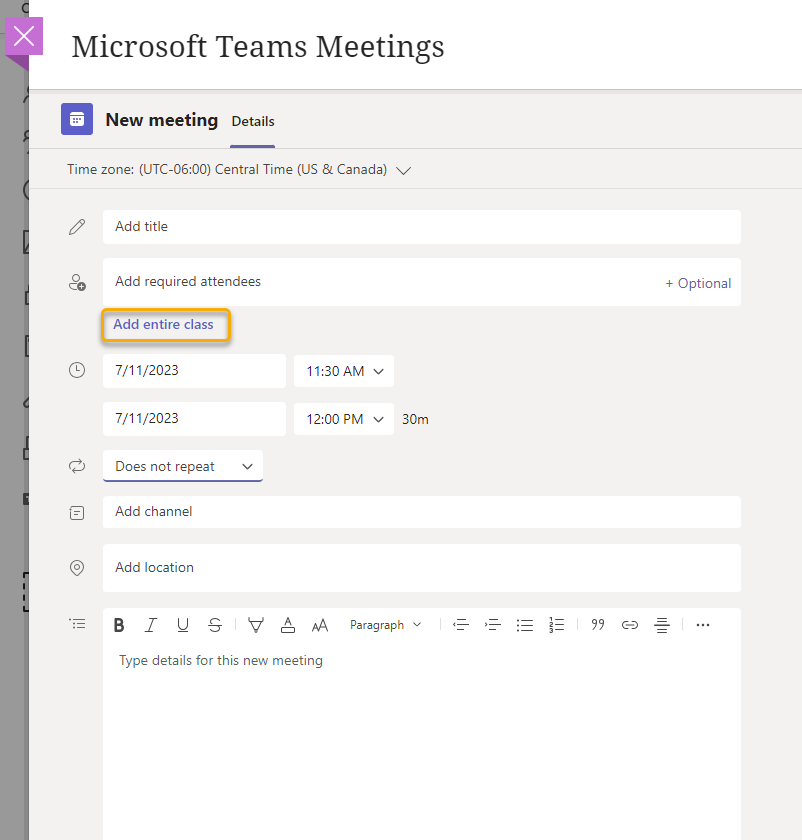
- In the Teams Meetings interface, select "New Meeting."
- Complete the required sections to create the meeting. Notice the option to "Add Entire
Class" under "Add required attendees." When you select this option, the meeting appears
on all of the students' Teams and Blackboard calendars.
*NOTE: If you record your meetings, students can access recordings and transcripts by going to the Teams Meetings tool and selecting the date of the meeting.

To Use the Teams Classes Tool:
- Open your Blackboard Ultra course.
- In the Details and Actions section, find "Microsoft Teams." Select "Open Microsoft Teams," and then "Open Microsoft
Teams classes."
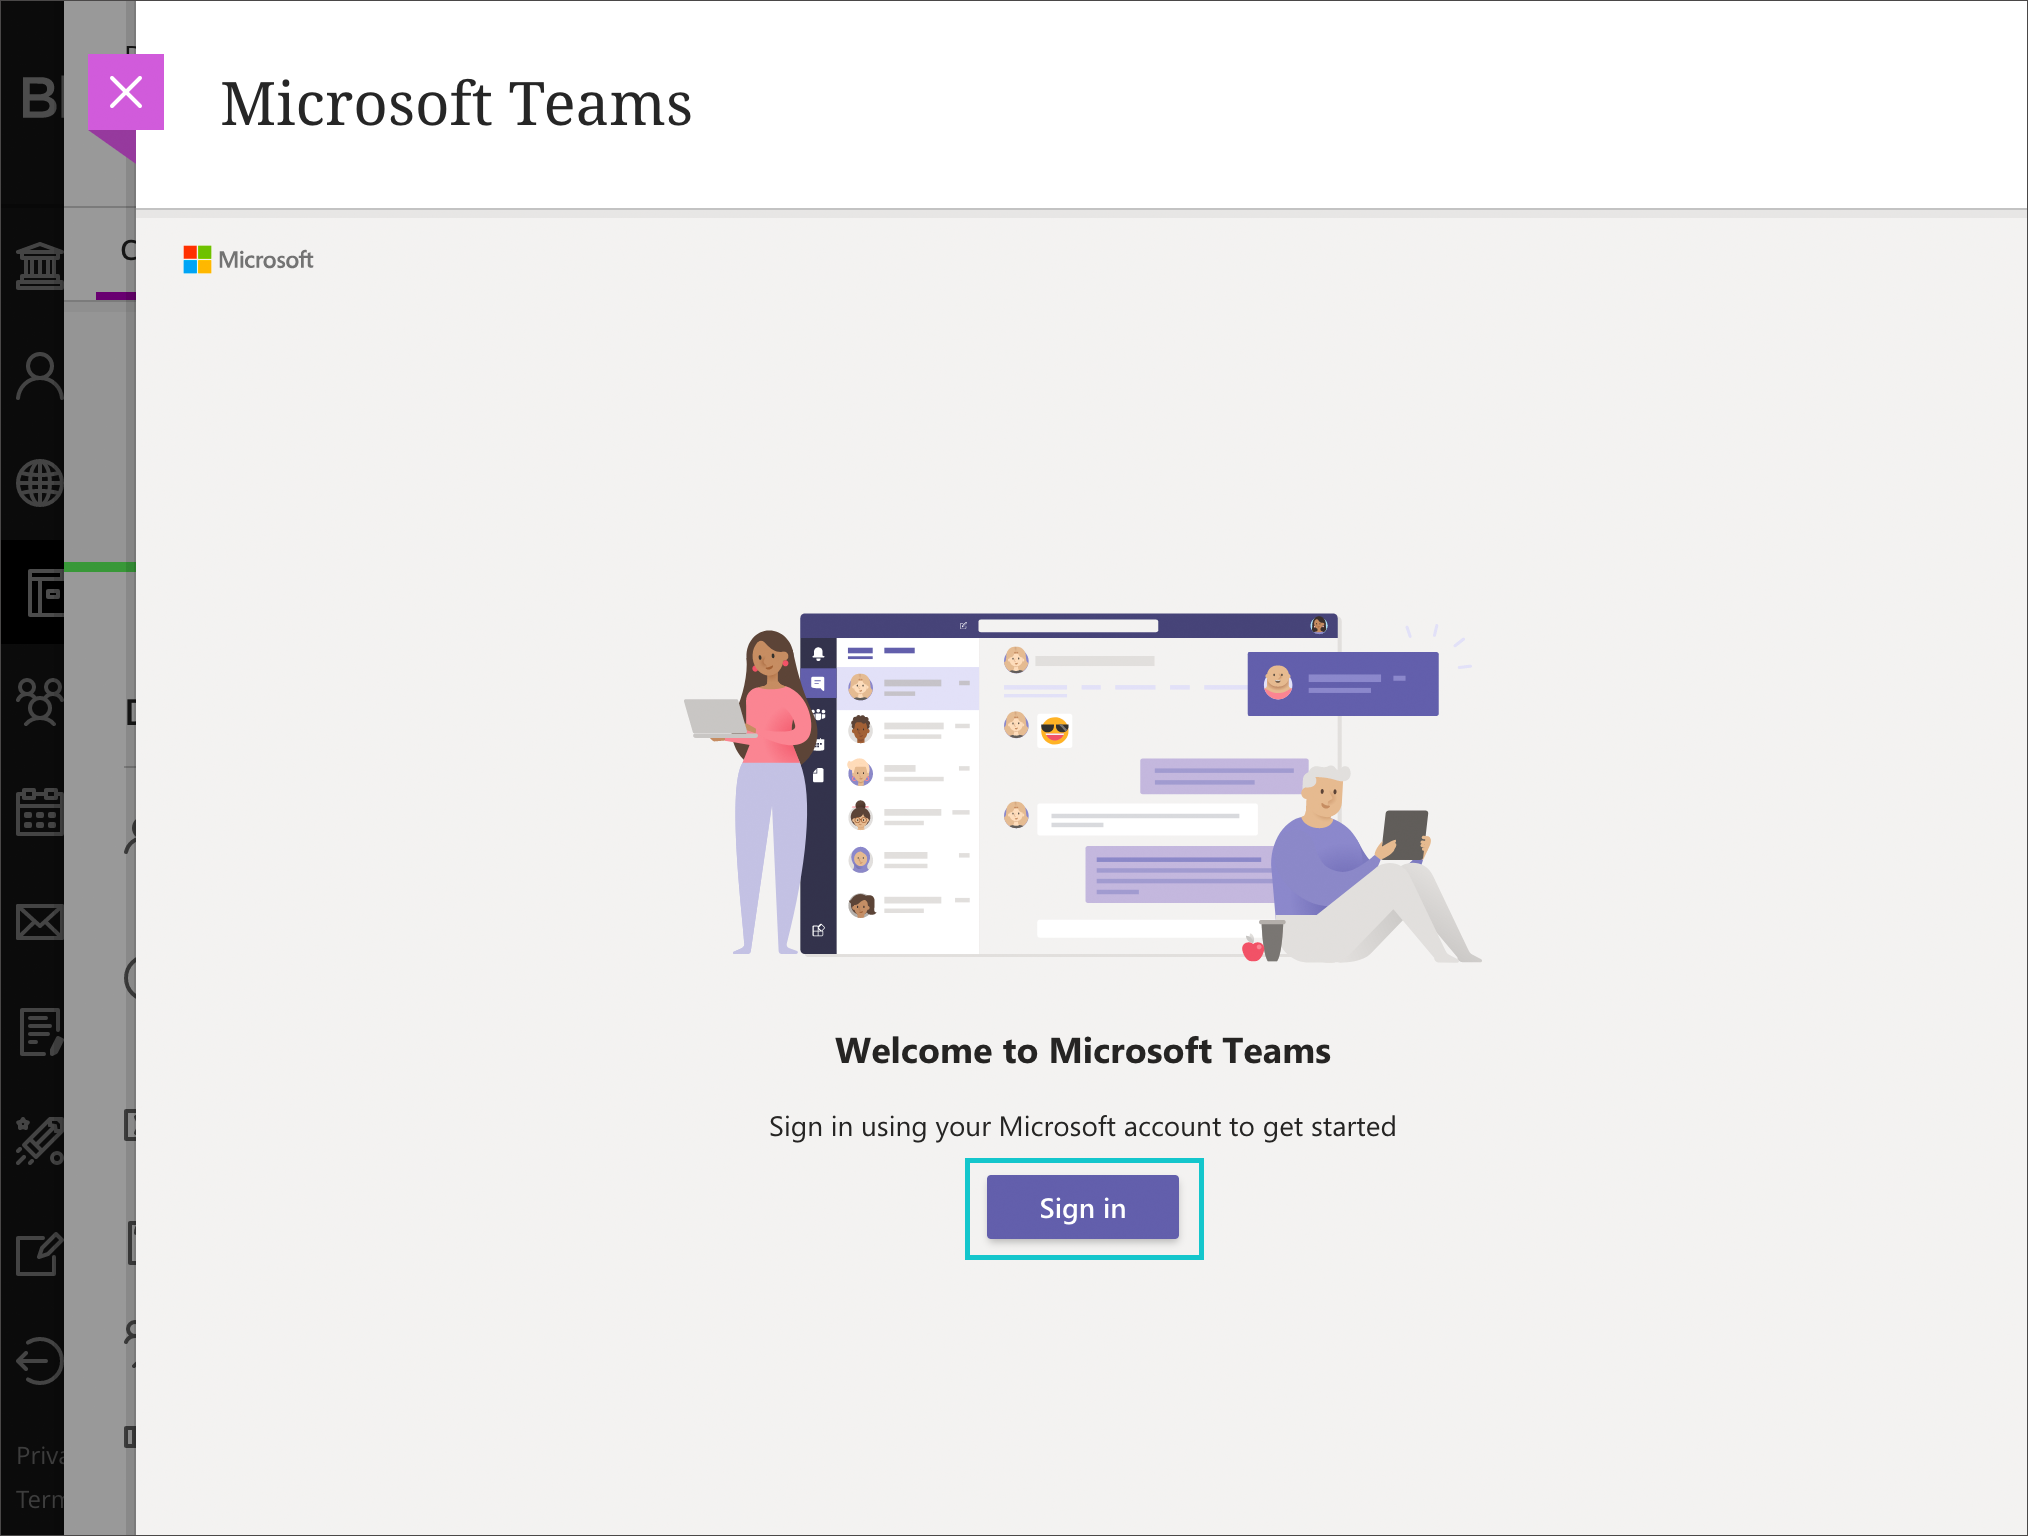
- Select "Sign in." If you are not automatically redirected to open Microsoft Teams,
sign in to Teams using your institutional credentials.
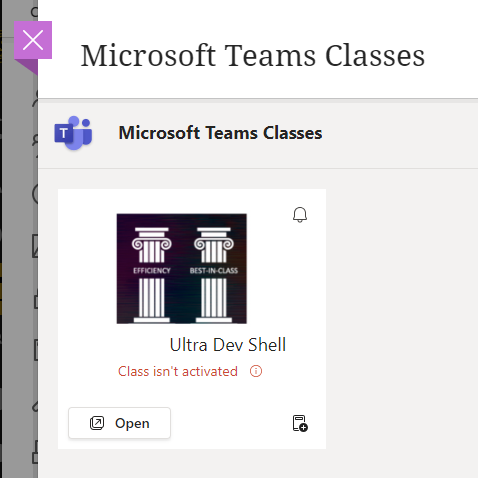
- Find the course, and select "Open." As indicated in this image, the class is not yet
activated. This means you can work in the Team but students cannot yet access it.
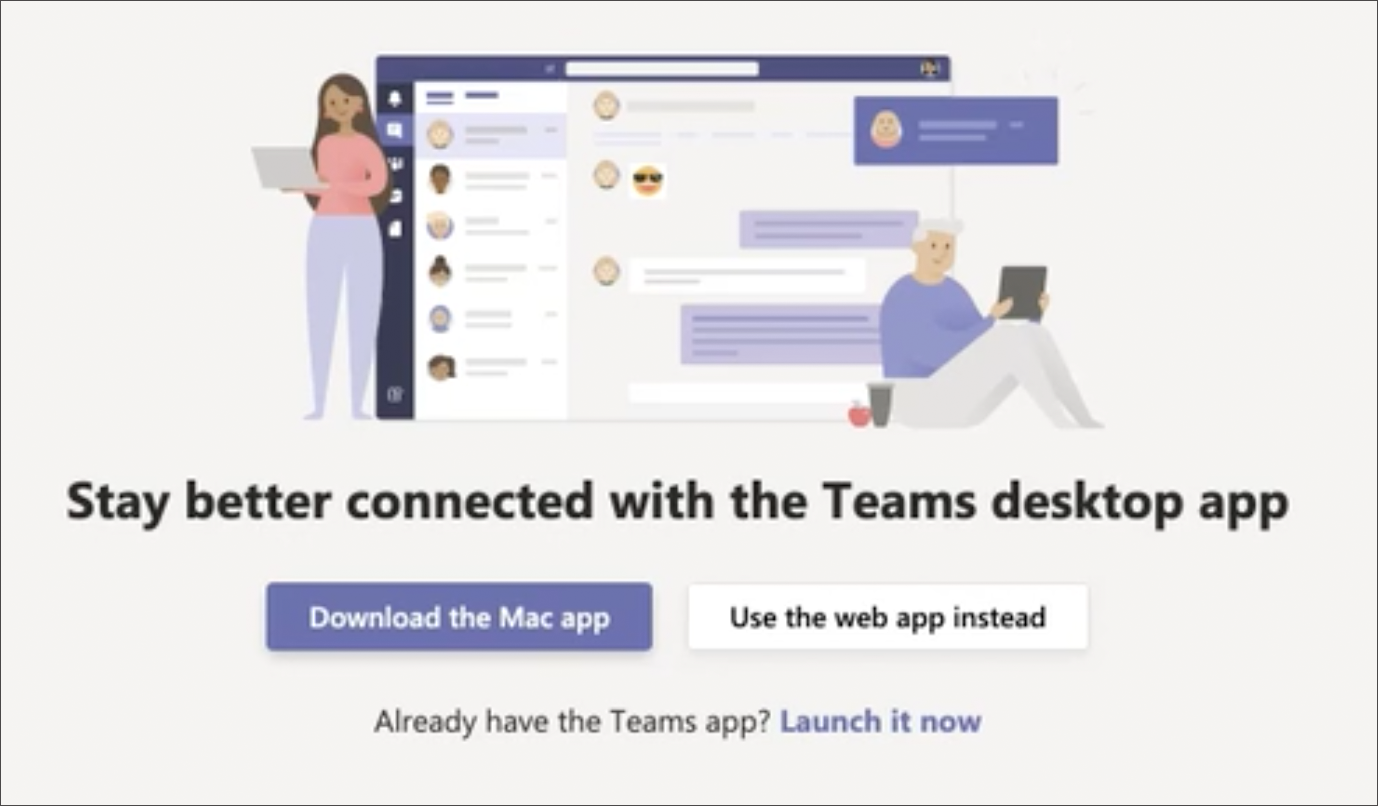
- Select how you would like to open Teams. You may choose between the web app (in a
browser) or the Teams app.
- When you are ready, activate your class team.
For more information about using Teams Classes, please visit the WSU Teams Guide or sign-up for Class Teams training under myTraining in myWSU.
To Record an Asynchronous Lecture:
- Open the Teams app, and select "Calendar."
- In the top right, select "Meet Now."
- Give your meeting a name and select "Start Meeting."

- Set up your lecture by sharing your screen, adjusting your camera settings, and presentation mode (see the WSU Teams Guide for specific information on these settings.
- When you are ready to record, select the "More" menu and choose "Record and transcribe,"
and "Start recording." ( "Start recording" starts both the recording and transcription;
while "Start transcription" starts only the transcription.)

- When you are finished recording, end the meeting.
Share a lecture recording in Blackboard
- In order to share a Teams meeting recording, locate it by opening the Teams app and selecting "Chat."
- Find the meeting and select it. Here you will find information about the meeting, as well as anything that was entered in the chat area during the meeting. Also found here are links to the meeting transcript, attendance, and meeting recording.
- To copy the link, select the three dots (the more menu) at the top right of the item.
Copy the link, and post it in Blackboard wherever you would like.
NOTE: Because this is the same meeting recurring over and over, you will want to choose a more descriptive title for the recording link in Blackboard, i.e. "4/3/2023 Meeting Recording."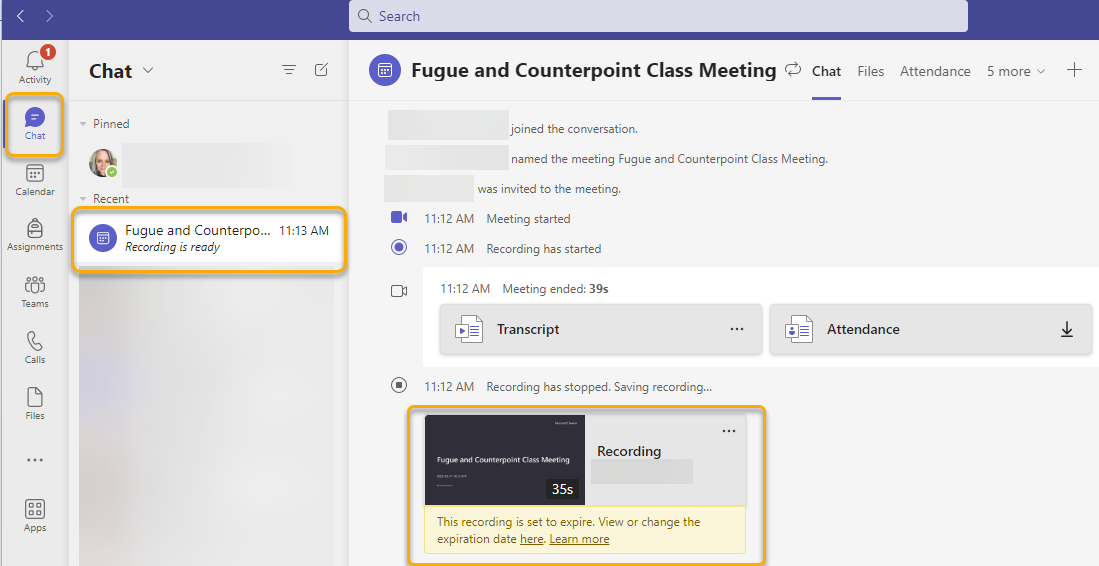
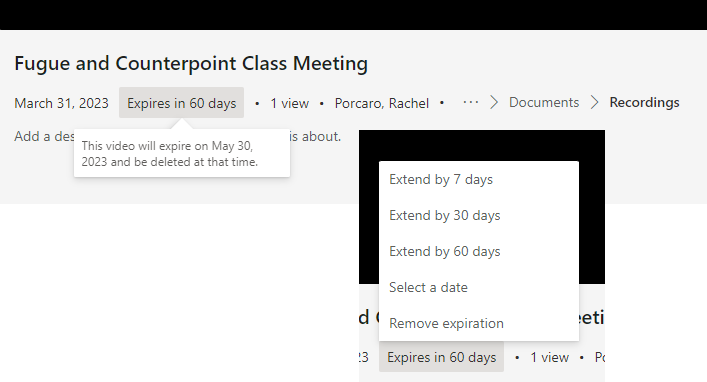
- You might notice a warning near the recording that says "This recording is set to
expire. View or change the expiration date here." The default retention setting for
meeting recordings is 60 days. To change that, click on the link and select the current
expiration date to see a menu of options.
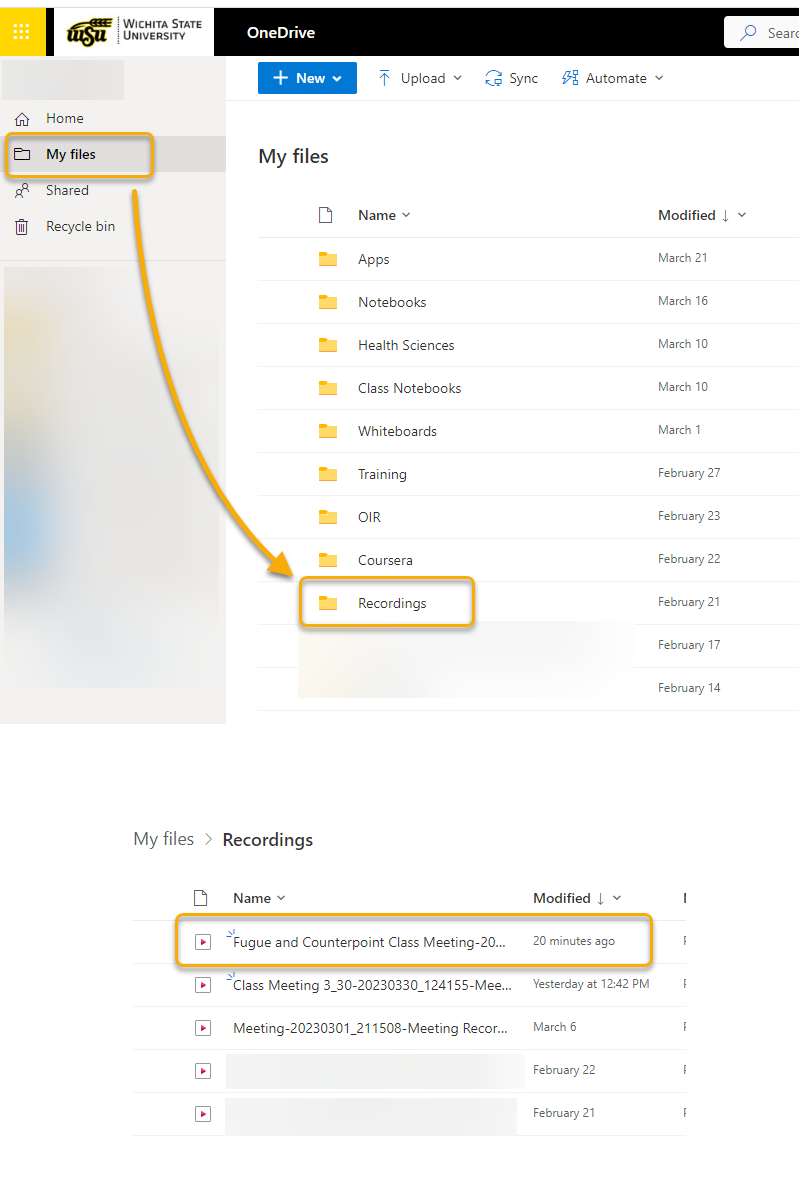
FYI: Teams meeting recordings open in Microsoft Stream, but the videos are automatically saved to your One Drive. To locate them, open Microsoft 365 and choose "One Drive" from the waffle menu. From there, select "My Files" and find the "Recordings" folder. Inside the folder you will find a list of all of your Teams recordings, with options to open, share, manage access, and much more.