

How to Edit and Approve Catalog (CAT) Pages
This is for reviewers who need to edit and approve the WSU catalog pages during the annual review process.
Accessing the Dashboard
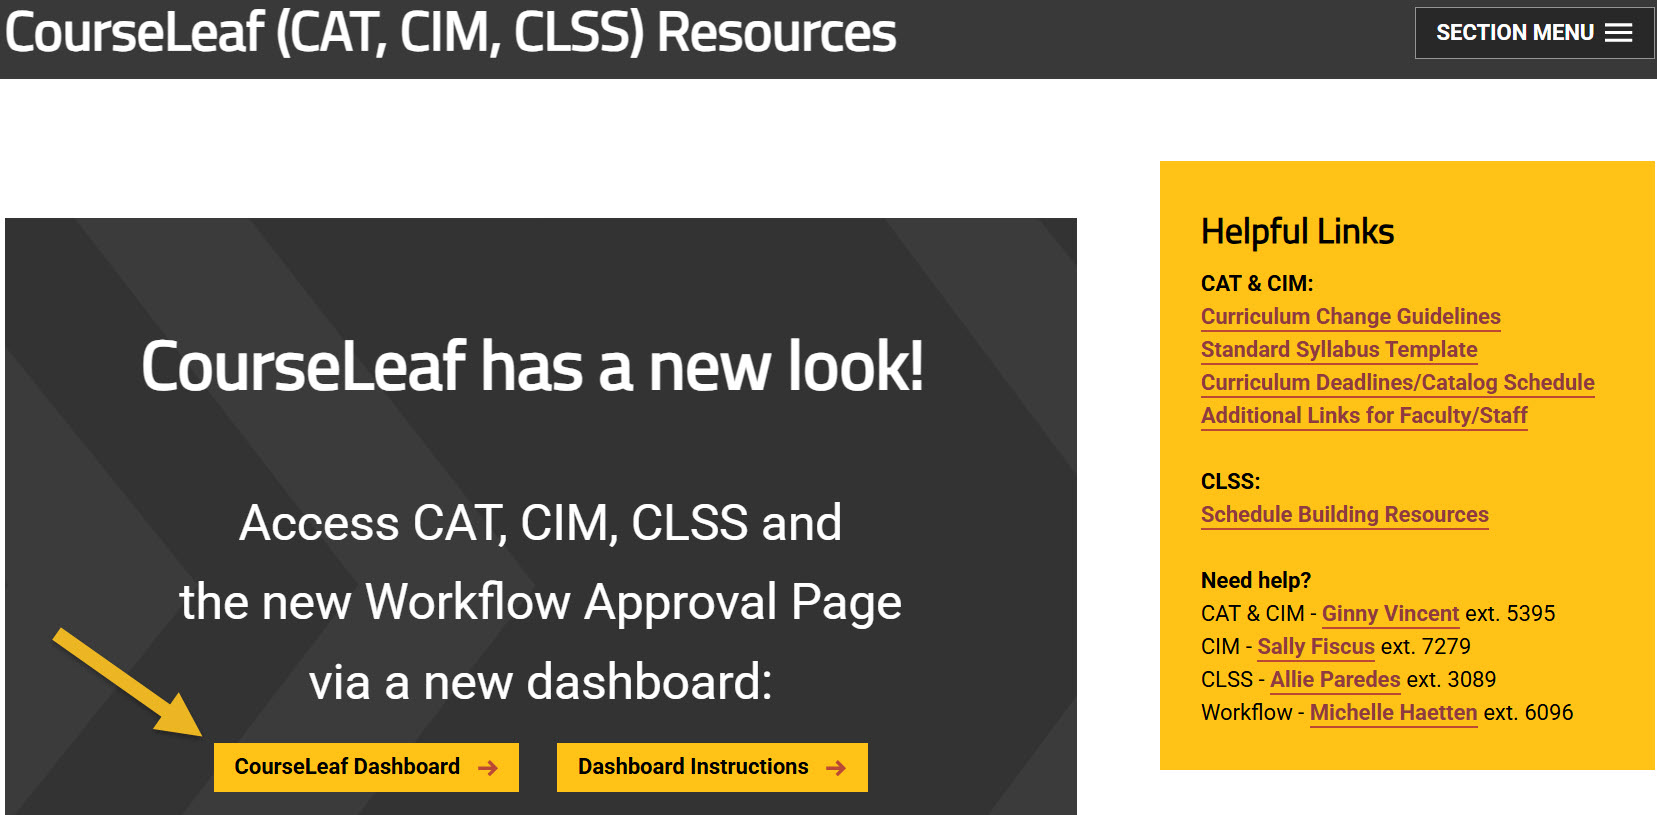
Using any web browser except Internet Explorer, go to the CourseLeaf (CAT, CIM, CLSS) Resources page (https://wichita.edu/courseleaf) and click the CourseLeaf Dashboard button link:
Your Approval Queue: The Workflow Tab
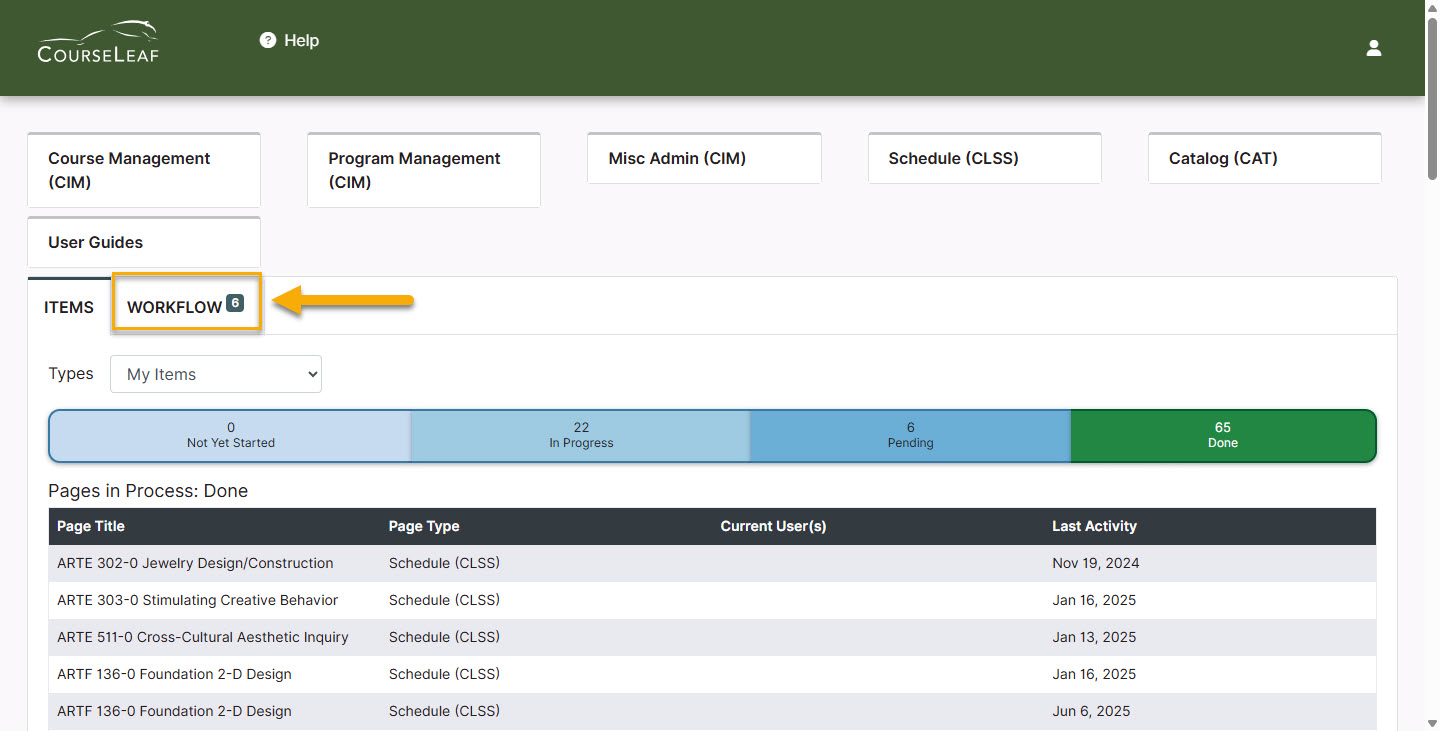
When the CourseLeaf Dashboard window opens, pages in your queue will not be immediately visible. This is due to the dashboard defaulting to the Items tab. You will need to click on the Workflow tab to view your queue.
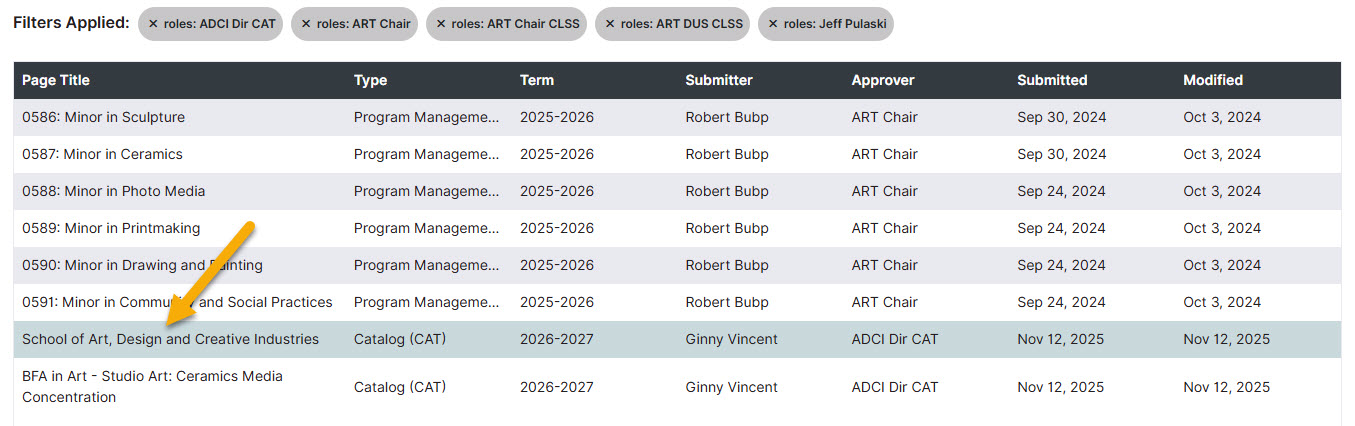
The Workflow tab will automatically filter for your role. If you have multiple roles in the CourseLeaf system (CAT, CIM, CLSS), then all of your roles will be selected and any items in those queues will appear in the list (note the different role names in the Approver column).
Please Note: If there are no items for you to approve, then nothing will appear under the Workflow tab.
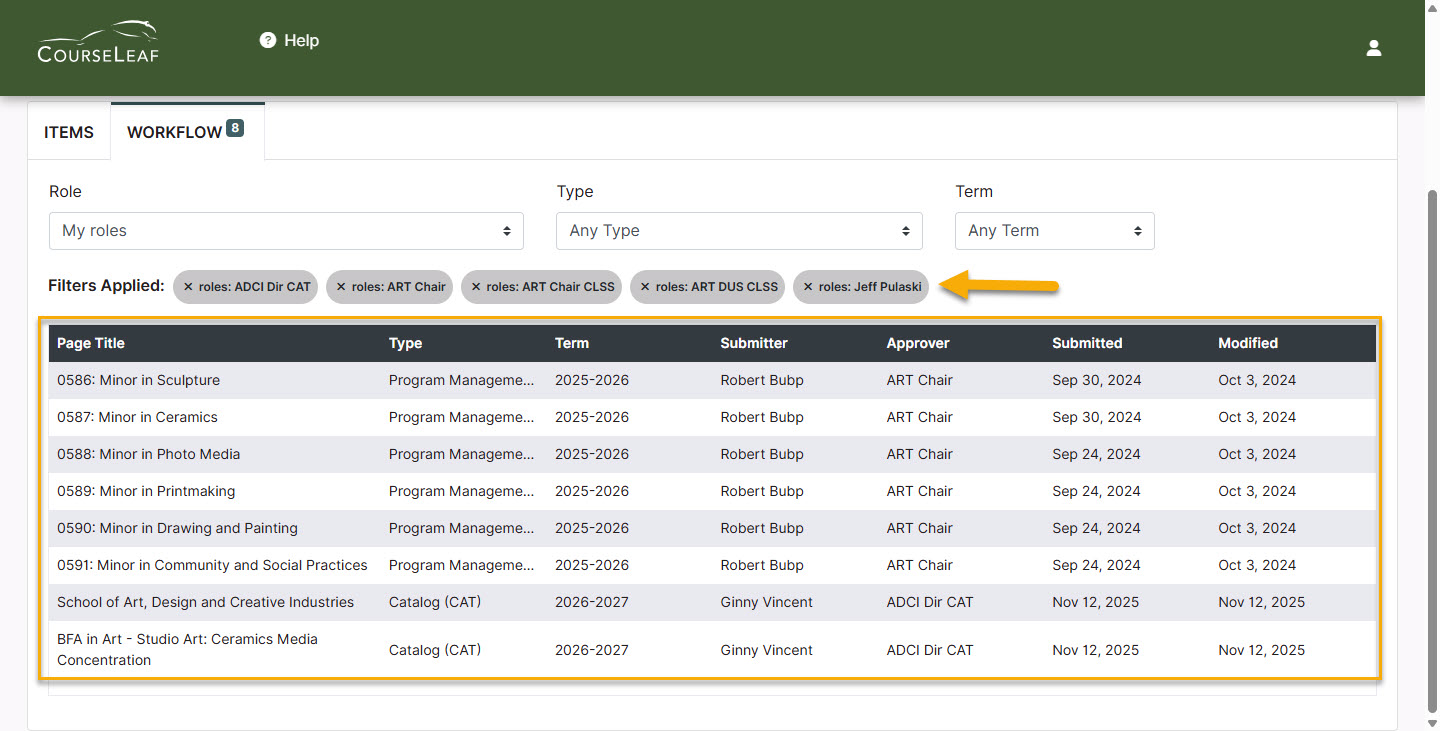
To filter only for a specific role, leave the role you want to view alone and click on the X by any of the role names in the grey bubbles to remove that role.

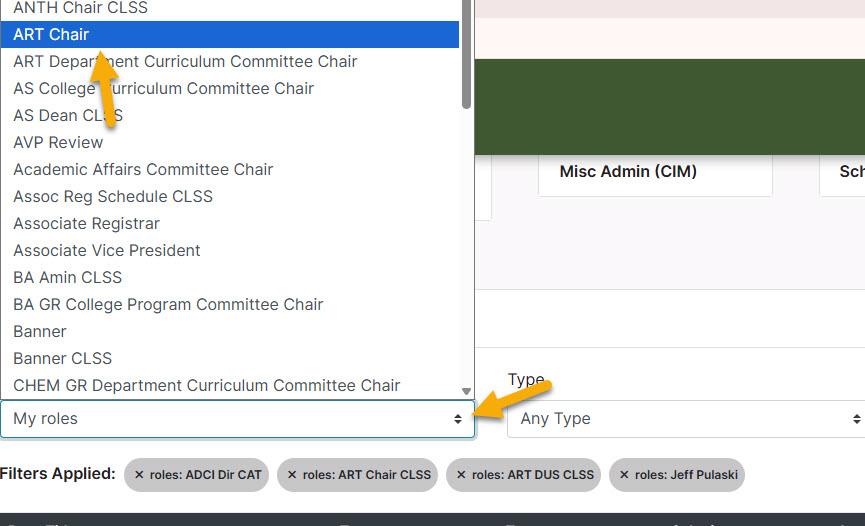
To add back any of the roles, search for it under the Role drop-down list, and click on the role you wish to view. Only roles with something in the queue will appear in the drop-down.
Items can also be filtered by type and term. Use the Type filter to view only programs, courses, catalog pages, or schedule items. Use the Term filter to view items with a specific effective term.
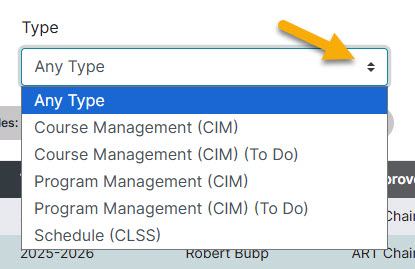
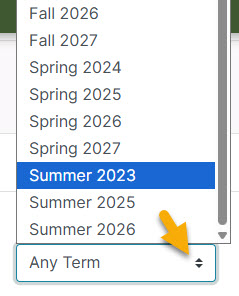
Please Note: Any filters selected are added to the filters already applied. You will need to click on the X of any filter you wish to remove. The system will not automatically remove any filters.
Reviewing Pages
Click on any of the catalog pages to view it. A preview screen will pop up with the page:
Red text with a line through it indicates current information that someone is proposing to have removed or changed on the page. The green text indicates new information being proposed.

Editing Pages
If you need to make edits, click the Edit button in the top banner. A beige-colored editing toolbar will drop down.

The pencil icons on the toolbar represent tabs that have been built for the page. Most likely, the information you will need to edit can be accessed by clicking the Page Body pencil icon. If doing that opens an empty window, click cancel to shut the editing window and click on one of the other pencil icons.
The titles next to each pencil icon correlate with the title on the page tab. The only exception is the “Overview” tab which always correlates to the Page Body pencil icon.

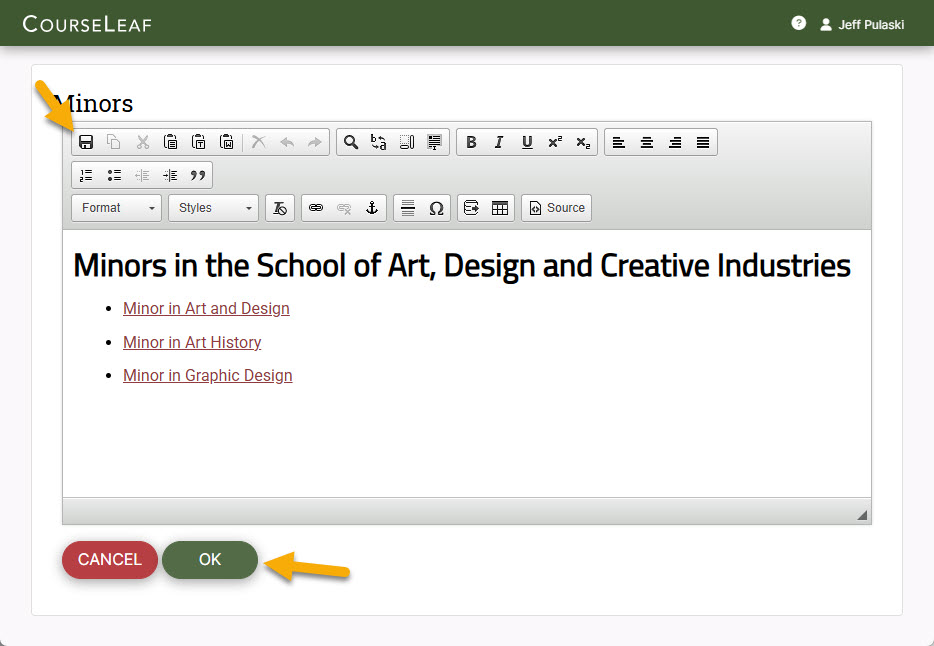
To edit the information on the page, click on the pencil icon you need to open the Editing Window. The title of the tab you are editing will appear in the top left corner.

The Editing Window utilizes many of the same formatting controls you would find on any standard document editor.
Once you have finished editing the page, click the Save Icon first to save your changes and then click the green OK button.
Tables
If the catalog page has information in a table, the existing table will have a blue border in the Editing Window. Double clicking anywhere inside the table will open the table editor.

Program Information on CAT Pages
If the catalog page you are editing has program information, the text will appear in a grey box. This information cannot be edited from the CAT page. Only the most recently approved version of the program will be displayed. You will be able to see the date of that last program approval.
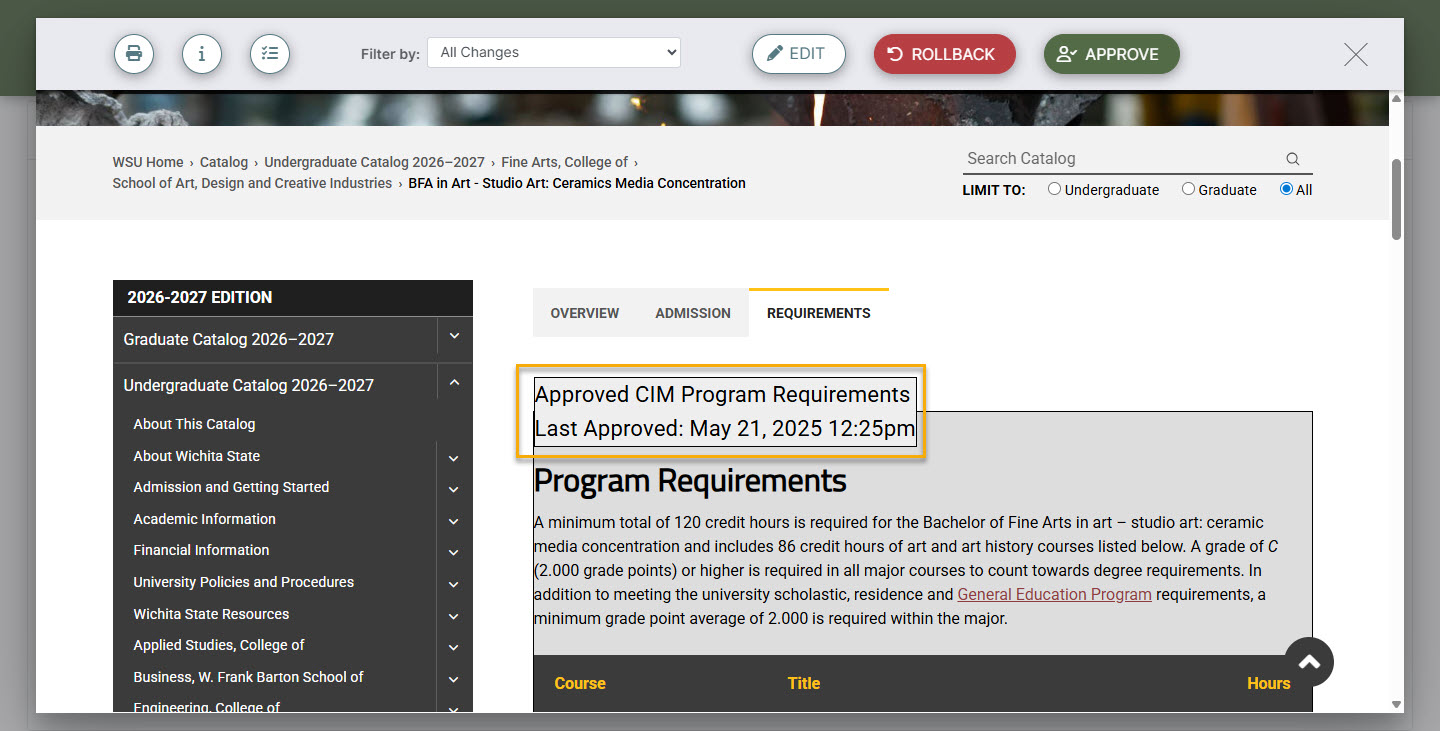
If any program information in the grey box needs to be updated, the program will need to be edited in CIM Program Management and sent through workflow for approval. If a proposal is already in CIM to update the program, then once that proposal is fully approved, the CAT page will automatically be updated with that information. To learn how to edit a program in CIM, visit the CIM User Guides page.
You do not need to hold program CAT pages to ensure the information gets updated later. As long as the CIM proposal reaches the end of workflow before the catalog deadline, the CAT page will be automatically updated. The catalog will also be sent out for a final review before publication at which point, you can verify that the program information was properly updated as well. See the Catalog Production Schedule for program change deadlines.
Approving CAT Pages
Once you have finished editing and are ready to approve the page, click the green Approve button in the top right of the page Preview Screen:

If you’d like to confirm that this page has left your queue and has moved on to the next approval step in workflow, you can refresh the Dashboard, re-select the Workflow tab, and confirm that this page is no longer showing in the Pages Pending Approval section.
Please Note: Refreshing the Dashboard will reset the filters under the Workflow tab.
Rolling Back CAT Pages
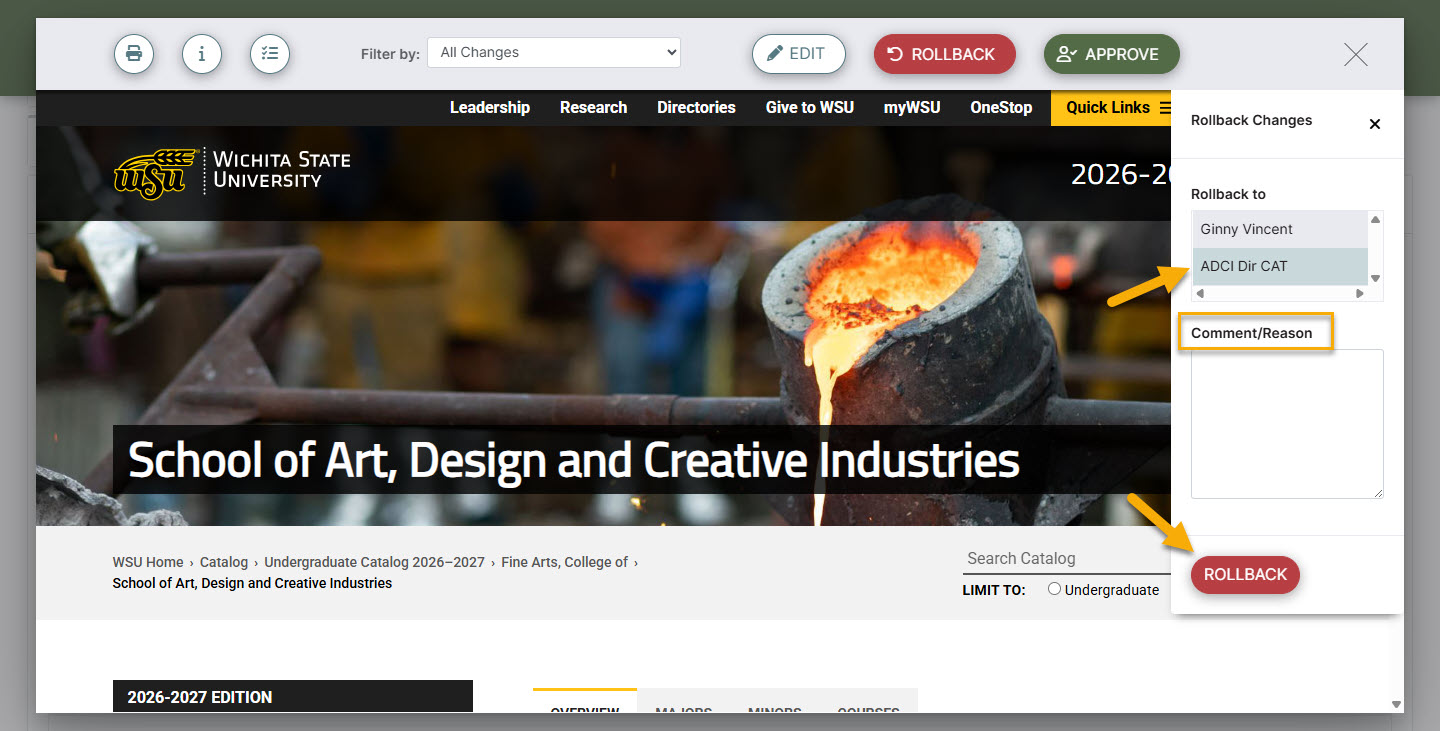
If you need to send the page back to the person that submitted it or anyone in a prior workflow approval step for edits before approving it, you can click the red Rollback button:

A new window will appear on the right side of the page Preview Screen allowing you to select whom you would like to roll the page back to. You can select any previous approver in the workflow or the initiator of the page. You are also required to provide a comment/reason for the rollback:
Please Note:
- The first person in the rollback list is the ‘initiator’ who submitted the page to workflow initially. Rolling a page back to this person will roll the page completely out of workflow and it will need to be resubmitted to workflow once any necessary edits are made.
- Whomever you choose to roll it back to will need to make the necessary edits and then all subsequent approvers in the list, who have already approved the page, will have to reapprove it with these new edits.
Additional Features in the Preview Screen
PRINT the Page:
Click on the printer icon:

HIDE the Current Information:
Click the drop-down next to the Filter by field. Select Hide Changes so the page only shows the proposed information. This eliminates the current information in red strikethrough from showing. The new proposed information will still show but it won’t be in green. To view the red/green markup once again, select All Changes from the same drop-down.

View Changes by a Specific Person:
Click the drop-down next to the Filter by field to select someone:
