WSU Catalog - Quick Guide CourseLeaf Editors/Approvers
Numbers in the lists correspond to the numbers in the illustrations.
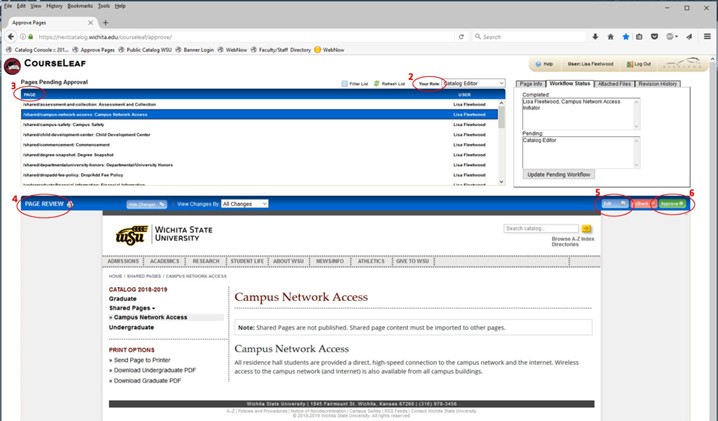
- Follow the link in the review request email, or navigate to the approve pages URL:
https://nextcatalog.wichita.edu/courseleaf/approve/
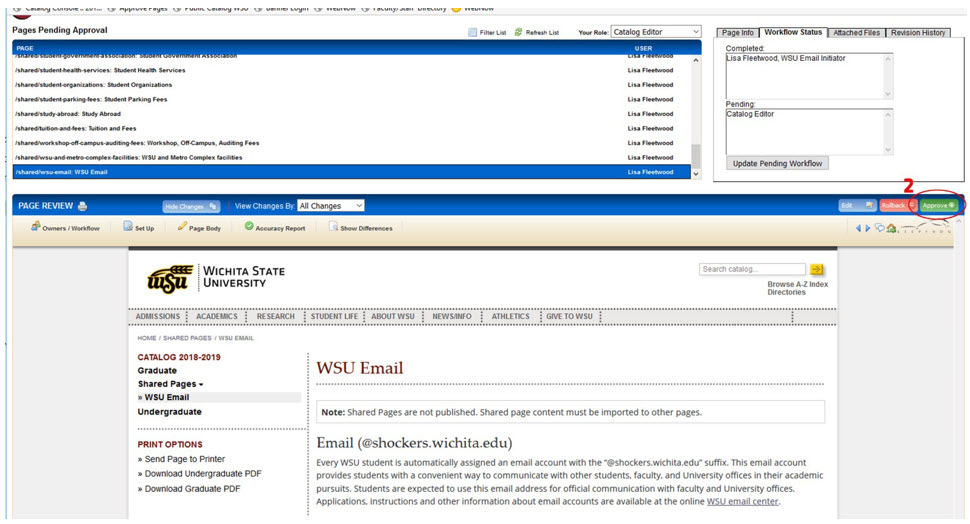
Log in using your WSU ID and password. (Use Firefox, Edge, Chrome or Safari; do not use Internet Explorer.) - Use the Your Role drop down box to choose the role you’ve been assigned. Make sure to choose your role, not your name. (If your role is not in the list, you have no pages/proposals to approve.)
- After choosing your role, a list of page URLs waiting for your approval will appear in the Page window. Select a page/proposal to edit/approve.
- The selected page will appear in the Page Review window.
- If edits are necessary, click the blue Edit button on the right.
- If no edits are necessary, click the green Approve button to approve and send the proposed page to the next person in workflow.
QUESTIONS? Contact Ginny Vincent, ginny.vincent@wichita.edu, 316-978-5395
Editing Toolbar
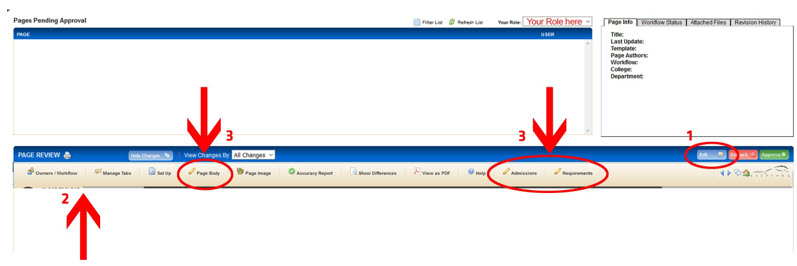
- If editing is necessary, click the blue Edit button to the right in the Page Review window.
- The beige-colored editing toolbar will drop down.
- The pencil icons on the toolbar represent tabs that have been built for the page.
Most likely, the information you will need to edit can be accessed by clicking the
Page Body pencil icon. If doing that opens an empty window, click cancel to shut the editing
window and click on one of the other pencil icons. (In the illustration below there
are two others — Admissions and Requirements.)
Editing Window
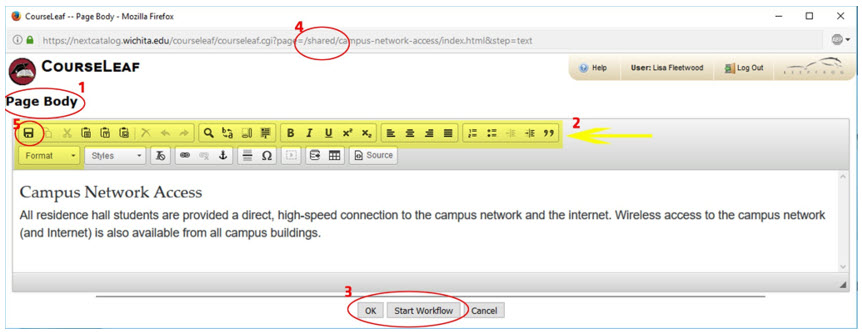
- The name of the tab being edited, which is Page Body.
- A toolbar of available formatting controls.
- When edits are complete, clicking OK will save your work and close the editing window. Click OK if you are not working on a shared page.
- If you are working on a shared page, the word shared will appear in the URL of the page. Click
the save icon first to save your changes. Then click Start Workflow to close the editing window and return to the Page Review window.
Hyperlinks
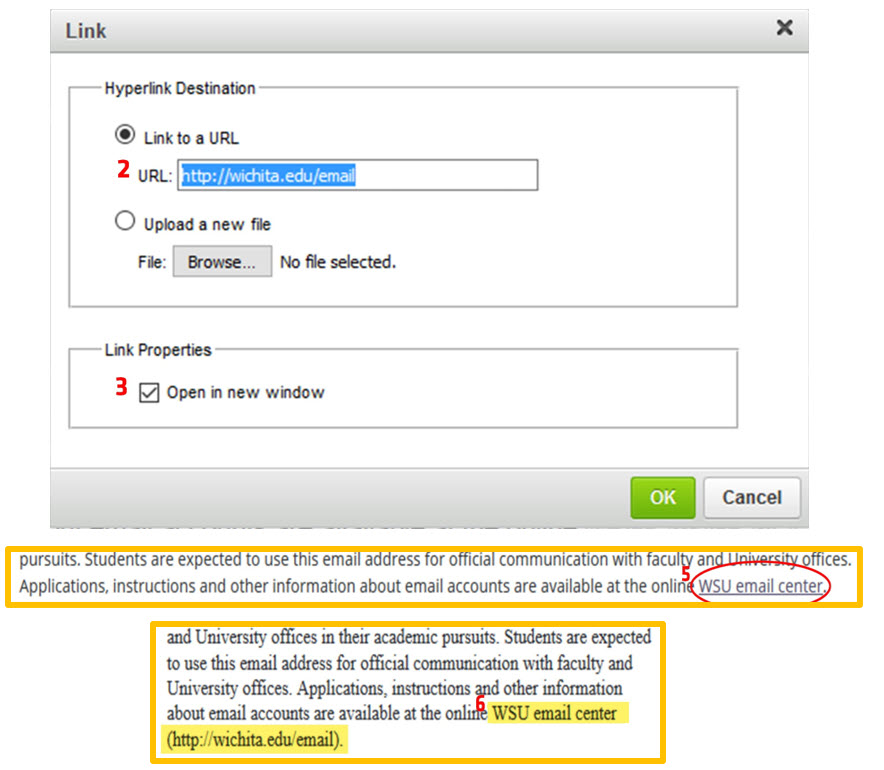
- In the editing window, double click on the hyperlinked word.
If the hyperlink hasn’t been set up yet. Select the word to be hyperlinked, then click on the link icon in the toolbar. A pop-up window will open. - When the pop-up window opens, type or paste in the new URL (including the https://).
If the URL is long and complicated, a print-friendly URL can be requested by clicking the Web-site Support link at the bottom of any WSU page, then clicking the button to Request Short URL. - If the link will point to a page outside the catalog, check Open in new window .
- To remove a hyperlink, select the existing hyperlink and click the delete link icon on the toolbar.
- Example showing hyperlinked text in online catalog.
- Example of the same text within the PDF.
Tables
- In the editing window, to insert a new table, click the table icon.
- Existing tables have a blue border. To edit an existing table, double click inside
the table.

Approving the Page
- After the page has been edited, saved, and workflow started, the editing window will close and the Page Review pane will be unobstructed.
- Click the green Approve button on the right to send the page forward to the next person in workflow.