Creating a NEW Program
This is for when you are wanting to propose a brand-new program (certificate, departmental honors, minor, bachelors, accelerated, masters, and doctorate).
Accessing the Dashboard
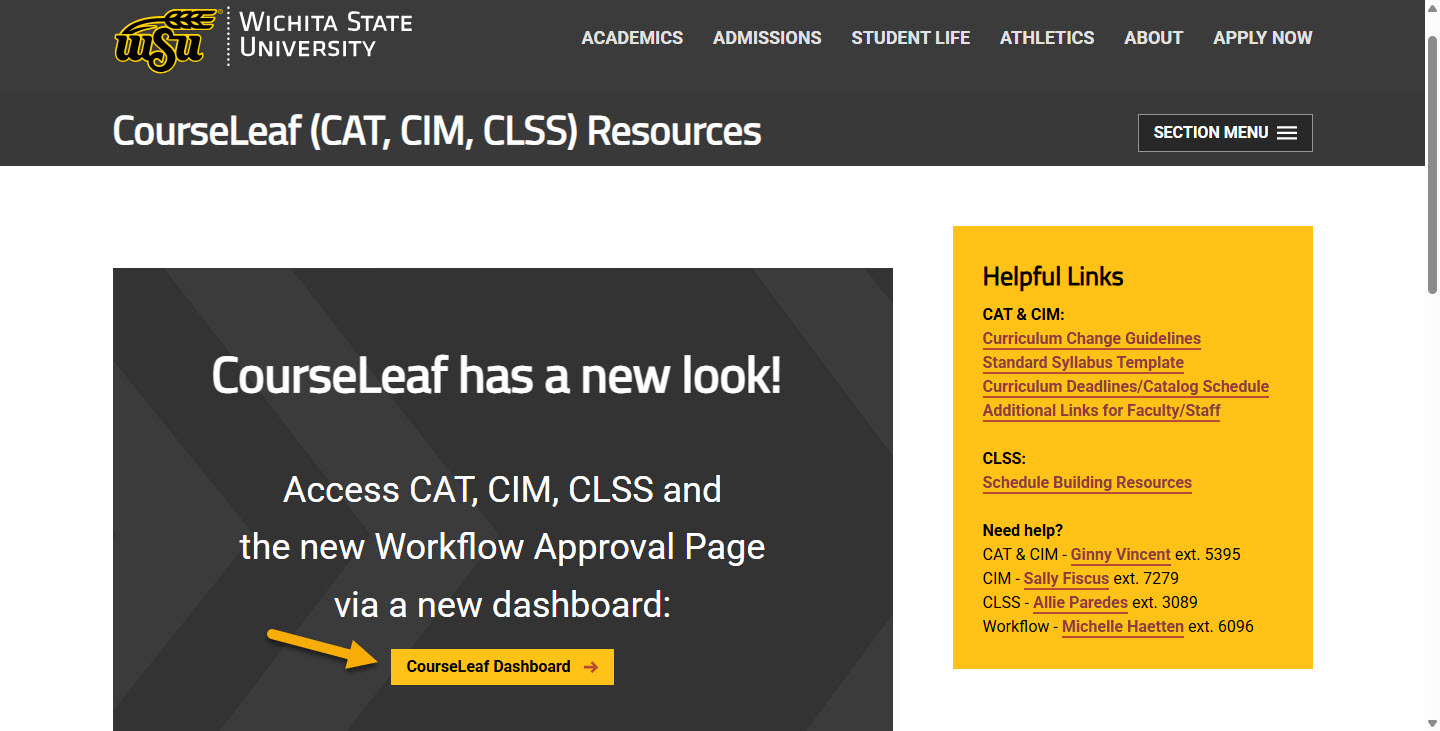
Using any web browser except Internet Explorer, go to the CourseLeaf (CAT, CIM, CLSS) Resources page (https://wichita.edu/courseleaf) and click the gold CourseLeaf Dashboard button link:
Accessing Program Management
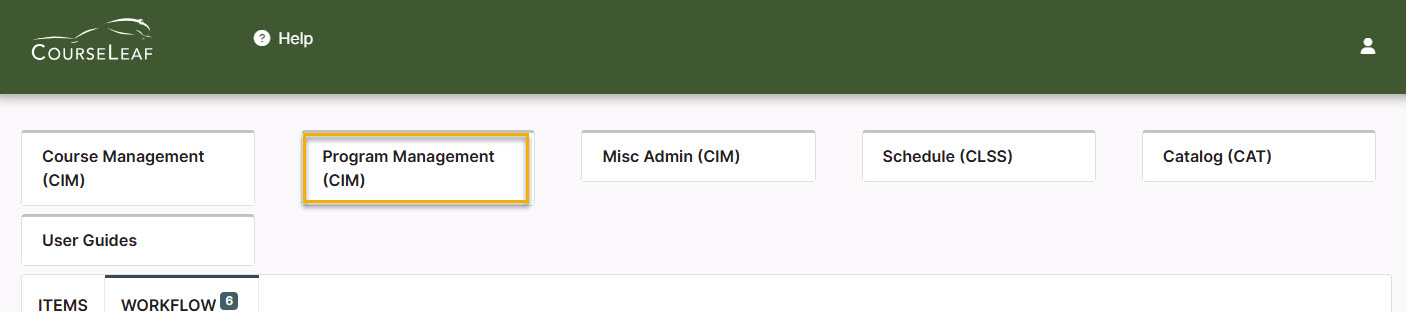
Once in the Courseleaf Dashboard, click on the Program Management (CIM) Module Card to be taken to the Program Management system.
Creating a New Program Steps
Step 1: Open New Program Form
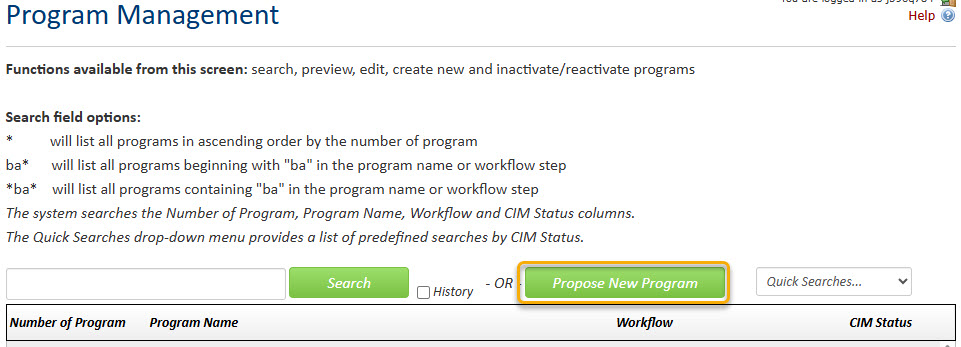
In the Program Management system, click on the green Propose New Program button:
A new program form will open in a new window.
Step 2: Type of New Program
As you begin filling out the program proposal form, you will see that required fields are shown in red and blue question marks denote WSU-specific help information.
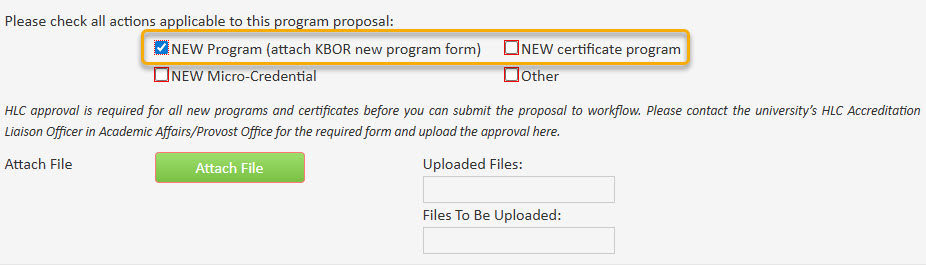
After filling out the contact information, check the appropriate option under applicable actions:

Please Note: If you are entering new accelerated program, track/concentration of existing program, or departmental honors, then select Other.
If you select NEW Program or NEW certificate program an additional question will appear asking you to contact the AVP for Institutional Effectiveness in Academic Affairs for HLC approval:
Please Note: NEW programs require a KBOR form to be submitted to KBOR for approval. The KBOR approval does not need to be completed before the program is submitted to the CIM workflow. The AVP step of workflow will hold all NEW programs until the KBOR approval is given.
Also Note: If you are proposing a program that is only a different level of an already existing program with the same topic, you will not need to attach a KBOR new program form. For example, WSU currently offers a BA in political science. If you were proposing a new MA in political science, then no KBOR form is needed. The same is true for new concentrations of an existing program. For example, WSU currently offers the BAA in media arts with six different concentrations. If you were proposing a new concentration for the BAA in media arts, then no KBOR form is needed. New certificates do not require a KBOR form.
Step 3: Program Overview
Use the drop-down boxes to select Department, Degree Type, and Program Level. For example:
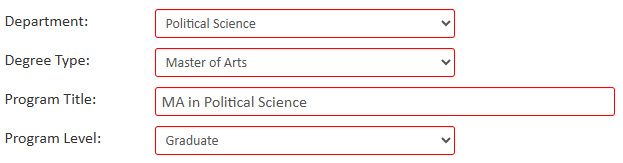
If the Degree Type drop-down menu does not have the desired type, choose Other and use the Additional Comments/Needs field further below to specify.
Enter the Program Title with the type of degree listed first and then the title of your new program (i.e. MA in Political Science). If you are creating a new concentration for an existing program, enter the program title with the degree, title of existing program, and title of concentration (i.e. BAA in Media Arts with a Concentration in Voice Acting).
Please Note: The type of degree for bachelor's, master's, and doctorates needs to be abbreviated on the CIM form (i.e. MA instead of Master of Arts). This is for consistency and ease of searching for programs in CIM. If you prefer the degree type to be spelled out in the catalog, please note that on the CIM form or reach out to the catalog editor.
New programs can be given any future term as an effective date. Note: a change to an existing program has a separate policy concerning effective terms.
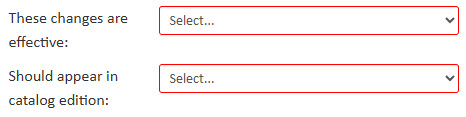
Catalog edition refers to the first catalog that this new program will appear in. So, the next catalog to be published.
If the new program is only going to be offered online, then mark the Online only option. If the program needs both an on ground and online code, then select the Both on ground and online option:
If you are proposing new departmental honors, then mark this question as ‘Yes’:
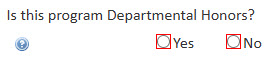
Please Note: Departmental Honors programs should be submitted on separate CIM program proposals. They are not included on the degree CIM program form.
Step 4: Program Catalog Information
Fill out all Admissions and Requirements information. Admissions information is optional, while Requirements is a required field.
Enter any admission information required specifically for the new program. If there is no specific admission requirements, this box can be left blank.

Enter all of the requirements for earning this degree/certification. Include information such as required courses, list of electives, minimum GPA requirements, any steps needed to complete program, thesis/dissertation information, etc.
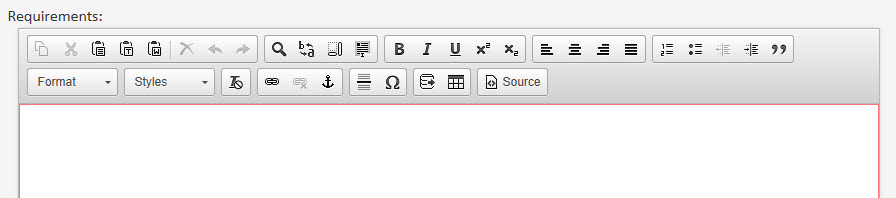
Any additional information not in a table can be added like any other text document. If you are copying and pasting any text from another location (i.e. Microsoft Word document), please use Paste as Plain Text in order to remove any code on the back end that might cause issues in CIM.
Adding a Course Table:
To add a table of courses in the Admissions or Requirements fields, click on the Table icon:
![]()
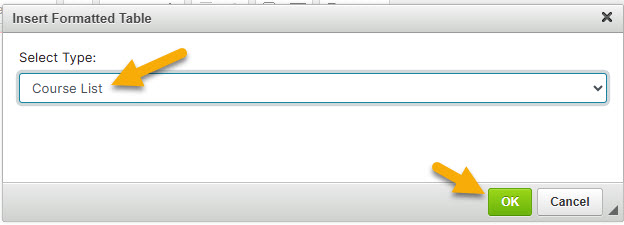
A box will open. You will want to select Course List and then click on the green OK button:
This will open the table editor:
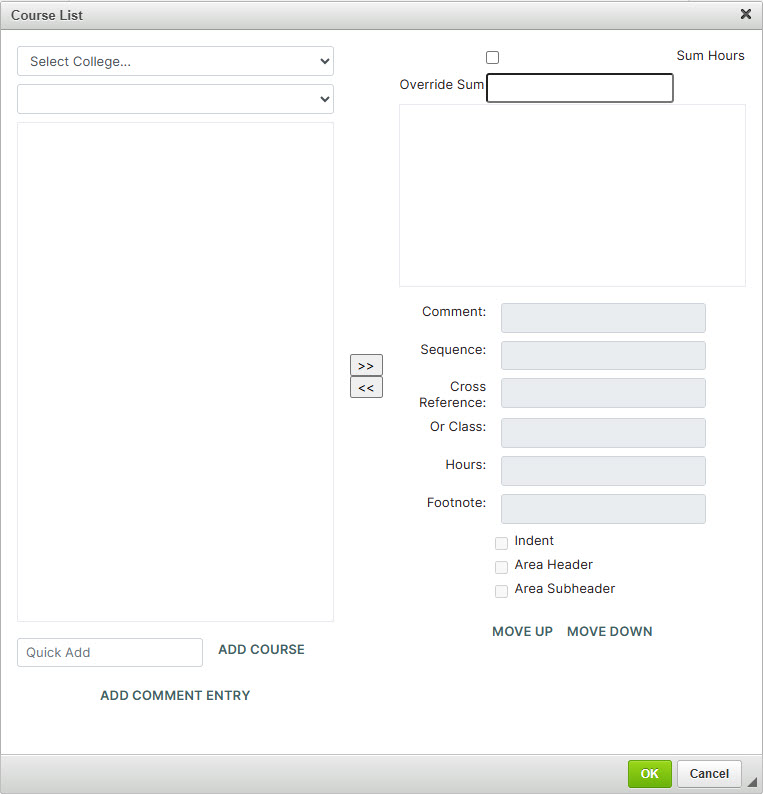
ADDING COURSES
There are two ways to add courses to your table:
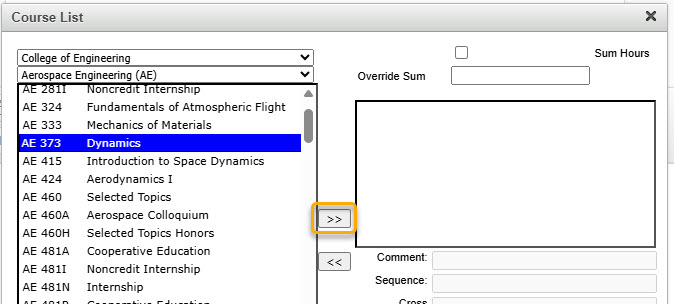
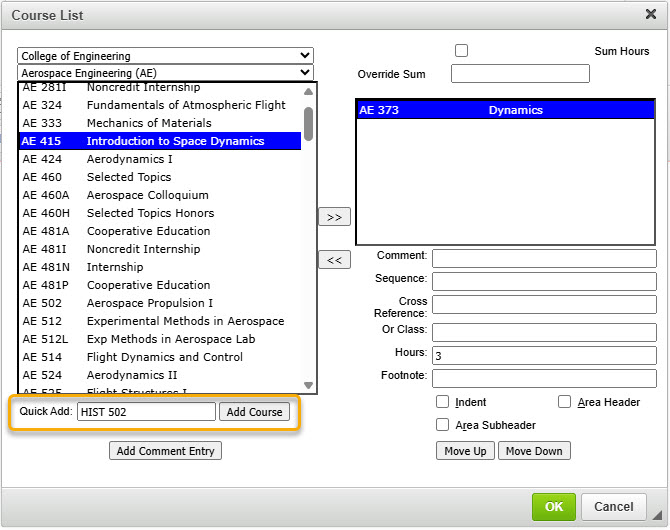
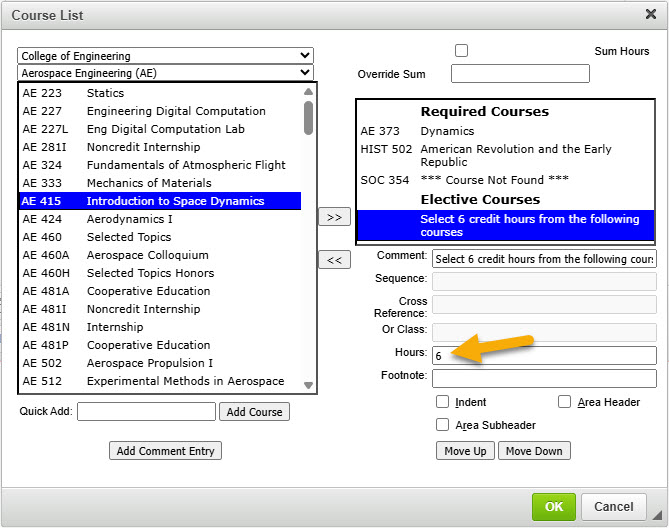
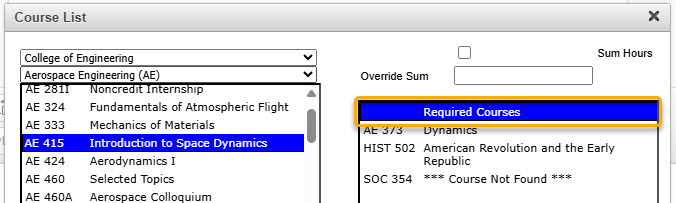
Option 1: Use the drop-down arrows on the left-hand side of the editor. You can search by college and subject to find a list of all available courses. Select the course you wish to add and then click on the right-pointing arrows:
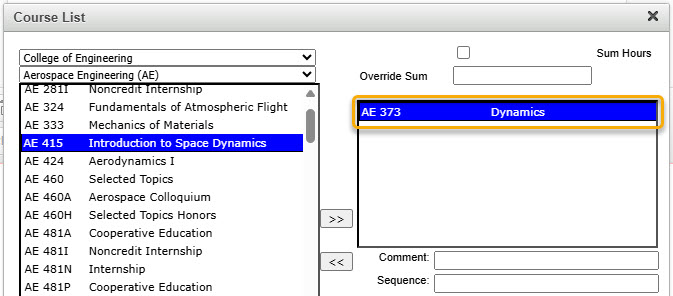
This will move the selected course (AE 373) into the right-hand box:
Please Note: inactivated courses or new courses that haven’t been fully approved in workflow will not be found in the list of available courses. In order to add these courses to your table, you must use the Quick Add feature illustrated in Option 2 below.
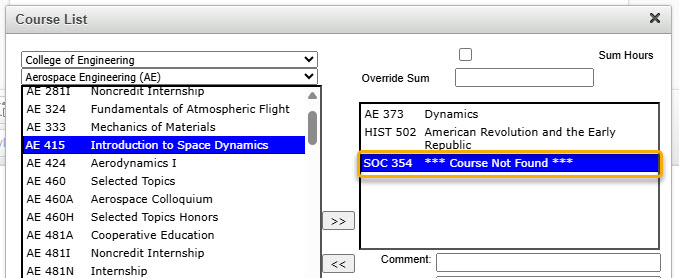
Option 2: The Quick Add field allows you to manually type in the course you want to add without searching for them. Type in the subject code and number of the course you want to add, and then click on the Add Course button. The subject code must be typed in all caps, and there must be a space before the number for the system to recognize the course. Do not type in the course title in the ‘Quick Add’ box.
Please Note: If you are adding a new course that is going through workflow for approval, you can add it to your table with the Quick Add feature. The course will appear as “Course Not Found” in your table. However, once the course is fully approved and out of workflow, the table will automatically fill in the correct information.
ADDING COMMENTS
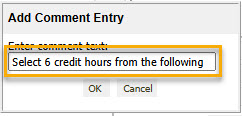
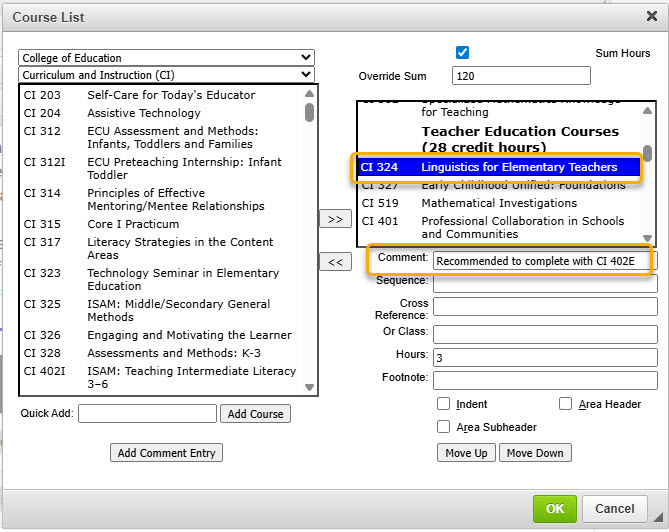
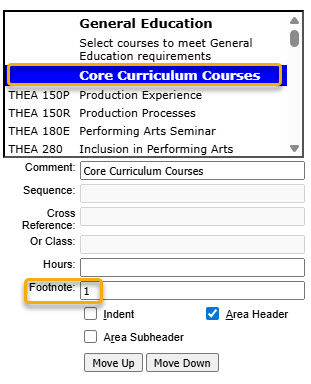
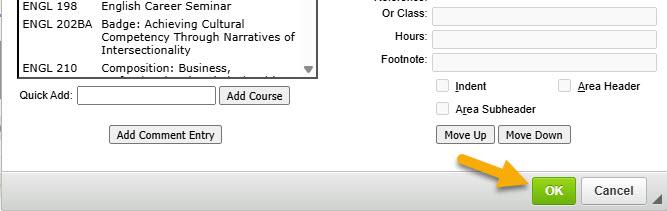
To add a comment on its own line or header to your course list, use the Add Comment Entry button located in the bottom left corner of the table editor.
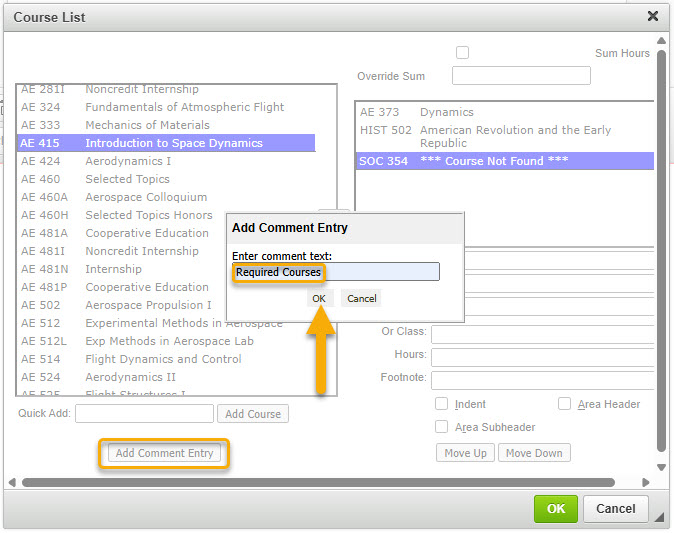
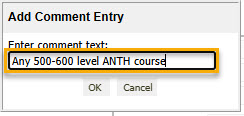
Once you have entered the necessary text, you can make it a header or sub-header by checking the appropriate box:
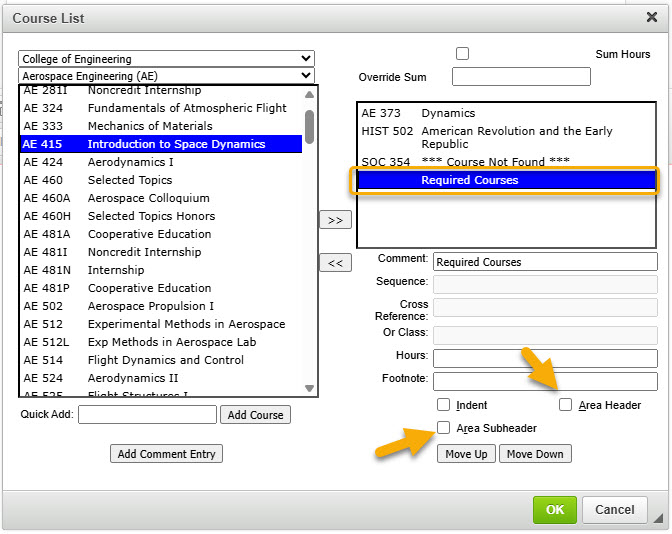
Comments can also be used to add lines about requirements such as how many electives to select from a list or a certain type of elective course that students need to select.
With these comments, credit hours can be added by typing in the Hours field. These hours will then be added to the Credit Hour column of the course table.
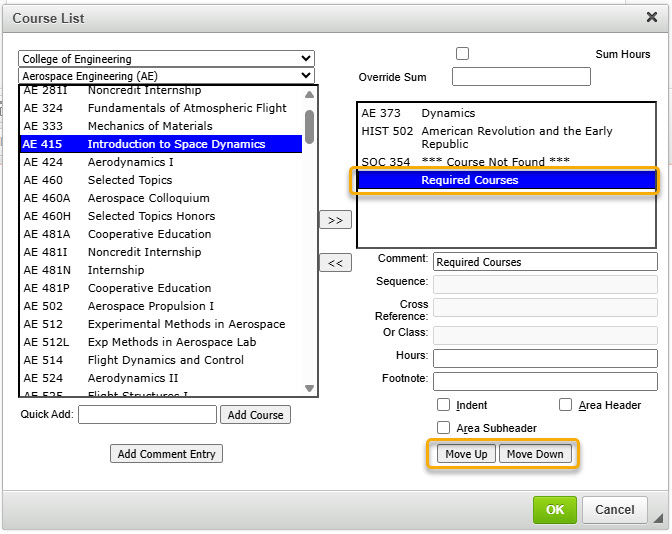
MOVING TEXT/COURSES
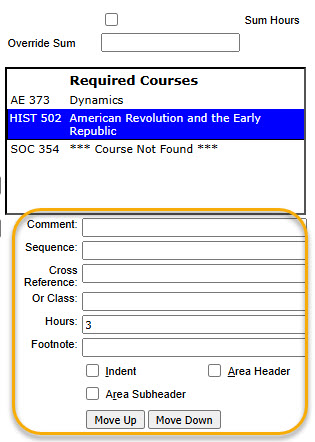
To move text and/or courses around in your table, select the item in the right-hand box that you want moved and then use the Move Up and Move Down buttons:
ADDITIONAL FEATURES
The items on the bottom right side of the table editor are additional features that you can perform to the course you select in the box above:
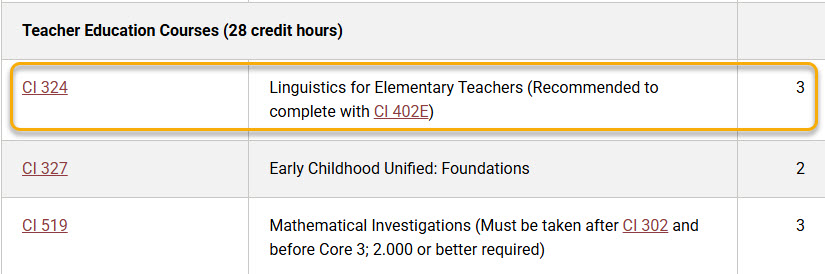
Comment – add parenthetical text that will appear next to the selected course. (This field displays differently than when you use the Add Comment Entry button located in the lower left of the table editor window.)
Displays like this in catalog:
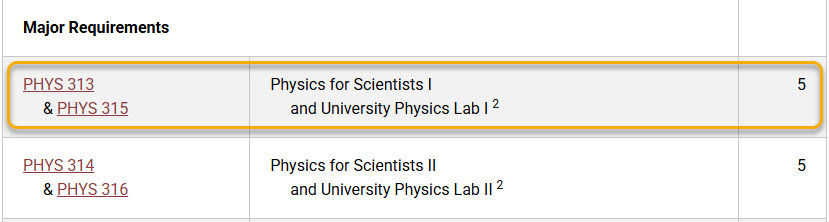
Sequence – list other courses that must be taken with or in addition to the selected course (creates an ‘&’ situation: PHYS 313 & PHYS 315)
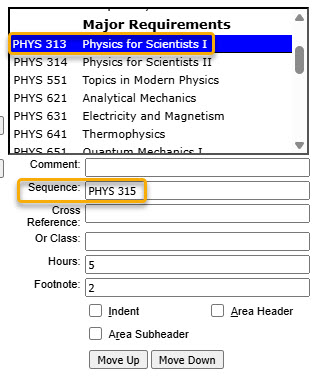
Displays like this in catalog:
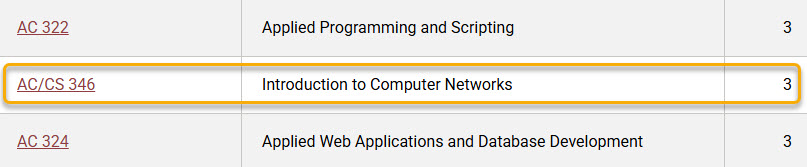
Cross Reference – if the selected course is cross-listed with another course, you can list the other cross-listed course here (i.e. AC 346/CS 346)
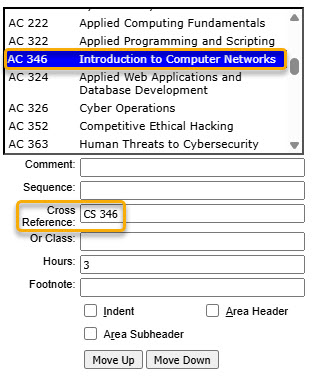
Displays like this in the catalog:
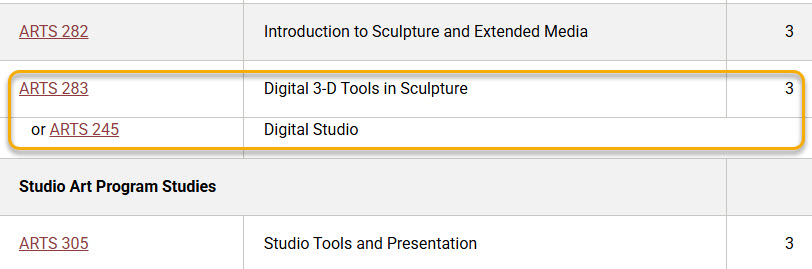
Or Class – list alternative course(s) to the selected course (creates an ‘OR’ situation: ARTS 283 OR ARTS 245)
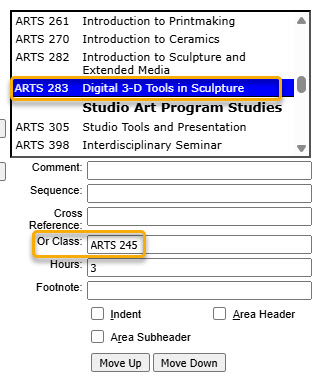
Displays like this in the catalog:
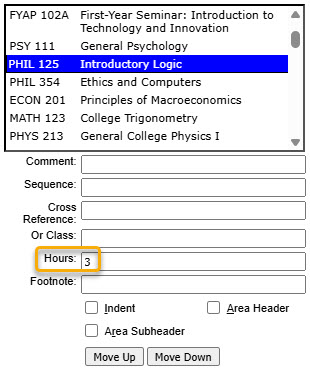
Hours – this field will automatically be populated with the credit hours of the selected course; you can change this number if necessary (i.e. a repeatable course such as a thesis course needs to be taken multiple times for a total of 8 credit hours)
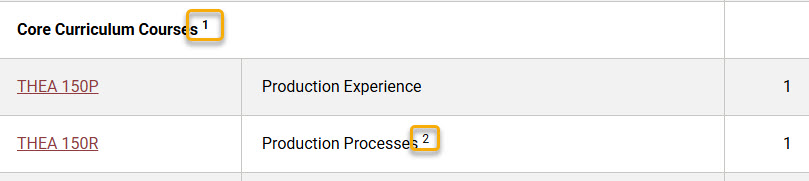
Footnote – if you need to reference a footnote, add the footnote number here
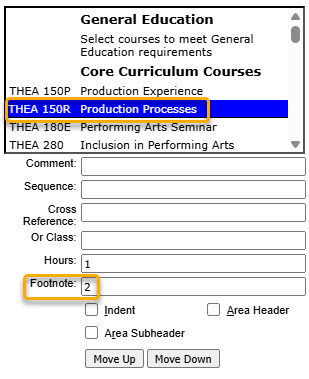
Displays like this in catalog:
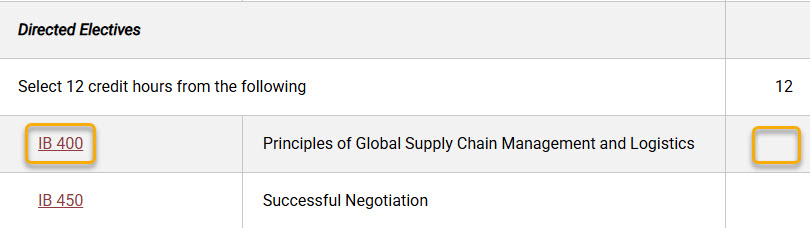
Indent – check this to indent the course/comment in the table; for indented courses, their credit hours will no longer show in the table (this is typically used when listing possible elective options students can choose from)
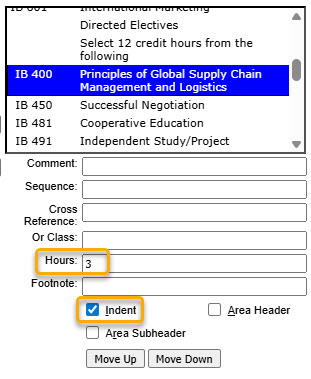
Displays like this in catalog:
SUM HOURS
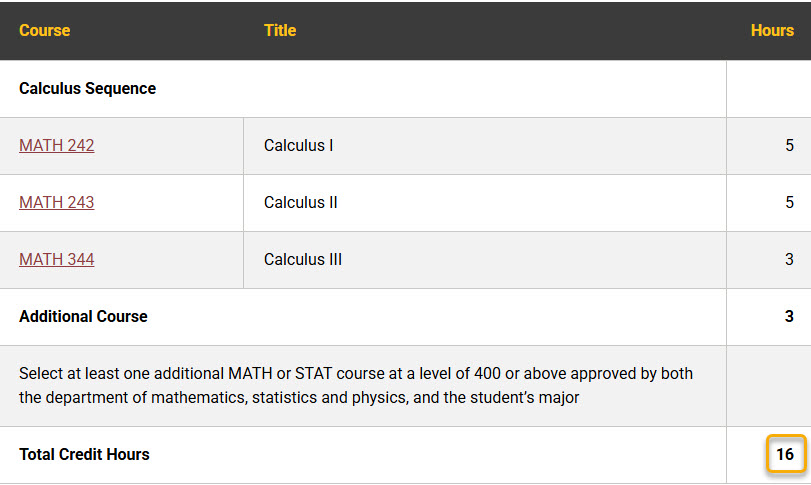
You can choose for your course table to show the total number of credit hours by checking Sum Hours located in the top right corner of the table editor.
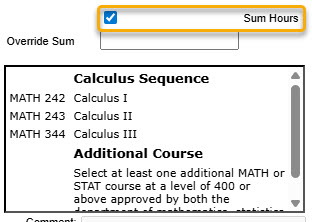
Displays like this in catalog:
You can also override the sum by typing in the total required credit hours.
COMPLETING THE TABLE
When you are done adding all necessary courses and formatting, make sure to click on the green OK button to insert your table.
If you need to go back and edit the table, double click anywhere inside the inserted table that is outlined in blue.
Adding a Plan of Study:
If you want to add a table to show the specific order of courses to be taken by year and semester, then click on the Table icon:
![]()
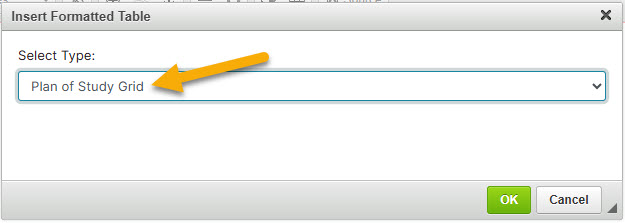
A box will open. You will want to select Plan of Study Grid and then click on the green OK button.
This will open the table editor for the Plan of Study:
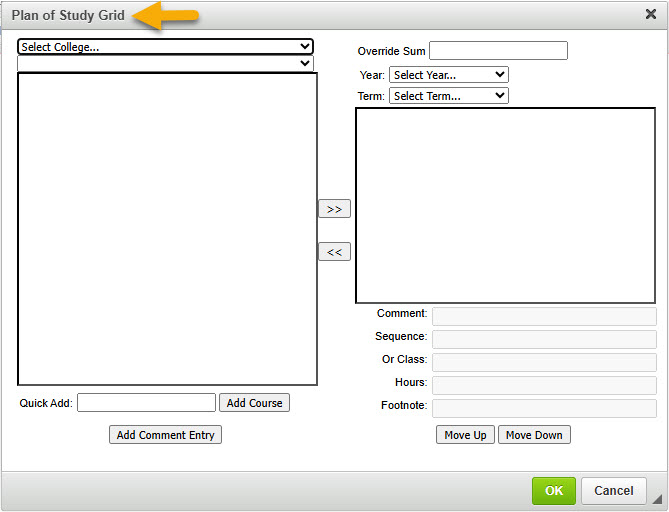
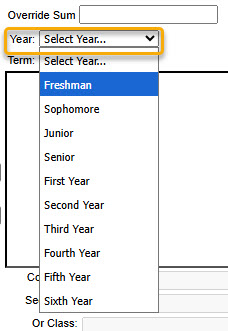
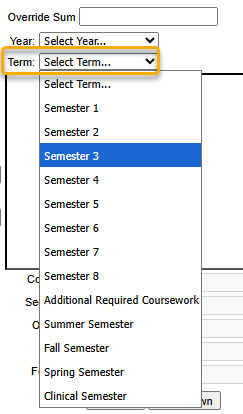
The functions and features are the same as for a Course List, except that you will need to select the Year and Term from the drop-down boxes before adding any courses:
Once you have selected the Year and Term, add the courses you want listed for that term. Then select a different term to add the courses students must take during that time period.
Adding/Removing courses and comments and all the other instructions for creating a Plan of Study are the same as creating a Course List. See above section for those detailed instructions.
When you are done adding all necessary courses and formatting make sure to click on the green OK button to insert your table.
If you need to go back and edit the table, double click anywhere inside the inserted table which is outlined in blue.
Step 5: Justification
Describe the reasoning for the creation of this new program and any overview information necessary.

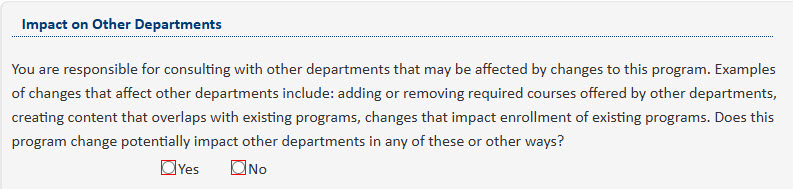
Step 6: Impact on Other Departments
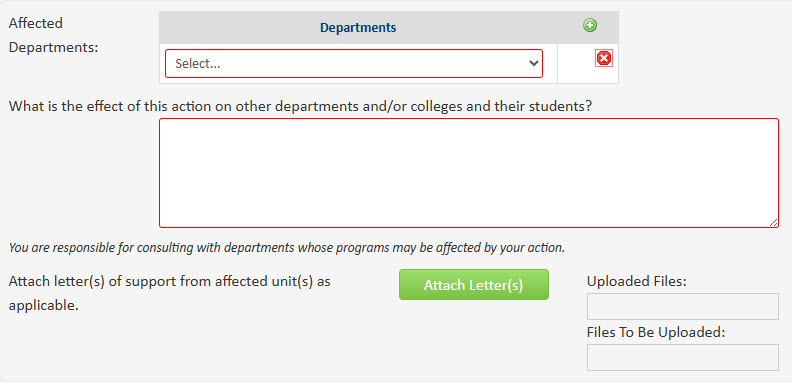
New and changes to programs often impact other departments/colleges. Adding or removing required courses offered by other departments, creating content that overlaps with existing programs, and other changes that could impact the enrollment of existing programs or courses are examples of ways other departments and/or colleges may be impacted. If your program has an impact on another department and/or college, then select ‘Yes’ for the question below.
Selecting ‘Yes’ will open additional fields. Use the drop-down menu arrow to select the Affected Departments and explain the effect your program may have on these departments. Attach any letters of support as needed.
Step 7: Resources
List any needed resources for this new program, and attach letters of support from any affected departments (i.e. if using courses from outside your department).
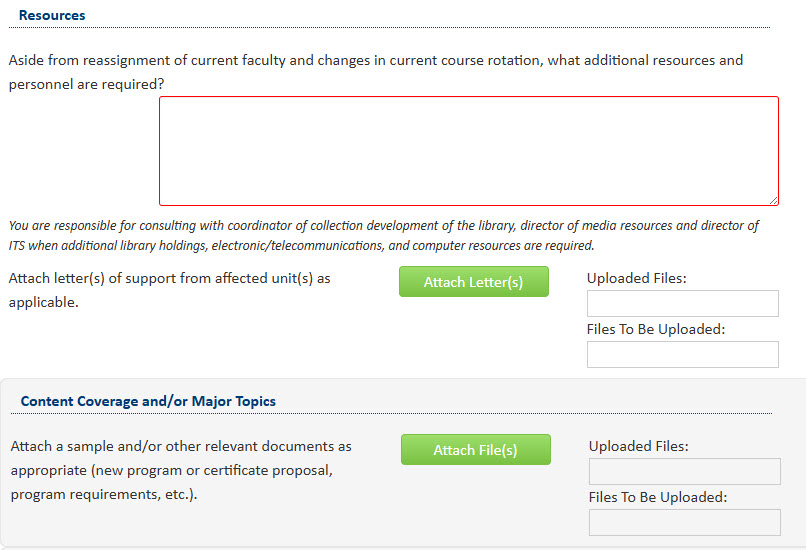
Also, be sure to attach all relevant documents such as new program proposal, program requirements, KBOR forms (if required), etc.
Step 8: Applied Learning
Applied Learning requirements are required for all programs except certificates, minors, and departmental honors. Accelerated degree programs also do not require separate Applied Learning requirements as those requirements are fulfilled by the bachelor and master’s degrees.
For new programs that require Applied Learning, mark the below question as 'Yes' and fill out all of the required information. Please put 'N/A' in the applied learning box below for those programs that do not require Applied Learning.

IMPORTANT: When filling out the Applied Learning description that will appear in the catalog, make sure to begin with the following text: "Students in the [program name] are required to complete an applied learning or researching experience to graduate from the program. The requirement can be met by..."
Step 9: Submit to Workflow
When you have filled out all of the required information and are ready to submit the program to the electronic workflow, click on the green Start Workflow button. If you need to save your work and come back at another time, click on the gray Save Changes button and then edit this program later.
