Reactivating an Inactive Course
This is for when you want to reactivate a currently inactive course so that it may be offered on the schedule of courses again.
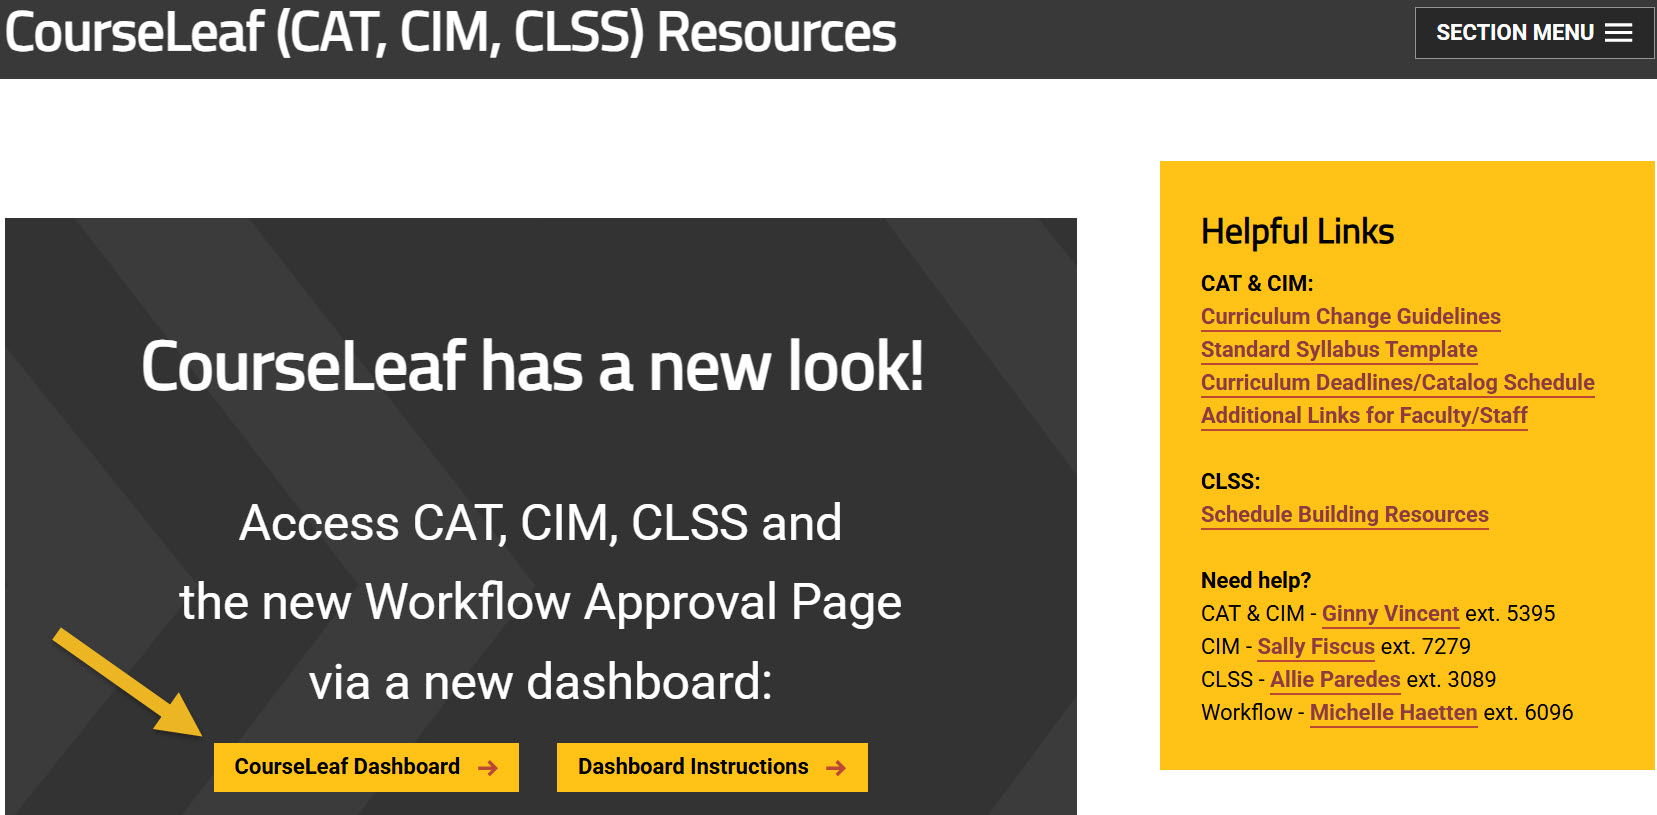
Accessing the Dashboard
Using any web browser except Internet Explorer, go to the CourseLeaf (CAT, CIM, CLSS) Resources page (https://wichita.edu/courseleaf) and click the gold CourseLeaf Dashboard button link:
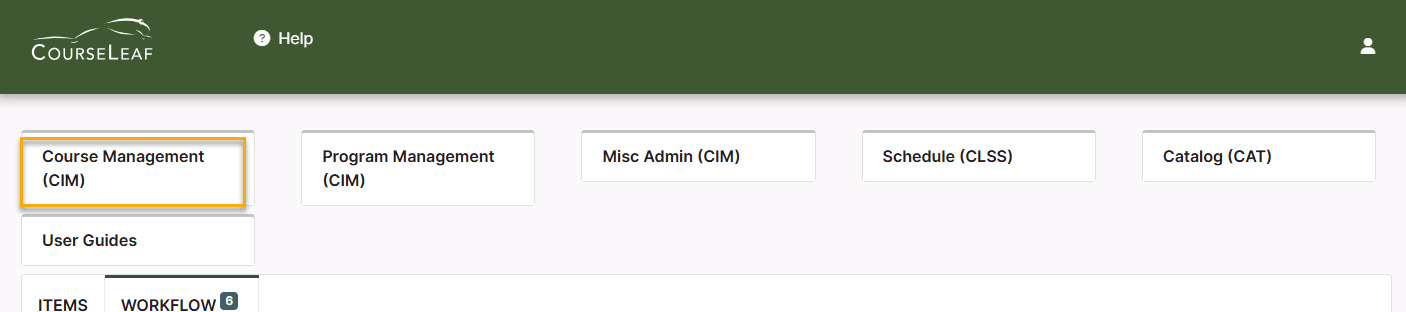
Accessing Course Inventory Management
Once in the Dashboard, click on the Course Management (CIM) Module Card to be taken to the Course Inventory Management system.
Reactivating an Inactive Course Steps
Step 1: Finding Course to Reactivate
In the Course Inventory Management system, search for the course you want to reactivate. In the search field, type in the subject and number of the course (i.e. BADM 201) or you can search by the course title. You can also use asterisks to search for all courses that contain specific words in the course code or title.
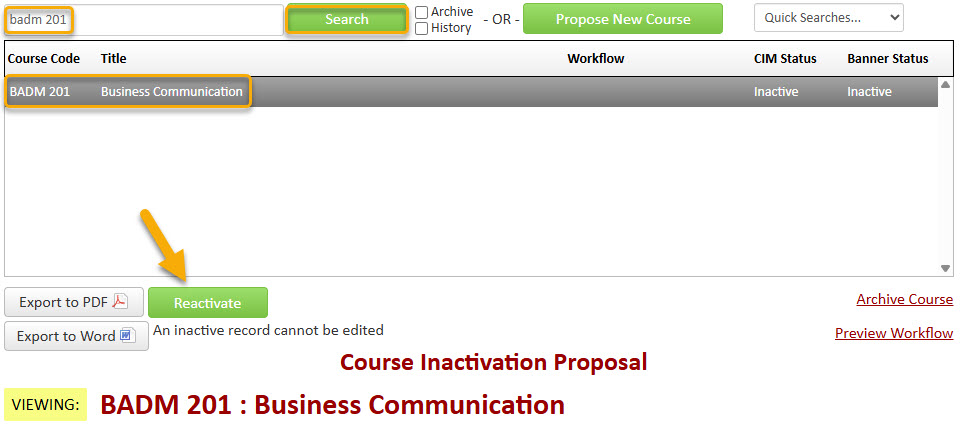
Once you have found the course you wish to reactivate, click on the green Reactivate button. This will open a separate window for the course reactivation proposal.
Step 2: Contact and Action Information
Fill out the contact information with the faculty member that can answer questions about this course. (Administrative assistants may be the one creating the proposal but the faculty member that requested this should be listed as the contact person.)
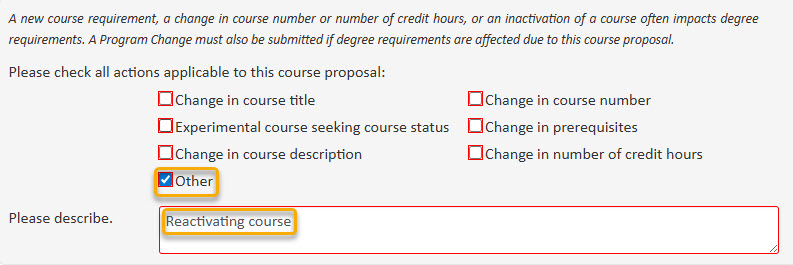
Check the Other option under applicable actions and type in Reactivating course. If you are planning on making additional changes to the course (i.e. updating the course description, title, prerequisites), check those options as well.
Helpful Information as you move through the form:
- Answers provided on this form affect the electronic workflow approval process. For example, checking the box for ‘New Course’ starts a different workflow than checking the box for ‘New Letter under Approved Root Course’. In addition, the workflow is constantly changing as you specify/change information. For example, selecting ‘Yes’ for ‘Does this course have a service-learning component’ adds the Service-Learning Coordinator to the approval process.
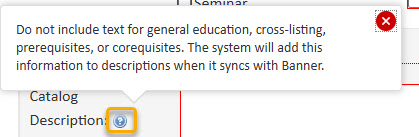
- Now that you are inside the proposal form the blue question marks represent WSU-specific
help:
- If you start a proposal but can’t finish it right now simply scroll to the bottom
of the form and click the Save Changes button. When you are ready to return to this proposal you can use the same links
as above to access CIM. Then, search for the course, select it, and click the Edit Course button:

Step 3: Course Information
Effective Term – You will need to select an effective term for this reactivation.
Most of the required fields on the form should already be filled out on the proposal. Review all of the information and make any edits as needed.
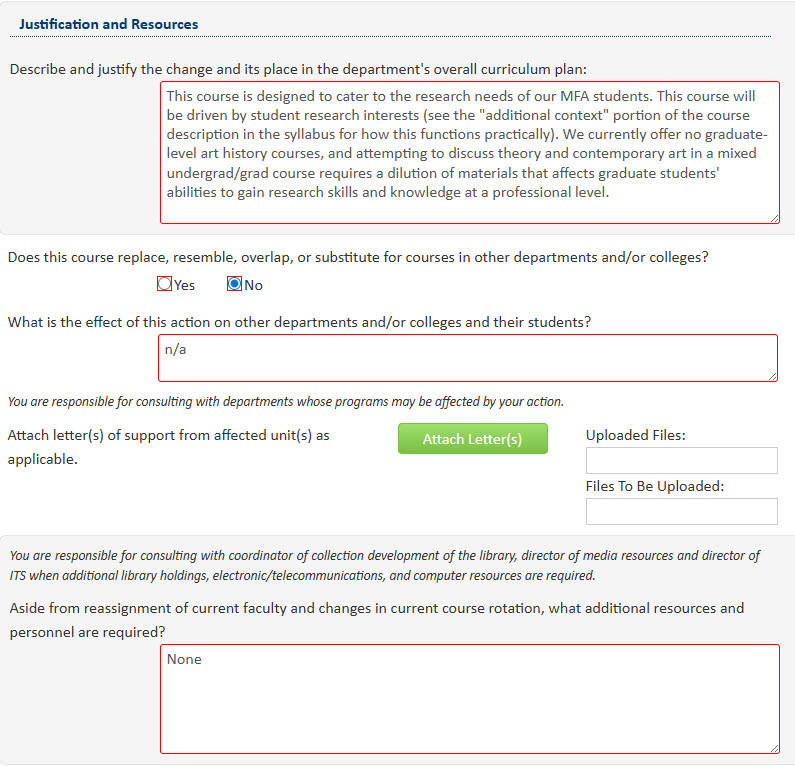
The Justification and Resources section will not be filled out. And so, you will need to explain why the course is being reactivated and answer the questions as to how reactivating this course may affect other departments/colleges, faculty, and/or resources. Also, if any letter(s) of support are needed, attach them here.
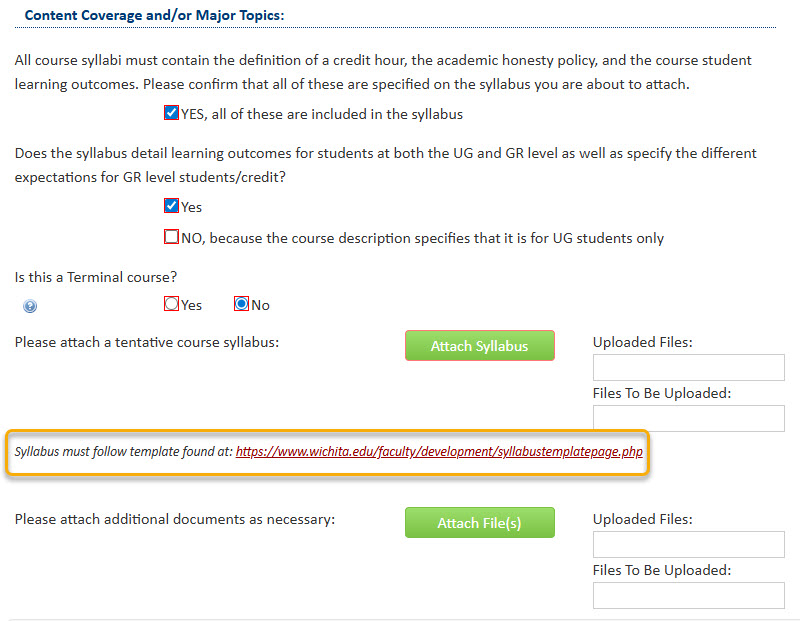
You will also need to attach an updated syllabus that follows the standard syllabus template. Please Note: The question concerning UG and GR level expectations will only appear on the form if the course number is 500-699. The Terminal course question will only appear on the form if the proposed course number is 500+.
Step 4: Start Workflow
Once you have reviewed, updated, and filled out the entire course proposal form, you will want to start the proposal through the electronic workflow approval process by clicking the green Start Workflow button.
