Honorlock in Ultra
Enabling Honorlock in your Ultra Course
You must enable Honorlock in each of your Ultra courses. To enable Honorlock, go to the content tab and select "Add Content" (the plus sign), and choose "Content Market."
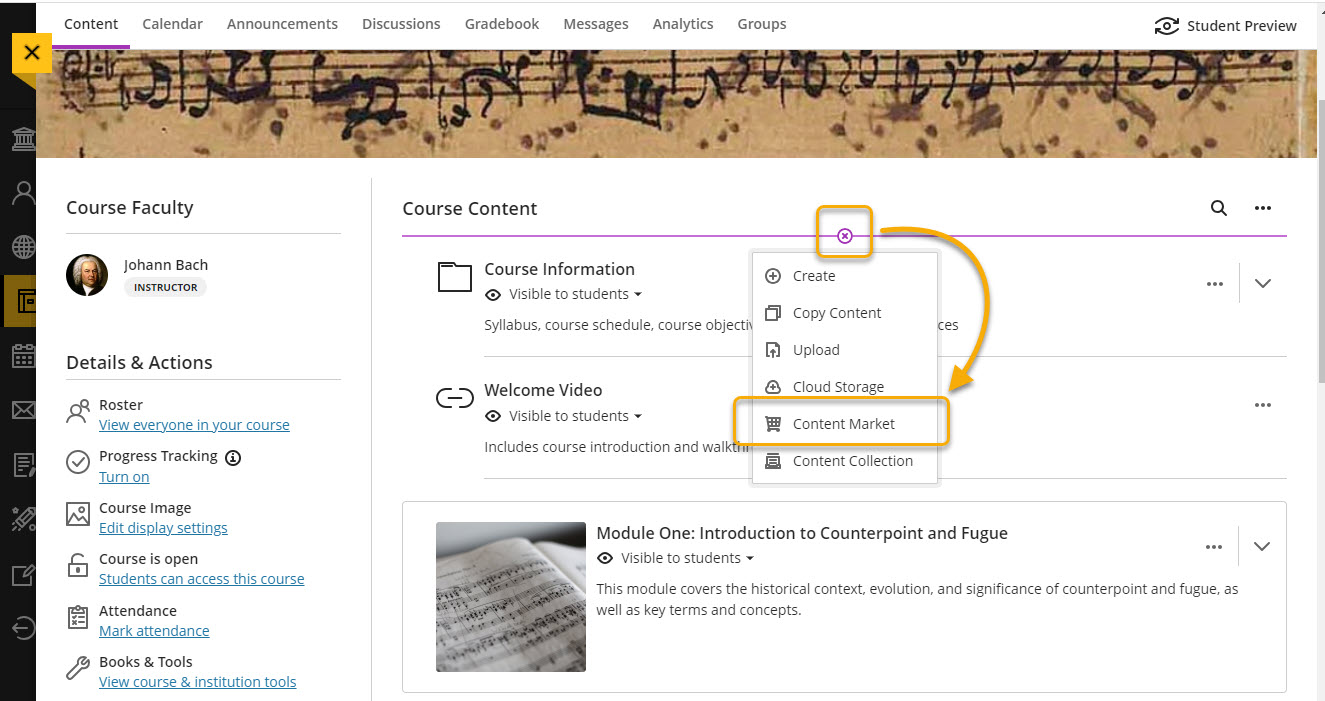
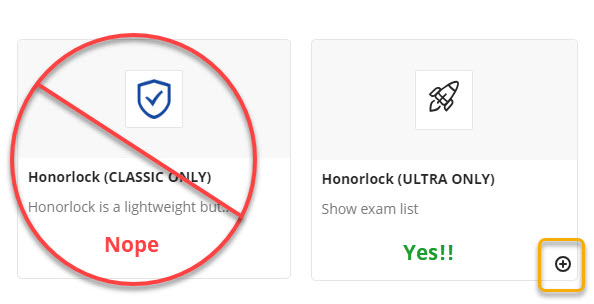
In the Content Market, locate "Honorlock." You will see two Honorlock tools, one indicated "Classic Only" and the other "Ultra Only," which is the one you want. If you click on the tool, it will open the Honorlock LTI. To add a link to the tool in the course content, select "Add" (the plus sign). The benefit of adding a link to the course content is that it is easy to access when needed in the future. By default, the link is hidden from students, which is the ideal setting.
Enable a Specific Test
Step 1
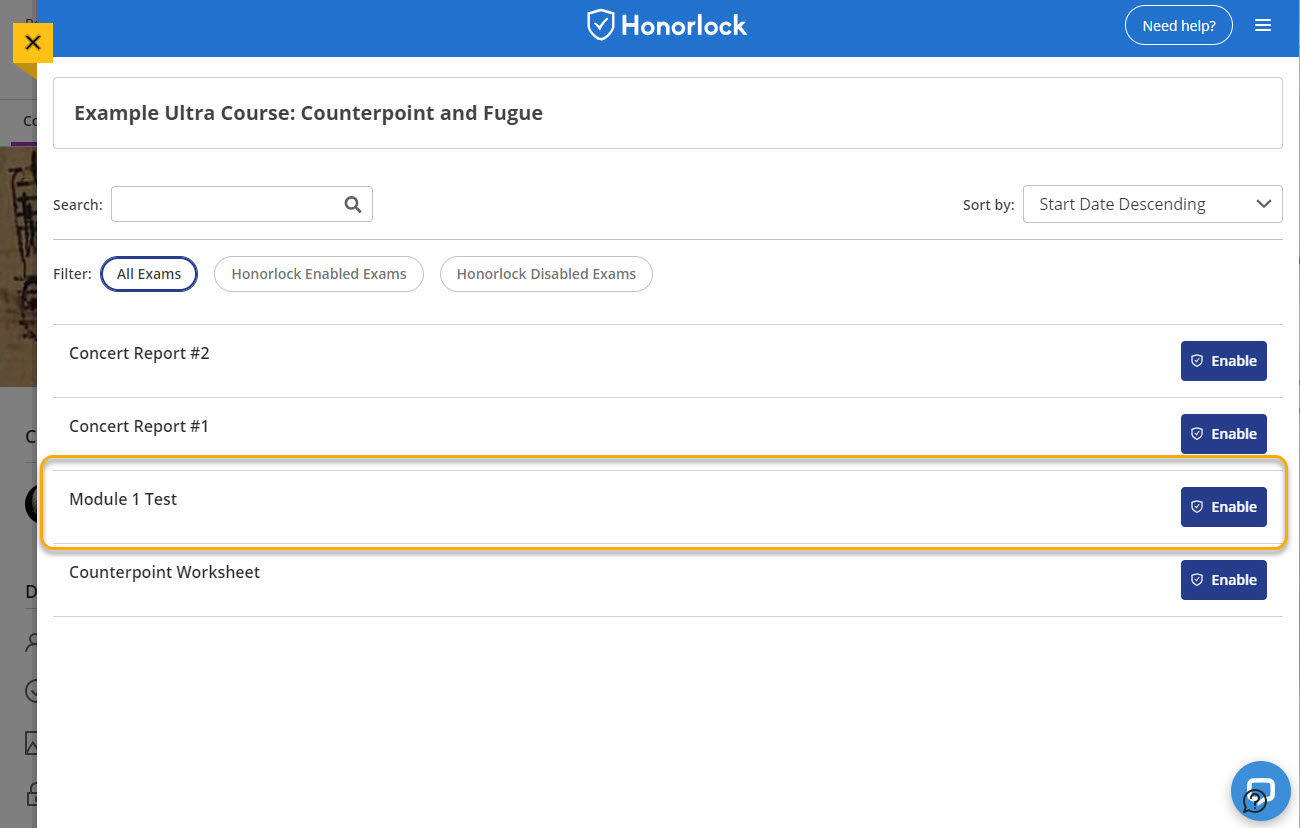
When you open the Honorlock tool, you will see a list of assessments already created in your course. Find the one you would like to enable and select "Enable."
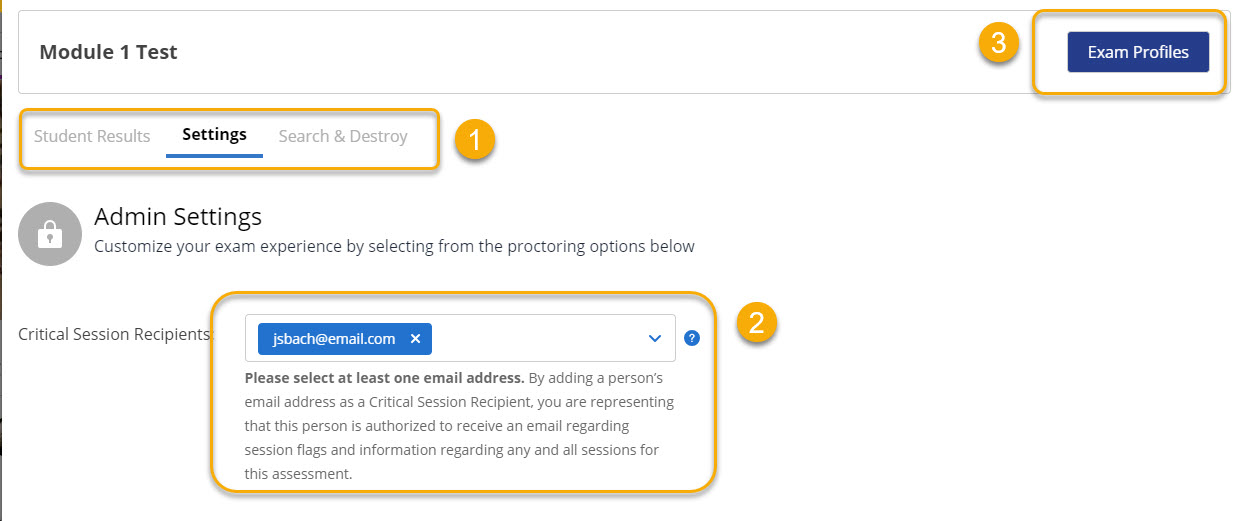
The next screen shows settings and information about that specific test:
- The default screen is "Settings," but there are two other tabs: "Student Results," where you can view results after the students have completed the exam, and "Search and Destroy," which helps protect your exam questions and can give you clarity on whether questions similar to yours have been shared online. For more information, see Honorlock's Search & Destroy Guide.
- Your email address. Since you enabled the it is assumed that you are a critical session recipient. You may add other email addresses, as well.
- Exam Profiles button (optional). If you find yourself using the same settings for multiple tests, you can set up
an exam profile, which can be applied easily to future exams.
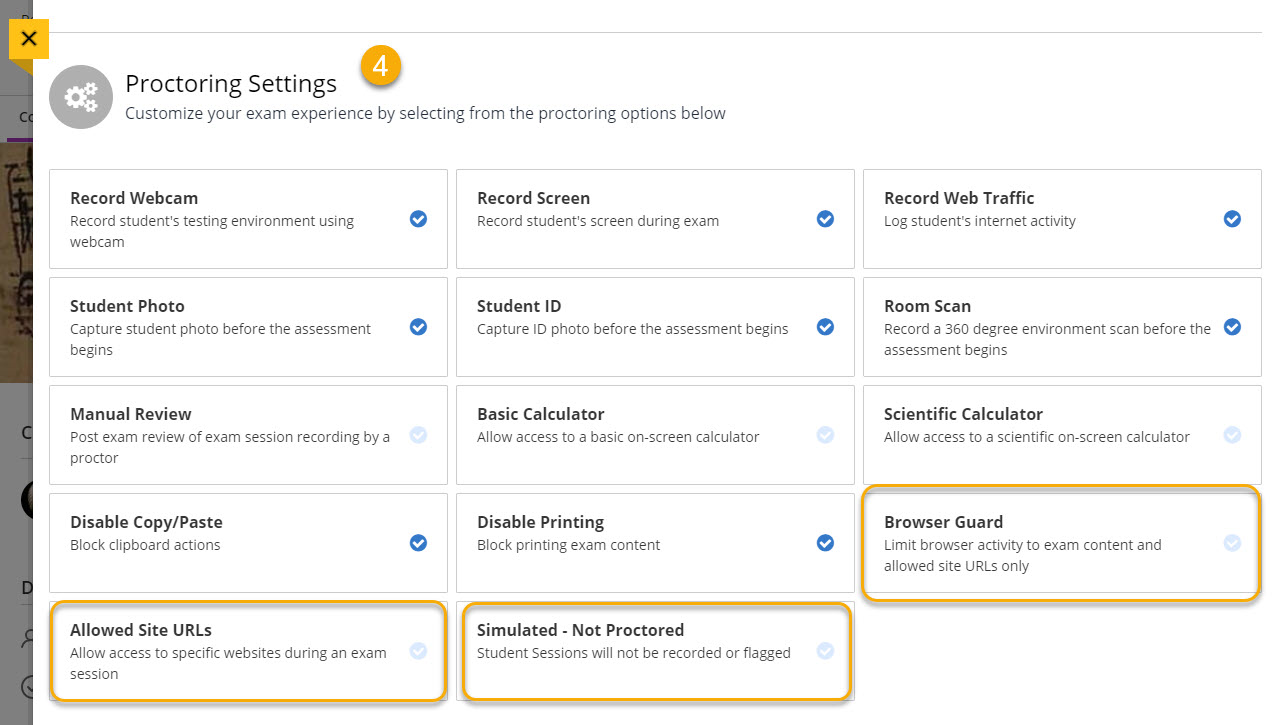
- Proctoring Settings. The default settings are pictured below. Note three settings that are not enabled
by default:
- Allowed Site URLs: add sites students need to access during the test;
- Simulated - Not Proctored: use for practice tests
- Browser Guard: locks down the exam so that students cannot access other apps or browsers during the
exam.
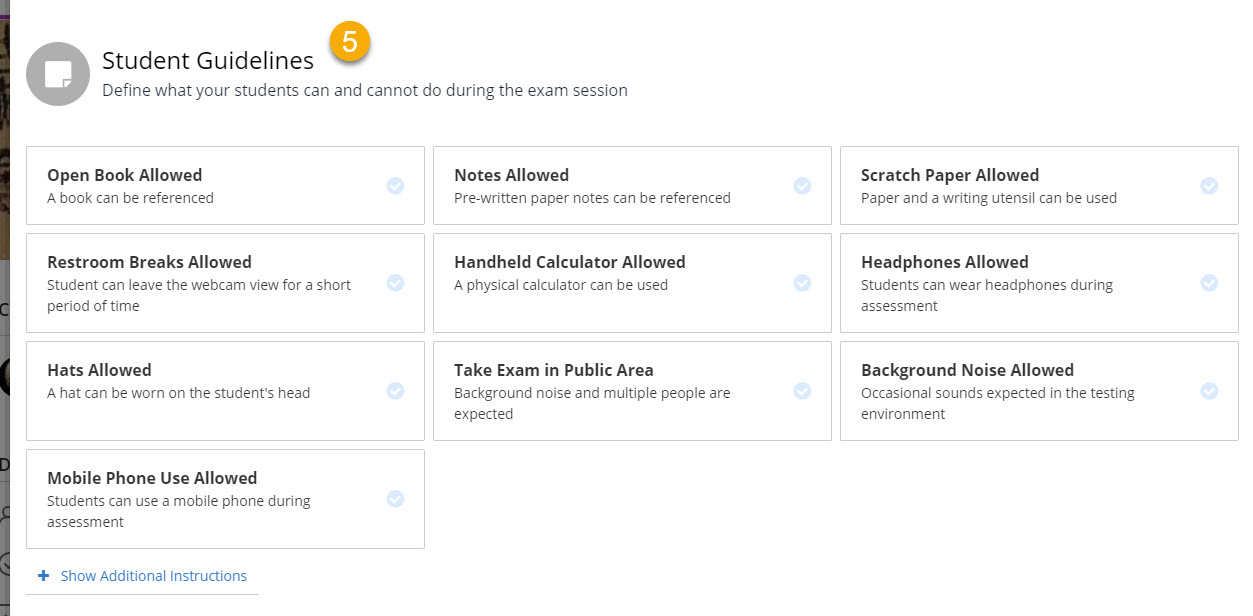
- Student Guidelines. Select the guidelines for the exam. All settings are off by default.
- Accommodations. Ignore this setting, as it is used for communicating accommodations to live proctors.
- Exam Visibility. Select a setting from the drop-down menu.
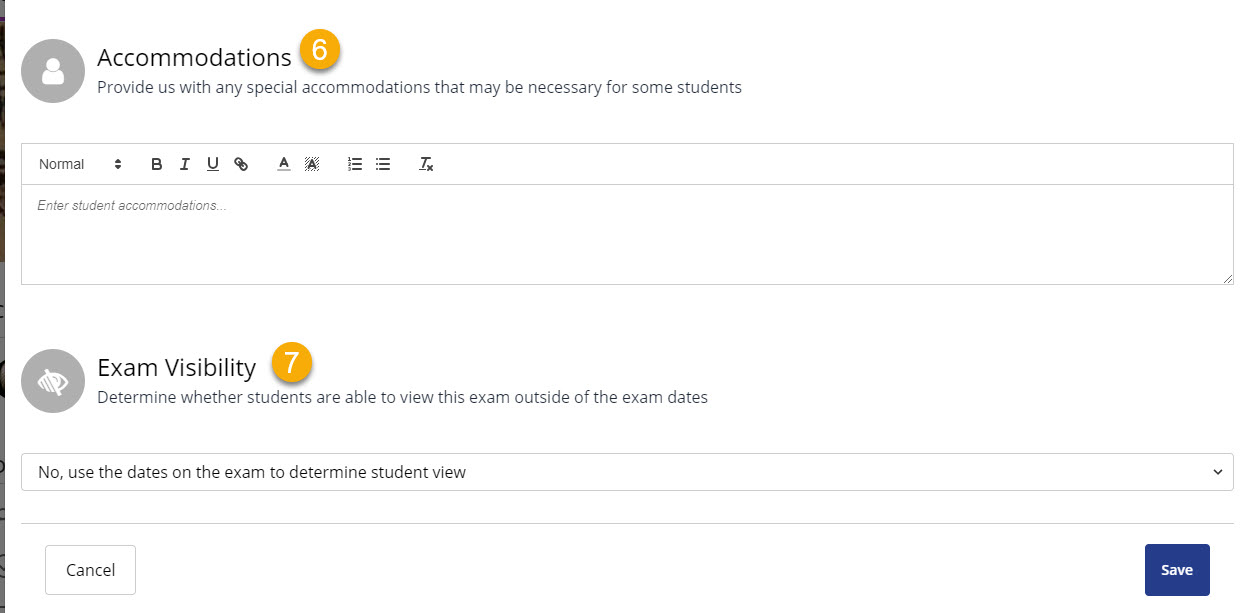
When you are satisfied with your settings, select "Save." You will be returned to the exam list, with a warning on the exam you enabled. You have enabled the exam in Honorlock; now you must enable Honorlock in the exam settings.
Step 2
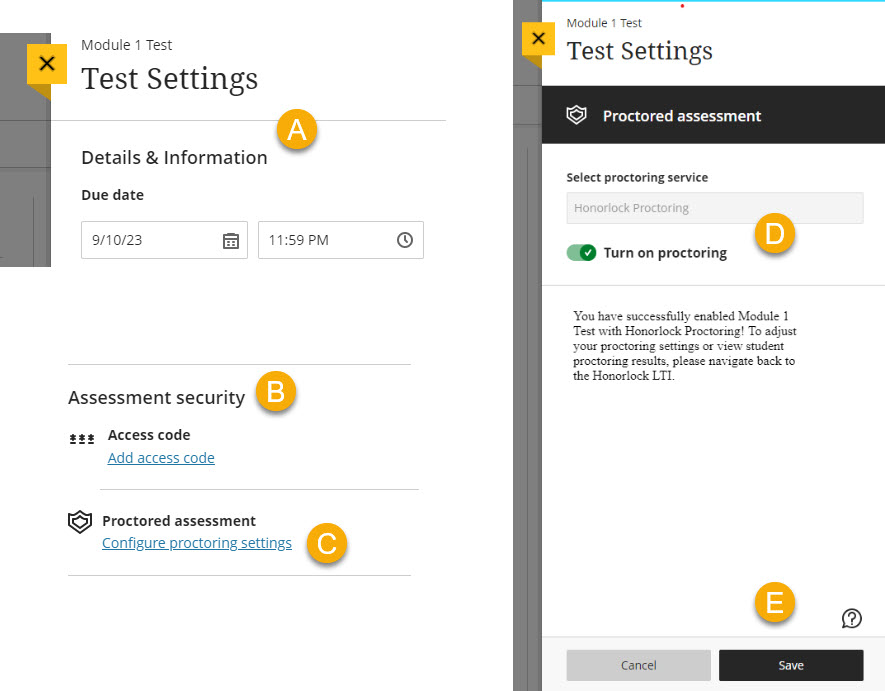
While we are working out the kinks of our Blackboard/Honorlock integration, to access this setting, you need to do the following:
- Locate the Exam settings.
- Under "Assessment Security," find "Proctored Assessment"
- Select "Configure proctoring settings."
- Turn on proctoring.
- Save.
- Save test settings (important! If you don't, Blackboard will ask you if you want to
close without saving, and your proctoring setting will not be saved).
Congratulations! You did it!
You will be able to tell that your exam is enabled in Honorlock by the shield icon and the label "Proctored."
