Step-by-Step Guide to Registration
Step 1: Prepare for Registration
- Make sure you meet the eligibility requirements for enrolling.
- Check the Registration Timeline to ensure registration is open.
- Note the following:
Registration and Payments
All registration and payments must be done online using the steps below. Plan Ahead:
-
- Some advising offices are open for appointments only on Monday and Tuesdays after 5:00 pm
- Offices are closed on major holidays.
- You will need your Shocker ID Card or other photo identification to do business in-person.
Foundation Courses / 48 Hour Requirement
The University’s General Education Program requires undergraduates enrolled in a Wichita State University bachelor’s degree
program to complete the following four courses with a grade of “C-” or better within
the first 48 credits earned toward their degree:
ENGL 101 and 102
COMM 111
MATH 111, 112, 131, 211 or equivalent
Corequisites and Linked Classes
Some courses have a corequisite course (another course that must be taken during the
same semester). Corequisites and Linked classes must be registered for at the same
time as the accompanying course.
Prerequisites
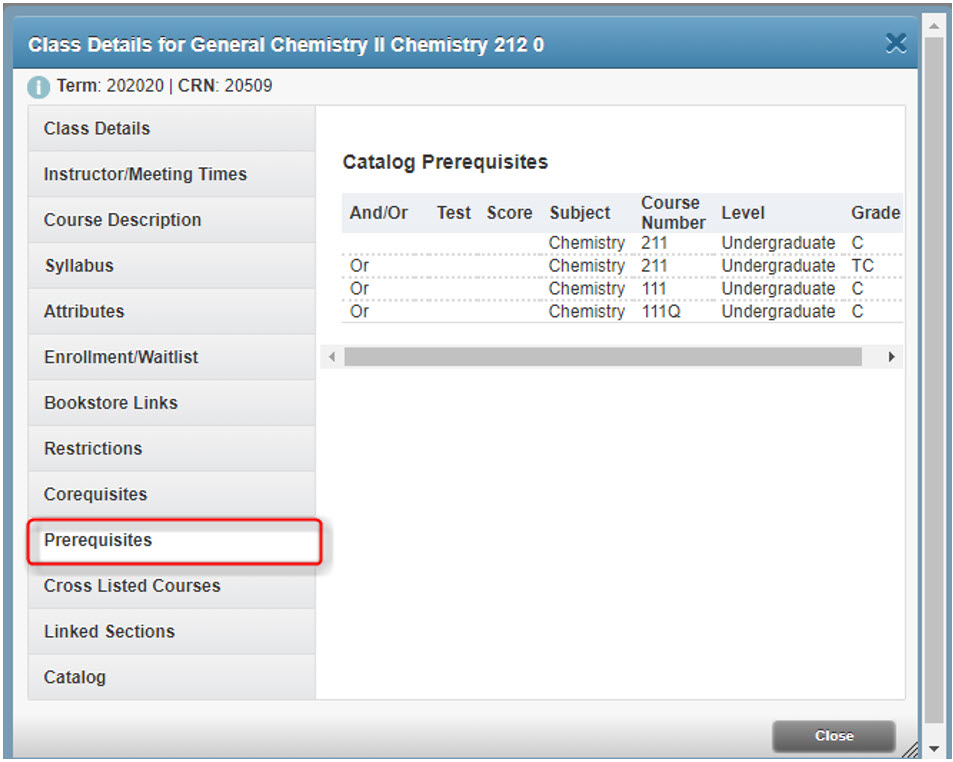
Many courses have a prerequisite (another course or courses that must be completed
before that course can be taken). To determine if a course you want has a prerequisite,
access the desired course in the online schedule, click on the Title of that course then the Prerequisites button. You will be allowed to enroll in the course you want in the semester following
the semester you complete the prerequisite(s). Only the department offering the course
may electronically waive the required prerequisite(s).
Waitlisting
Some classes offer a waitlist option when they fill up. Being on a waitlist does
NOT guarantee that you will get into that class. You cannot be on the waitlist for
a section of a course if you are already enrolled in a different section of that same
course. Additional Waitlisting Information
Audit Credit
Students are permitted in credit courses on a non-credit basis with appropriate approval
under an auditor classification. To be enrolled as an auditor, students must enroll
in-person and pay the same fees as for credit courses at the university. Auditors
may participate fully in the class and expect instructor evaluation of their work.
Auditors are expected to attend class regularly. The audited course will appear on
the transcript with the grade notation of AU. Enrolling for AUDIT credit can only be done in person at the Registration Window,
102 Jardine Hall.
Step 2: Log in to myWSU
- Go to https://www.wichita.edu/mywsu
- Log in using your myWSU ID and password.
Step 3: Register for Classes
- Click the myClasses tab:

- Locate the RegistrationTools section:
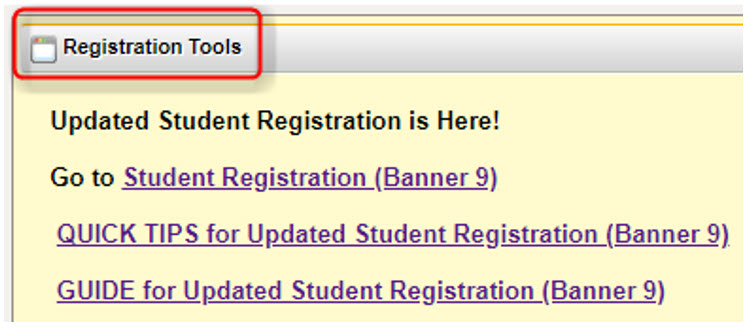
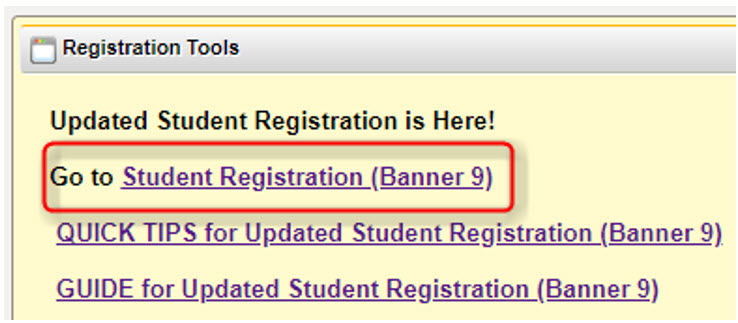
- Click the Student Registration (Banner 9) link:
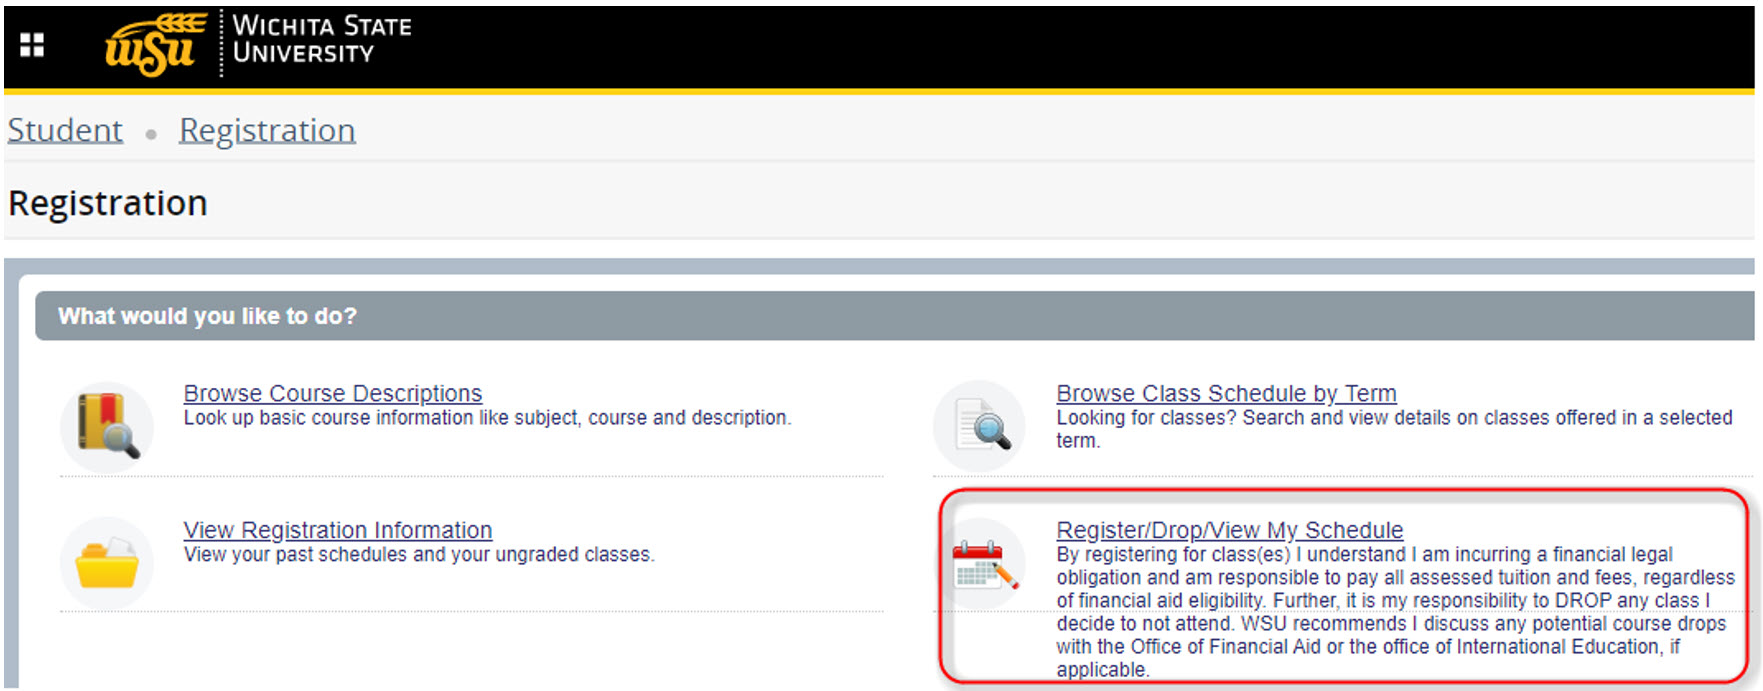
- Click the Register/Drop/View My Schedule link:
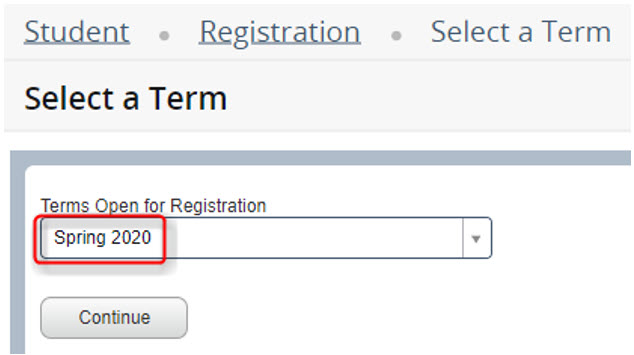
- Select the appropriate term and click Continue:
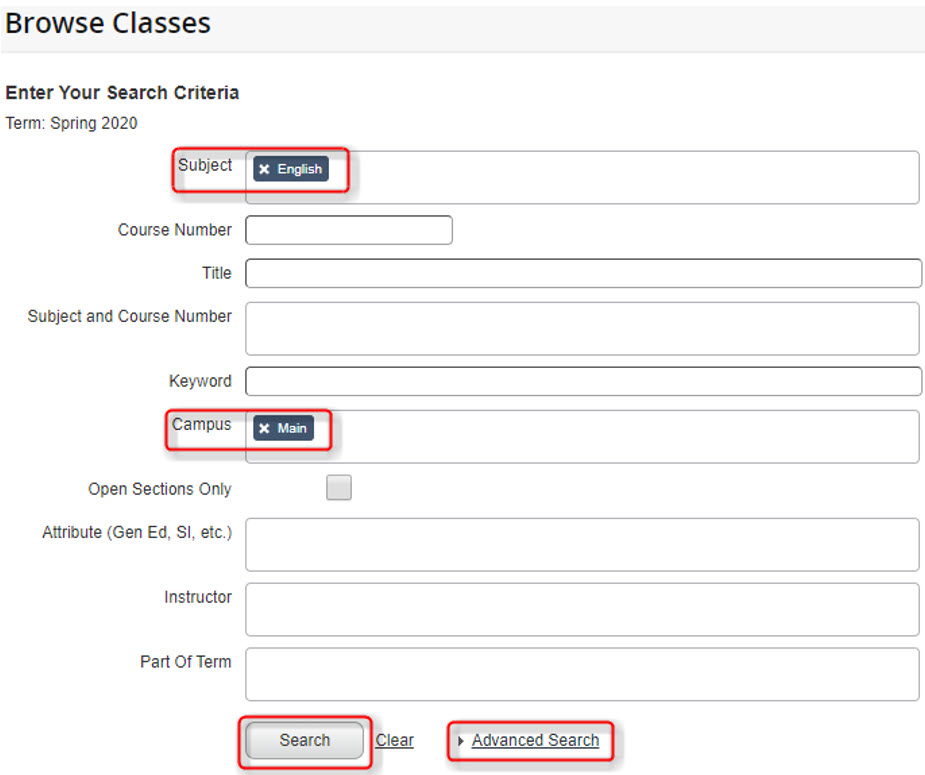
If you have a hold, a message will appear in the upper right-hand corner and you won’t be able to proceed with registration until it is resolved. The contact for each type of hold varies. Contact the department listed within the error message to resolve. - To see a list of all classes offered for the term, simply press Search:
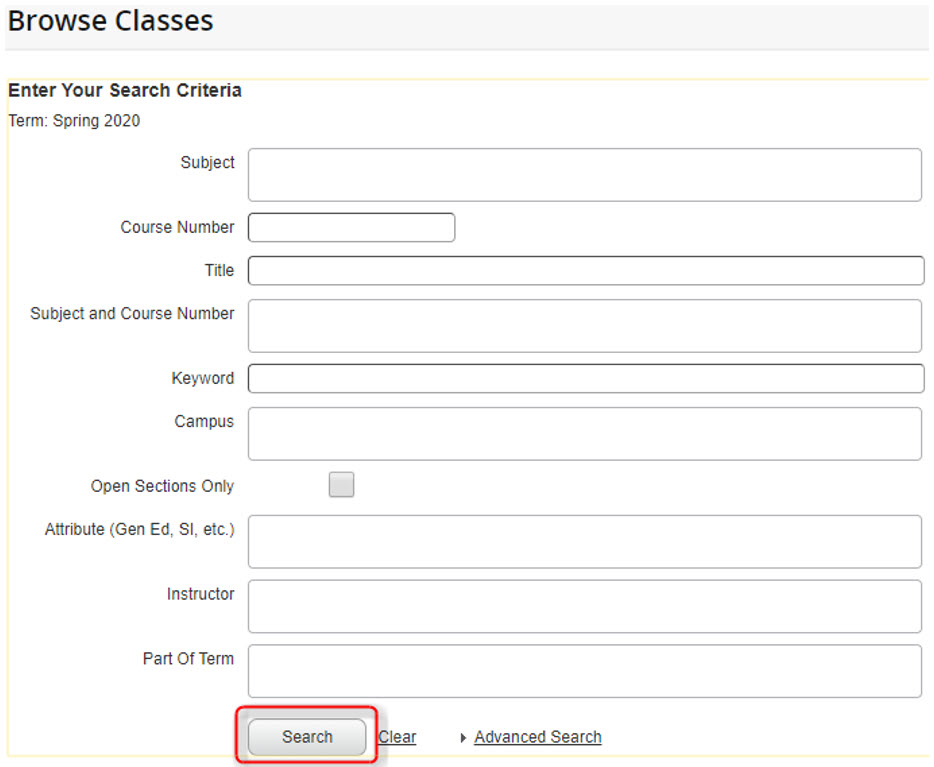
- To narrow your search, fill in one or multiple fields of your choice. Click the Advanced Search to see additional fields. Click Search to see a list of classes matching your criteria:
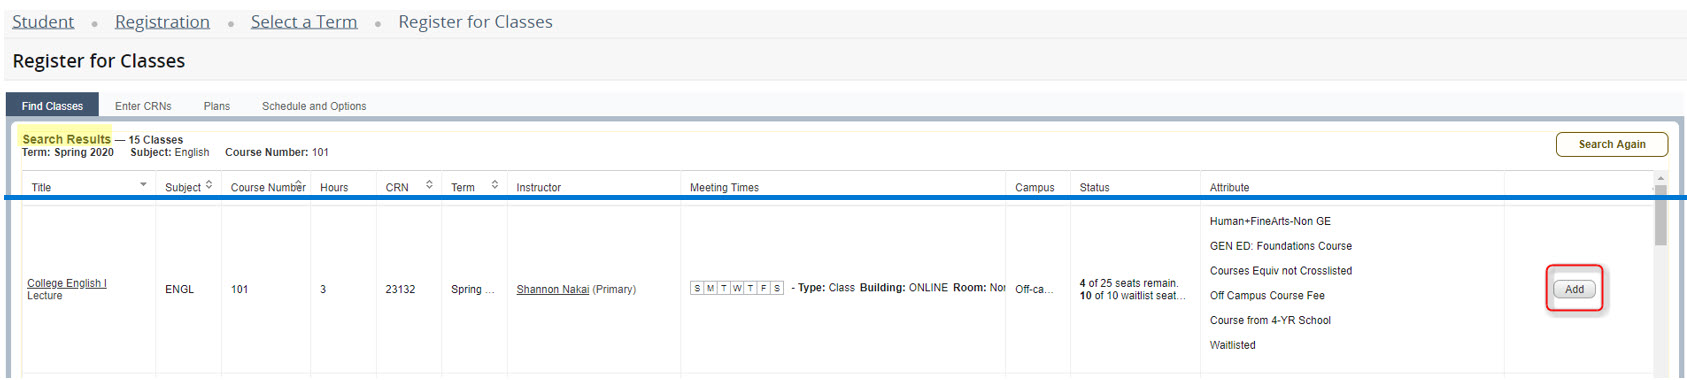
- Using the Search Results, navigate to the class you’d like to register for and click the Add button:
-
Helpful Hint: While in the Search Results screen, you can view additional information for each class by clicking the Title of the class. A new window pops up with buttons along the left-hand side for information such as Bookstore Links, Corequisites, Prerequisites, Cross-listed Courses, etc.
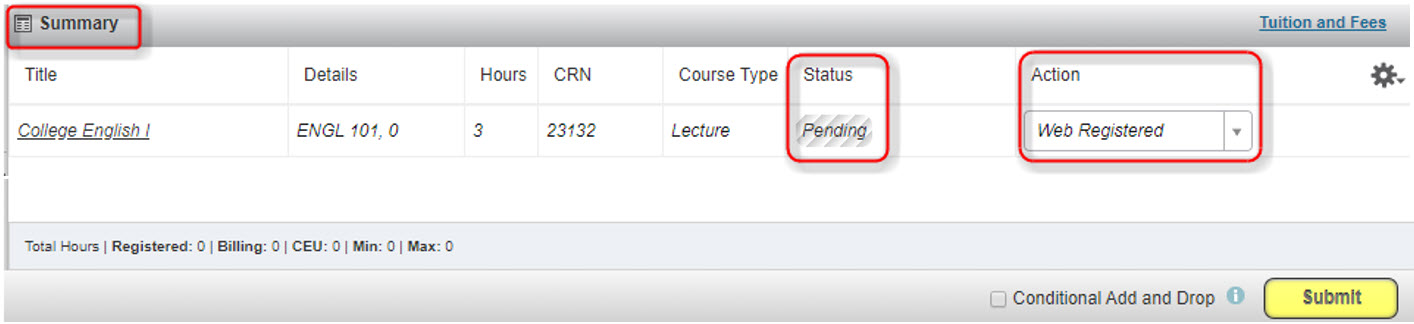
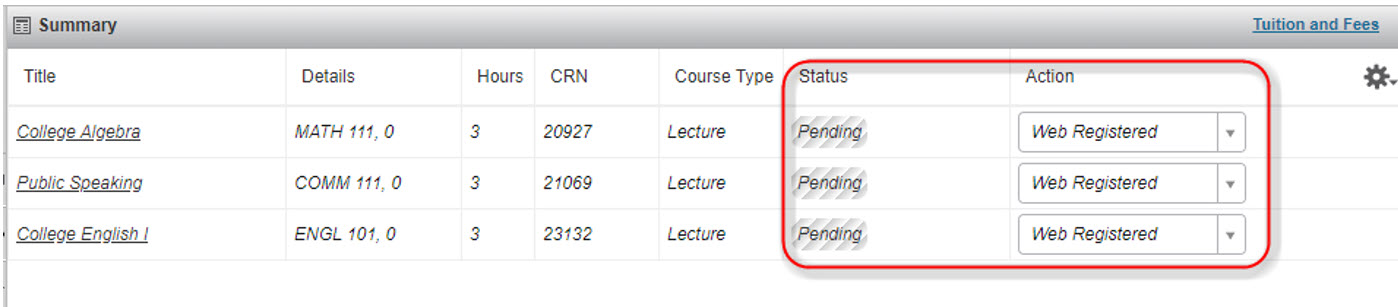
- Once you click the Add button for a class, it will appear in the Summary section with a Status=Pending and an Action=Web Registered:
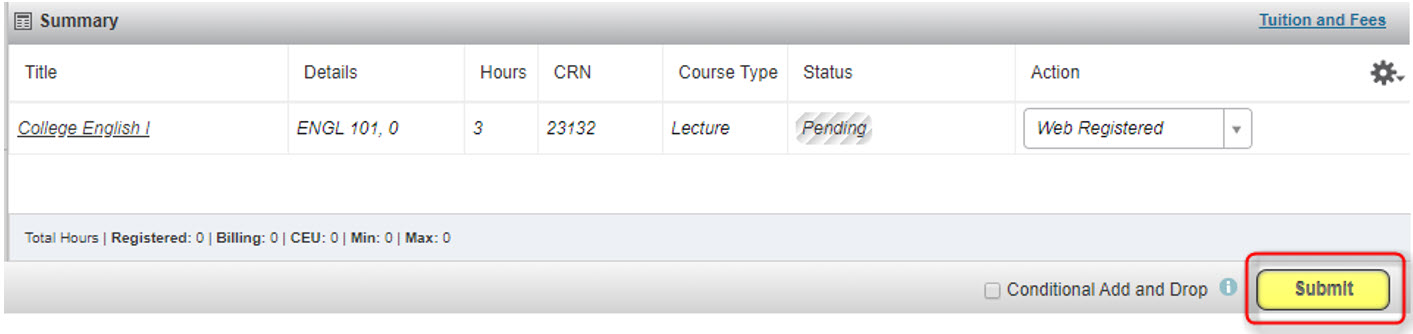
- Click the Submit button:
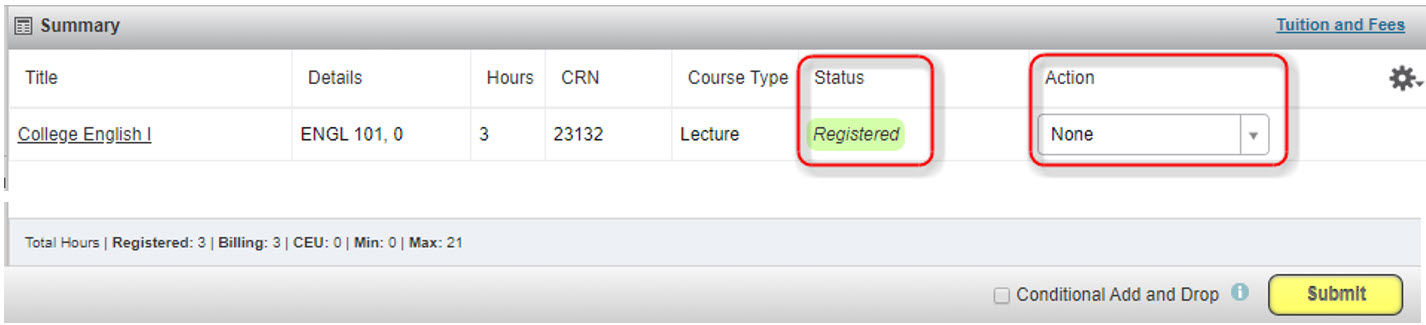
- Now the Status=Registered and the Action=None confirming that you are successfully registered in the class:
Receive an Error?
Follow the instructions within the error message(s) or contact your advisor/department. For additional assistance, contact the Help Desk at helpdesk@wichita.edu or (316) 978-HELP.
Step 4: Pay for Classes
Students must make payment arrangements by the deadline set by Financial Operations shown on the semester calendar. Bills will NOT be mailed. Holds are placed on accounts without payment arrangements.
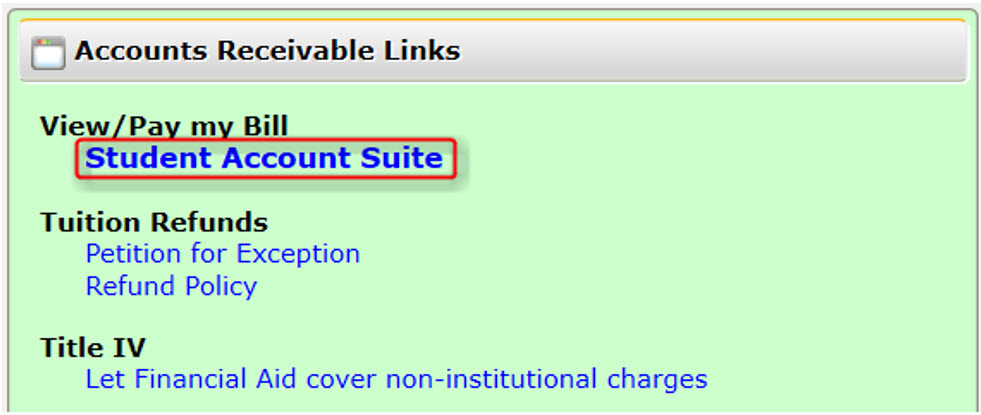
To access your online account:
- If you are not already logged into myWSU, do so now.
- Click the myFinances tab:

- Locate the Accounts Receivable Links section and click Student Account Suite:
- Payment Questions? (316) 978-3333
Helpful Contact Information:
For additional help, please contact the appropriate office:
| Office | Phone Number |
| Academic Advising | (advisor-specific) |
| Office of the Registrar | (316) 978-3090 |
| Office of Financial Aid | (316) 978-3430 |
| Accounts Receivable Office | (316) 978-3333 |
| Technology Help Desk | (316) 978-HELP |
More Helpful Hints:
- If you change your mind and don’t want to register for a class that is showing in
the Summary section with a Status=Pending, change the Action for that class to Remove then press the Submit button:

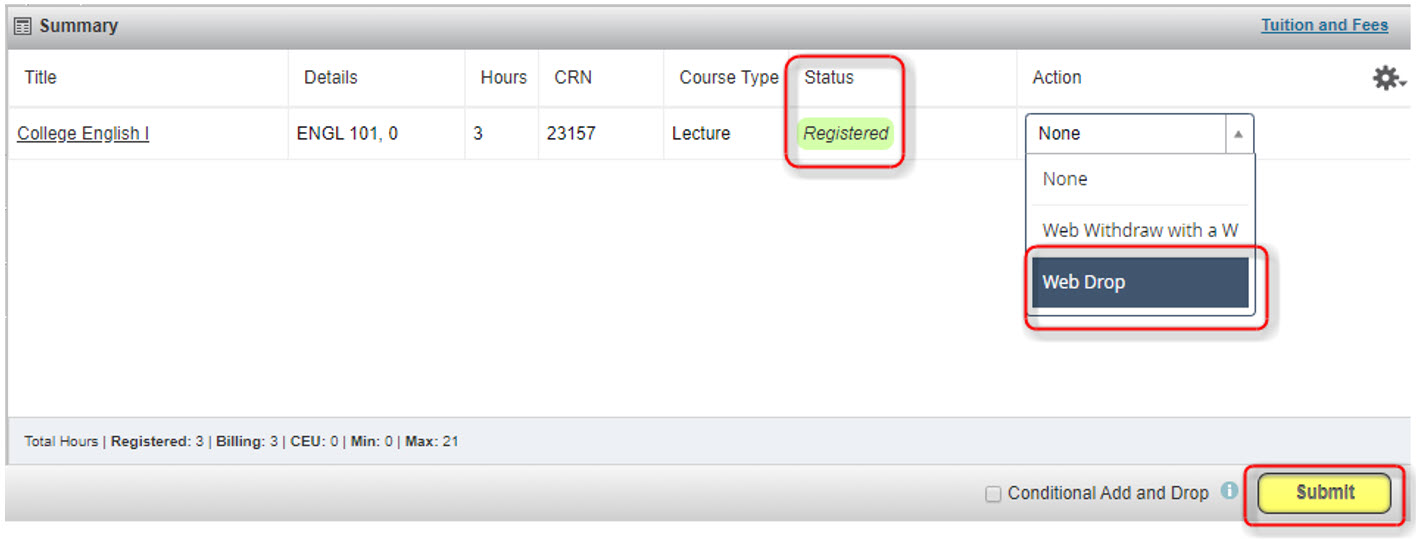
The class will then disappear from the Summary section. - If you want to drop a class that is listed in the Summary section with a Status=Registered, change the Action for that class to Web Drop then press the Submit button:
-
Now, you’ll see the Status=Deleted and the Action=None:

- You can Add multiple classes to the Summary section before clicking Submit to register for all of the classes at once:
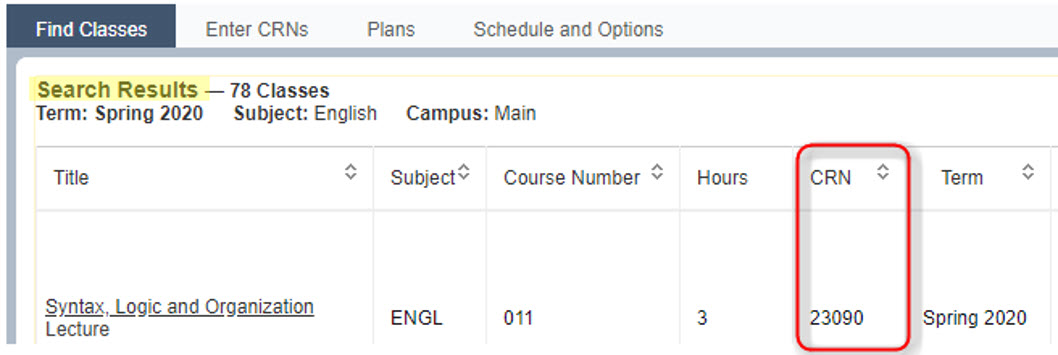
- Once you determine which classes you want to take, write down each corresponding CRN
(Course Reference Number – a five digit number assigned to a class). You can enter
this CRN into the Search screen at any time to quickly access the class information again:
- If you know the CRN (Course Reference Number) of the class you want to register for,
you can simply:
- If you are not already logged into myWSU, do so now.
- Click the MyClasses tab
- Locate the Registration Tools section and click the Student Registration (Banner 9) link
- Click the Register/Drop/View Schedule link
- Select the appropriate Term
- Click the Enter CRNs tab
- Enter each CRN and click Add to Summary
- Locate the Summary section and click Submit
- To print your schedule:
- If you are not already logged into myWSU, do so now.
- Click the MyClasses tab
- Locate the View My Schedule section
- Click the Banner 9 Student Schedule link
- Click Register/Drop/View My Schedule link
- Select the appropriate Term
- Click the Schedule and Options tab
- In the Summary section, click the printer icon along the right side of section:
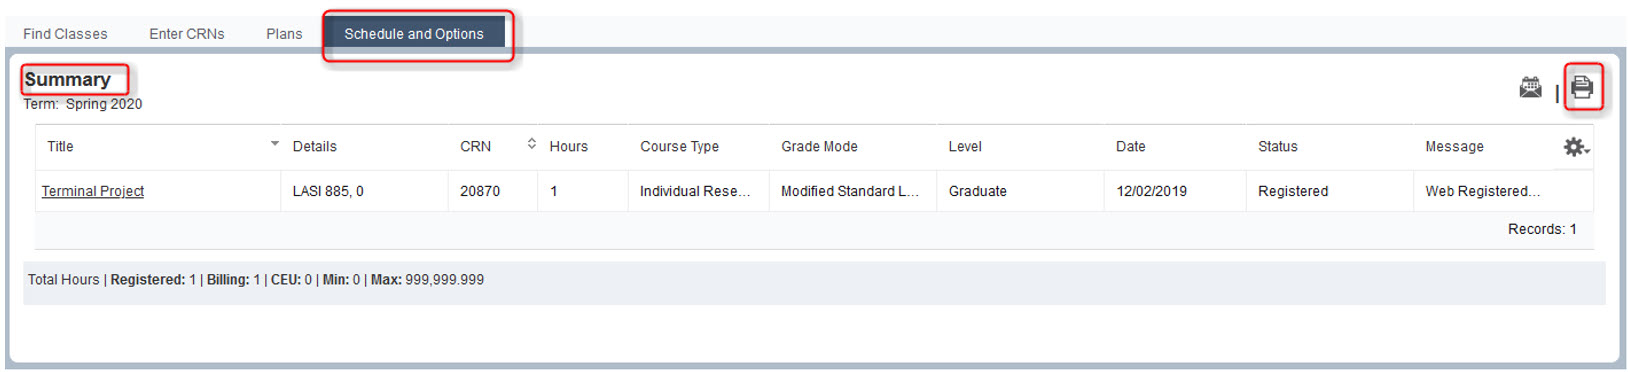
- A new window appears with your schedule in print-ready format. Use your browser’s print function to print.