
Creating and Launching Pools in Zoom
Creating and Launching Polls in Zoom
The polling feature in Zoom allows hosts to create up to 25 polls before and/or during the meeting. This tool could serve as an option for collecting attendance in online synchronous classes. It is important to note that polling is only available for scheduled meetings. Meetings created in the moment by clicking “new meeting” will not have polling capability. Once a poll is launched in a meeting, the host should see the responses in real time. After ending the poll, the host can choose to share the results with the meeting participants. After the meeting has ended, the host can download the results as an Excel file.
Creating a Poll When Scheduling a Meeting
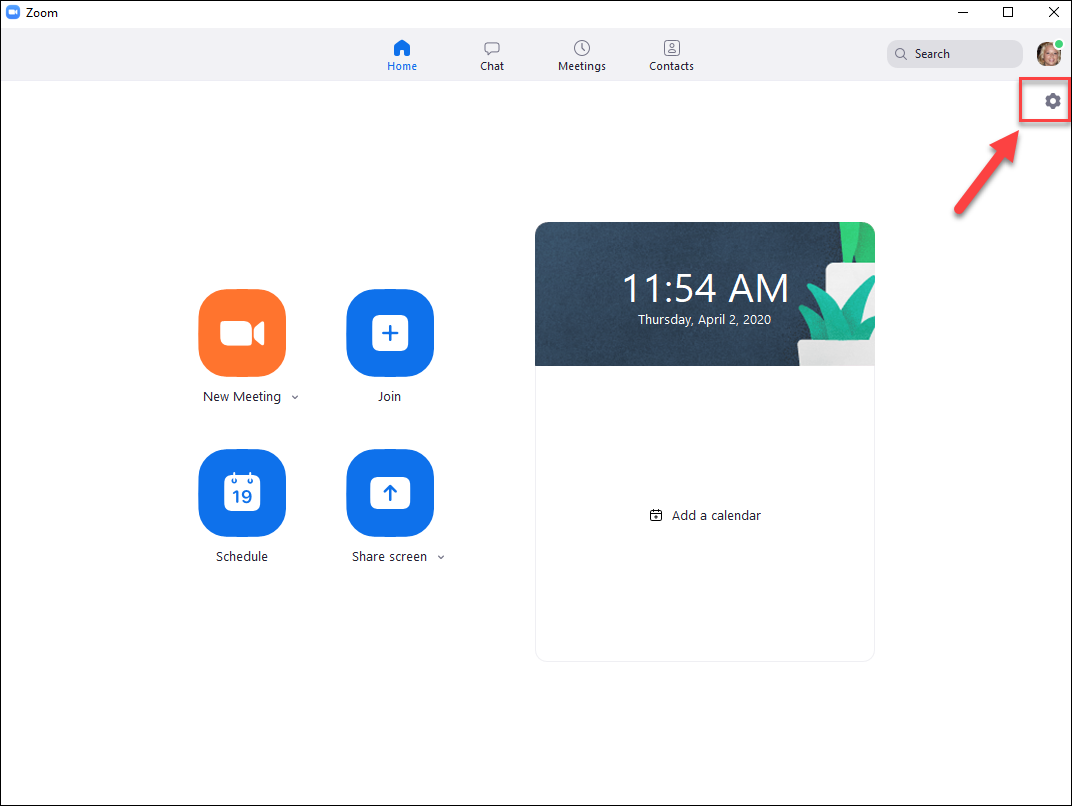
- Before we can add a poll, we need to verify that the polling feature is enabled. To
do this, open the Zoom app, and click on “Settings” in the upper-right corner.
- Click on “Profile.”
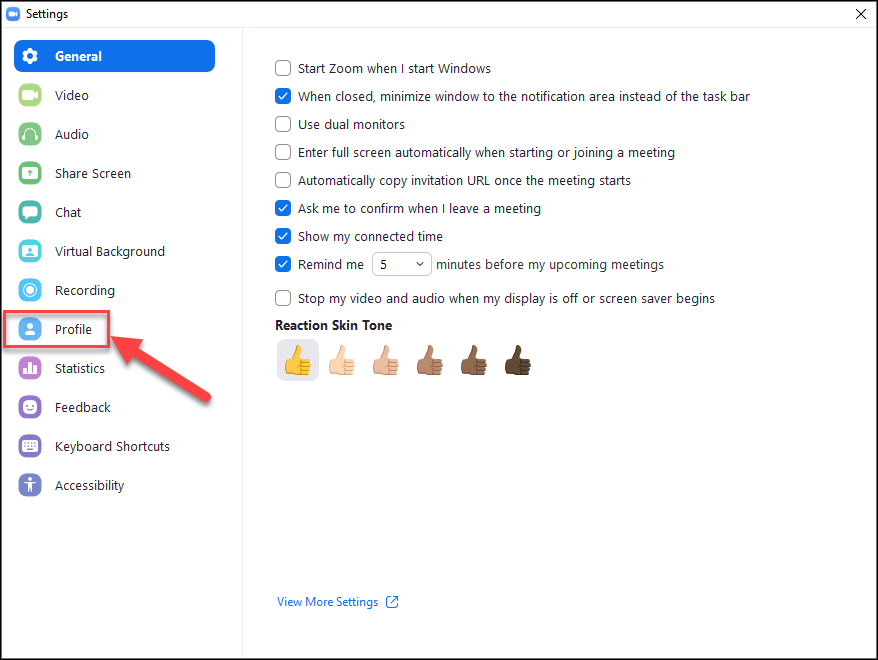
- Click on “View Advanced Features.”
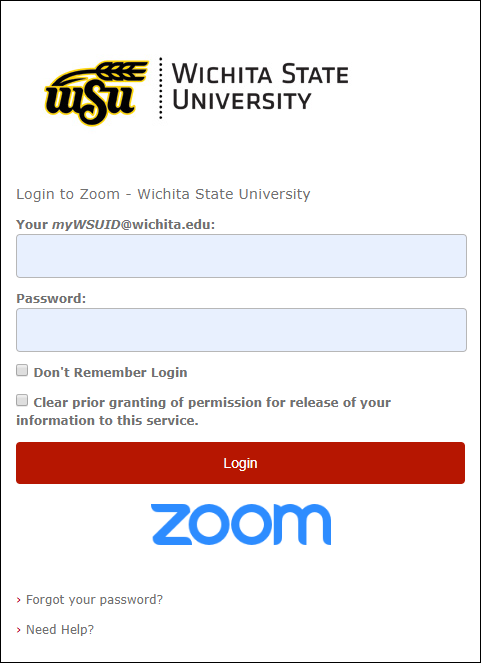
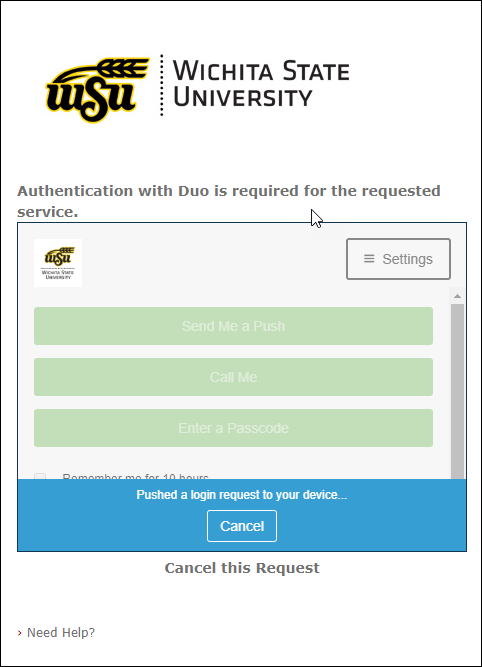
- You may need to Login and Duo.
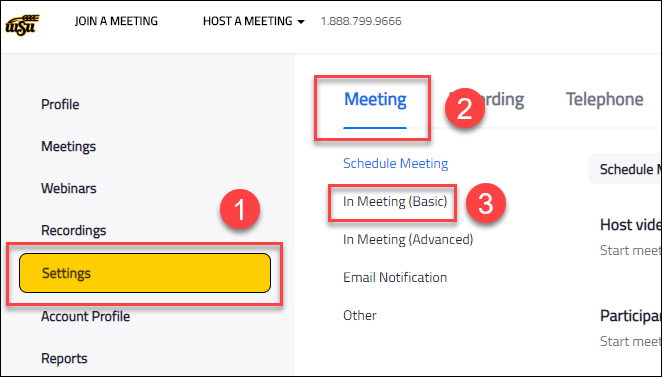
- Your Zoom web portal should open. Confirm that you are in the “Settings” area (1)
and the “Meeting” tab (2). Click on “In Meeting (Basic)” (3).
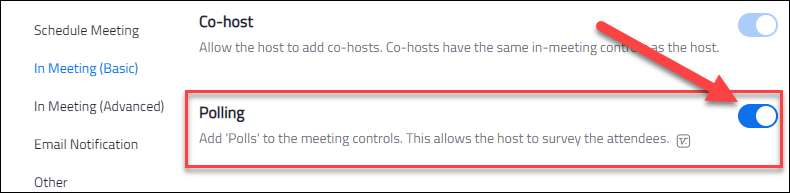
- Scroll until you see “Polling.” This feature is on by default; however, if yours is
disabled, click the toggle to enable.
- Now that we have confirmed our polling feature is enabled, we can add a poll to a
previously scheduled meeting, or schedule a meeting if we haven’t done so yet. Click
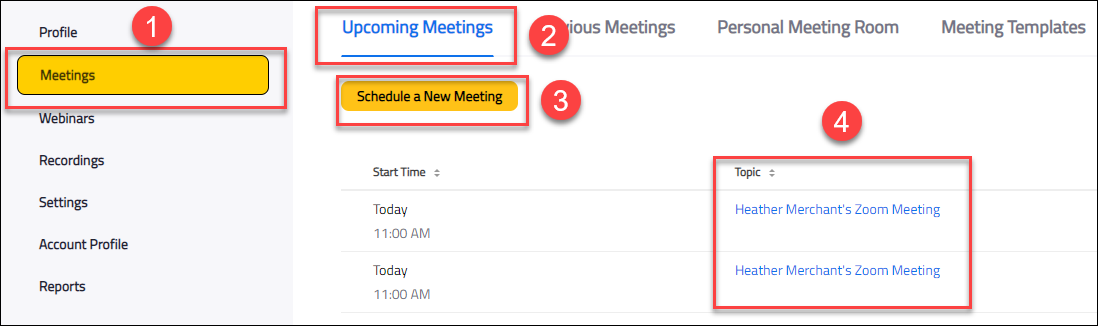
on “Meetings” (1) in the left column and ensure you are on the “Upcoming Meetings”
tab (2). If you need to schedule the meeting you may do so here by clicking on the
“Schedule a New Meeting” button (3). Otherwise, click on the scheduled meeting you
wish to add a poll to (4).
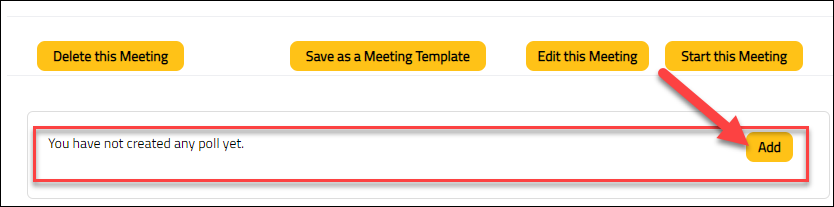
- Scroll to the bottom and click the “Add” button in the polls section.
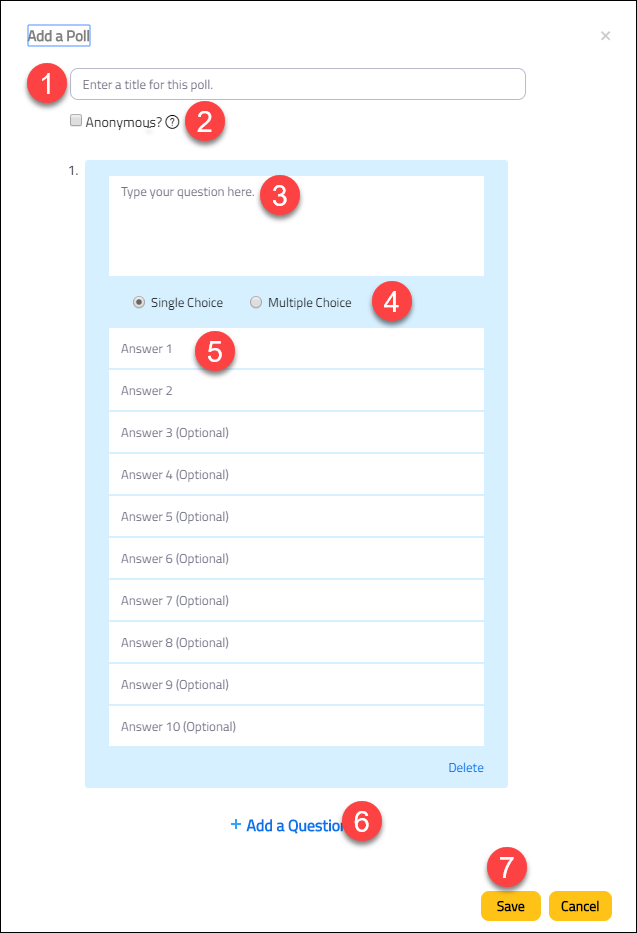
- The “Add a Poll” window will open. You will need to give your poll a title (1). Choose
if you want the respondents to be anonymous or not by checking/unchecking the box
(2). Type in your first question (3), and select if it is a Single Choice (respondents
can only choose one answer) or a Multiple Choice (respondents can select more than
one answer) (4) question. List anywhere from two to ten answer choices (5). To add
another question, click “Add a Question” (6). When you are satisfied with your poll,
click “Save.” Your poll is now attached to your scheduled meeting and can be launched
when needed during the meeting.
Creating a Poll During a Scheduled Meeting
- To create a poll during a scheduled meeting, click on the “Polls” icon in the bottom
toolbar.
- The “Polls” window will open. Click on the “Add a Question” button.
- The “Add a Poll” window in your Zoom web portal will open. Refer to Step 9 above to
create the poll.
- After clicking “Save,” the “Edit Meeting Polls” page will appear. From here you can
“Add” another poll to this meeting, “Edit” this poll, or “Delete” this poll. Clicking
the down arrow next to the poll title will give a list of the poll questions.
- To return to your meeting, simply close this browser by clicking on the “X,” or minimize
the screen to easily edit/add to your polls for this meeting.
- You now have a poll or polls available for launching anytime during this meeting.
Launching a Poll
- To launch a poll during a meeting, click on the “Polls” icon in the bottom toolbar.
- The “Polls” window should open. If you have more than one poll, click the down arrow
(1) to open the list of polls available. Select the poll you wish to launch (2) by
clicking on the poll title. Click the “Launch Polling” button.
- Your meeting participants will now be prompted to answer the polling questions.
- The “Name of your poll in Progress” window will open for the host. A timer can be found in the upper right
corner (1). The host should be able to see how many participants have responded (2)
and the results post in real-time (3); however, this does not always work. You may
need to ask your participants if everyone has submitted their response and click “End
Polling.”
- The results are now visible to the host, who may share with the participants by click
“Share Results” if desired or “Re-launch Polling” for new data.
- To end sharing the results, click “Stop Share Results.” Your polls will be available through the “Polls” icon for launching and re-launching as needed throughout the remainder of your meeting.
Downloading the Poll Results
- After ending your meeting you will be able to download the results of your poll(s).
You will first need to access your Zoom web portal. See steps 1-4 above. Now, click
on “Reports” in the left column, then on “Meeting.”
- You should now be on the “Meeting Report” tab (1). “Registration Report” will be selected
by default, you will need to change this by selecting “Poll Report” (2). Enter the
date range of the report; the default is always yesterday through today (3). Click
“Submit” (4).
- Click “Generate.” If you need to generate results for more than one meeting, use the
selection boxes to the left of the Scheduled Time column.
- You can now download your report by clicking on “Download.”
- Double-click on the file to open it. The file will be saved in your downloads area.
- Your Excel file with your results will now be open. It is important to note that if you selected “anonymous” when creating your poll, each participant will show as anonymous. If you did not select “anonymous” and your participants are logged into their Zoom accounts, their names and email addresses will be listed with their responses. If they were not logged in, they will be listed as “Guest.”