
Using and Customizing the Waiting Room
For added security or logistics, you may wish to use Zoom’s waiting room feature, which allows the host to control who joins the meeting and when they join the meeting. The host can admit participants one at a time or all at once and even return participants to the waiting room if needed. If you would like to use the waiting room feature but can't run your class or meeting and do that management at the same time, request a Zoom Co-Host from Campus Media Services.
Enabling the Waiting Room
- By default, the waiting room is not enabled. To enable the waiting room:
- Open the desktop app and click on the cogwheel in the upper right corner, “Settings.”

- Click on “Profile.”

- Click on “View Advanced Features.”

- Open the desktop app and click on the cogwheel in the upper right corner, “Settings.”
- You may need to Login and Duo.


- Verify you are in the “Settings” (1) section and under the “Meeting” tab (2). Click
on “In Meeting (Advanced)” (3).

- Scroll to locate the waiting room, and click to toggle on this feature.
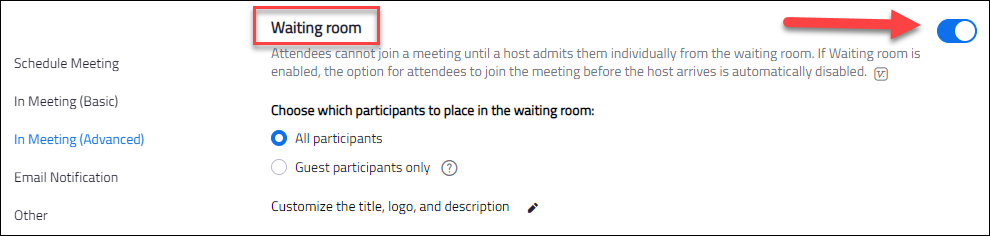
- Scroll to locate the waiting room, and click to toggle on this feature.
- You can now select which type of participants you want directed to the waiting room:
all participants or guest participants only.
- All participants: all participants joining your meeting will enter in the waiting room.
- Guest participants only: only participants not logged in or not on your Zoom account
will be directed to the waiting room.
- Note: If “Guest participants only” is enabled, you also have the option to allow internal
participants (users on the account), to admit guests from the waiting room if the
host is not in the meeting. To enable, check the box and click “Save.”

- Note: If “Guest participants only” is enabled, you also have the option to allow internal
participants (users on the account), to admit guests from the waiting room if the
host is not in the meeting. To enable, check the box and click “Save.”
Customizing Your Waiting Room
You can customize the title and description of your waiting room. You can even add an image. Before you can customize your waiting room, it must be enables. Please see “Enabling the Waiting Room” for instructions on how to do this.
- See steps 1-3 above.
- Click the edit icon (pencil) next to “Customize the title, logo, and description.”

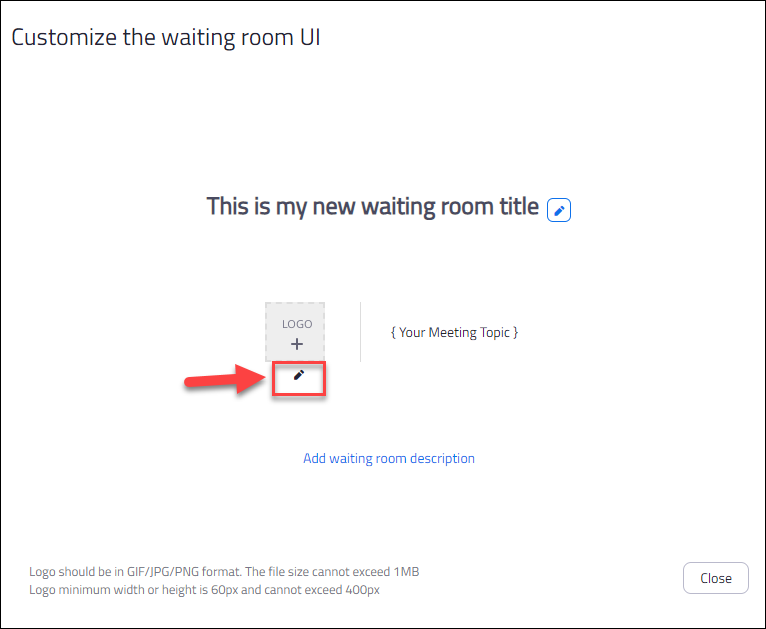
- The customize the waiting room options window will open
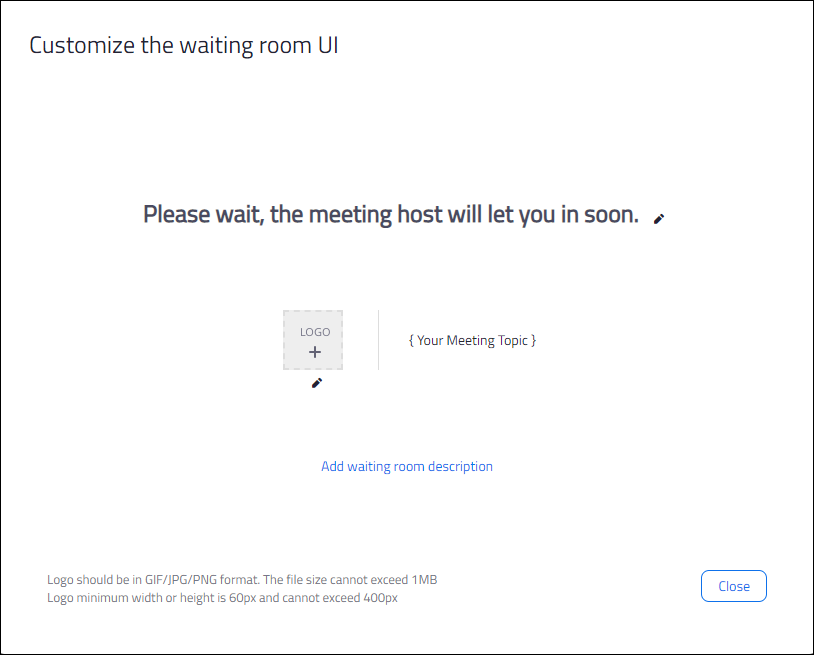
- The customize the waiting room options window will open
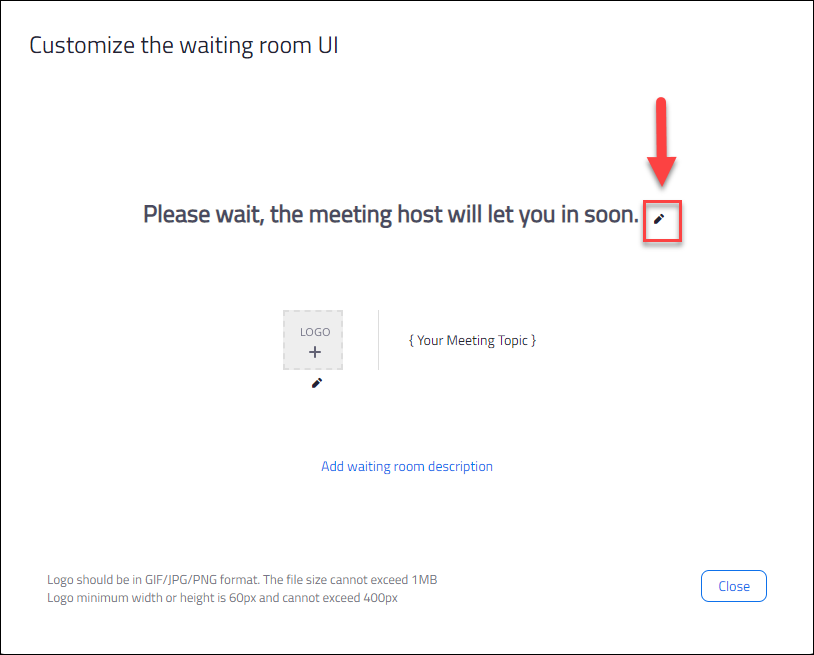
- To edit the title, click the edit icon (pencil) next to “Please wait, the meeting
host will let you in soon.”
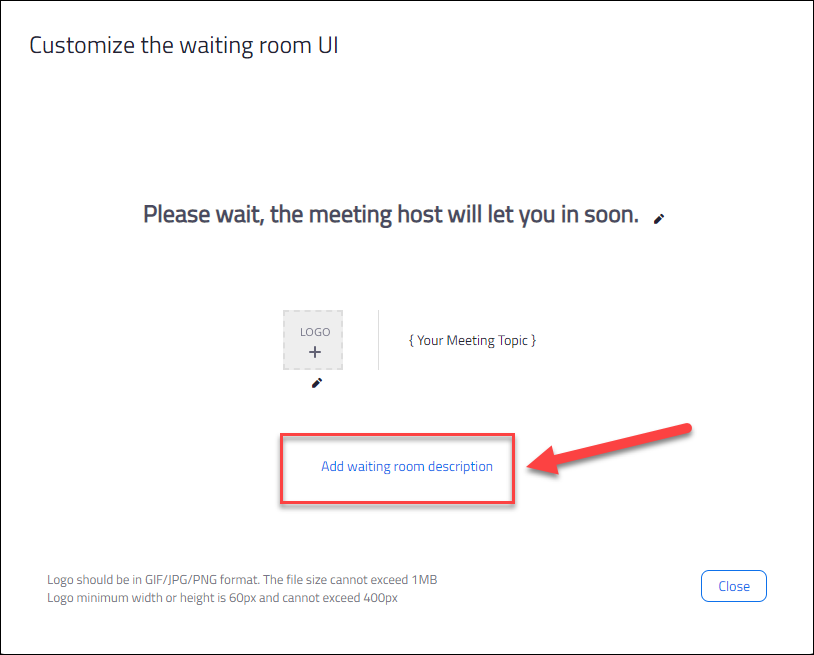
- Enter your new title of 64 characters or fewer, and click the checkmark to save your
new title.
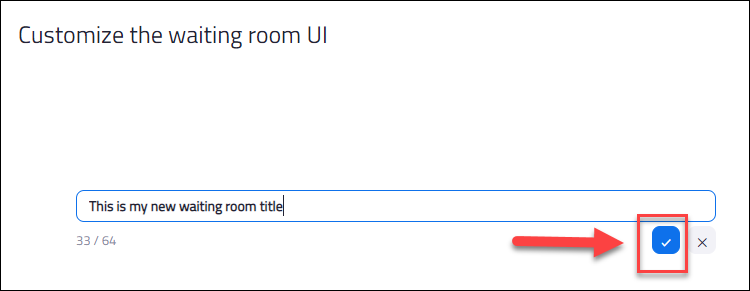
- To delete your new title and revert to the previous title, click the “X.”
- Enter your new title of 64 characters or fewer, and click the checkmark to save your
new title.
- To upload a logo of your choice, click the edit icon (pencil) below the logo box.
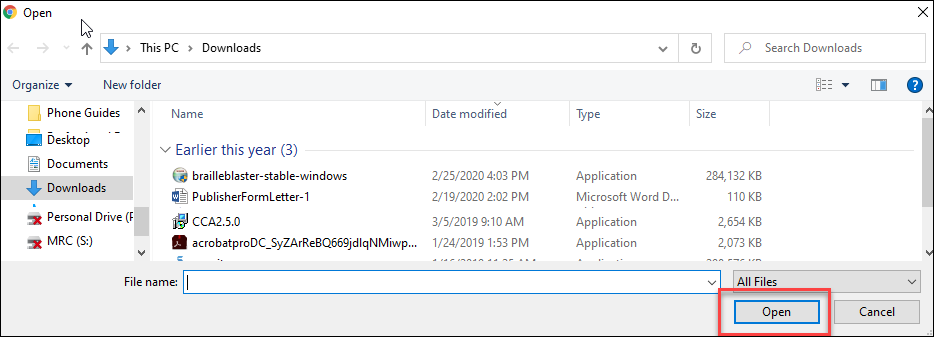
- Your device’s file explorer should open.
- Search for and select the image of your choice. Click “Open.” Note: Logos can be in
GIF, JPG or PNG format. They cannot exceed 1MB. The minimum height and width is 60px
and the maximum is 400px.
- To replace this image, repeat the previous steps.
- To delete this image, click the “X” found under the image.
- To add a description to your waiting room, click “Add waiting room description.”
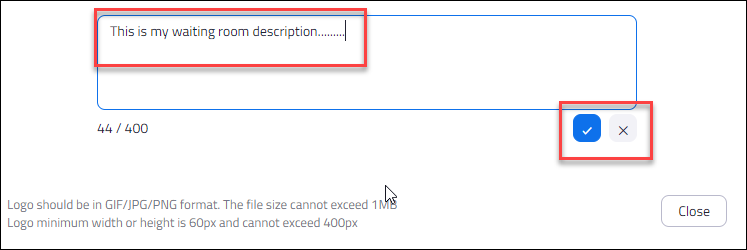
- Type in your description of 400 characters or less.
- Click the checkmark to save your description.
- To delete your description, click the “X.”
- When you are satisfied with your waiting room customization, click “Close.” Participants joining your meetings (for which the waiting room has been enabled), will now see your customized title, image, and description
Individual Meetings
Now that the waiting room has been enabled in your advanced features, you will be able to choose if you want to use your waiting room or not when you schedule a meeting.
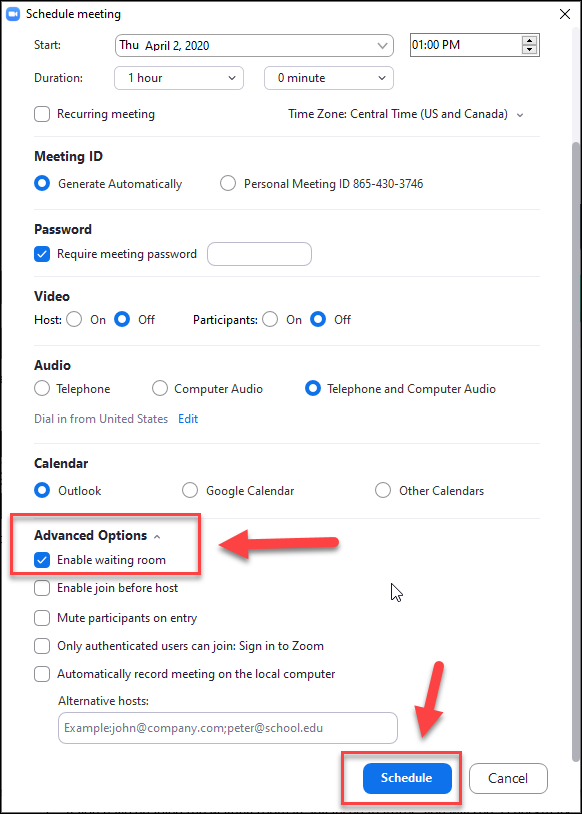
- Begin scheduling a meeting as you normally would.

- Scroll to the bottom of the scheduling window and
 click to open the “Advanced Options” dropdown menu.
 - “Enable waiting room” will be selected by default.
- If you do not want to use the waiting room for this particular meeting, simply uncheck the box.
- Click “Schedule.”
Personal Meeting Room
To enable or disable the waiting room for meetings using your personal meeting room ID (not ideal for security), you will need to access the Zoom web portal. Note: Enabling the waiting room from the advanced features (see “Enabling the Waiting Room”) will enable the waiting room for your personal meeting room as well.
- Open the desktop app and click on the cogwheel in the upper right corner, “Settings.”
- Click on “Profile.”
- Click on “View Advanced Features.”
- You may need to Login and Duo.
- Click on “Profile.”
- Select “Meetings” in the left-hand column. Then click on the “Personal Meeting Room”
tab.
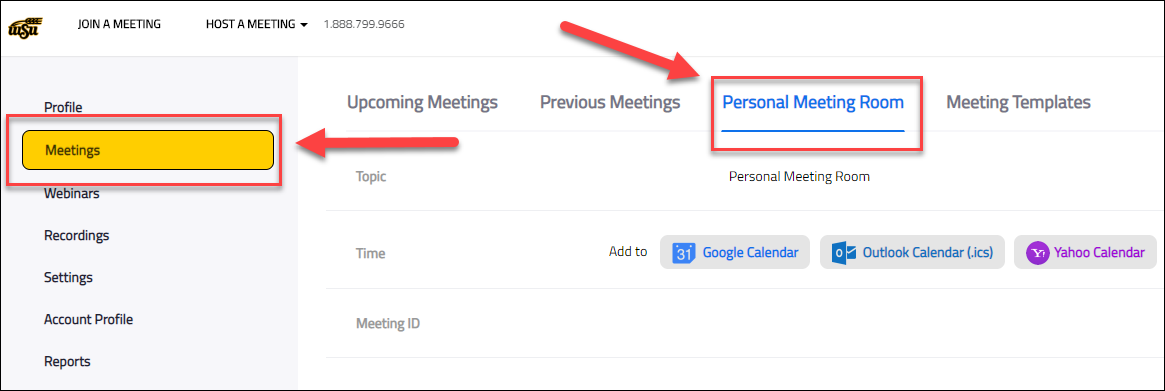
- Scroll down to “Meeting Options.”
- If you have enabled the waiting room in advanced features, you will see a checkmark next to “Enable waiting room.”
- To disable the waiting room for your personal meeting room, click “Edit this Meeting.”

- Uncheck “Enable waiting room” and click “Save.”

During the Meeting
During your meeting you can admit participants from the waiting room one at a time or admit all participants at once with one click. You can even return them to the waiting room or enable/disable the waiting room feature as desired.
Admitting Participants from the Waiting Room
- When participants first arrive in your waiting room, the “Manage Participants” icon
in the bottom toolbar will highlight and flash. A small pop-up will appear, asking
if you want to “Admit” or “See waiting room.” If you wish to add participants as they
arrive, click on “Admit.” If you wish to wait or to see the waiting room, click “See
waiting room.”

- To add participants individually at any time during the meeting:
- Click “Manage Participants” in the toolbar at the bottom of your screen. Note: If
you do not see this toolbar, simply hover over the bottom of your screen and it should
appear.

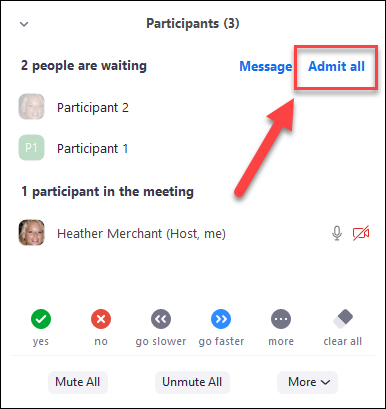
- The “Manage Participants” window will open. Hover over the name of the participant
you wish to admit, and click “Admit.”

- To admit all participants in the waiting room at once, instead of clicking “Admit” for each participant, click “Admit all.”
- Click “Manage Participants” in the toolbar at the bottom of your screen. Note: If
you do not see this toolbar, simply hover over the bottom of your screen and it should
appear.
Returning Participants to the Waiting Room
- Click “Manage Participants” in the toolbar at the bottom of your screen. Note: If
you do not see this toolbar, simply hover over the bottom of your screen and it should
appear.
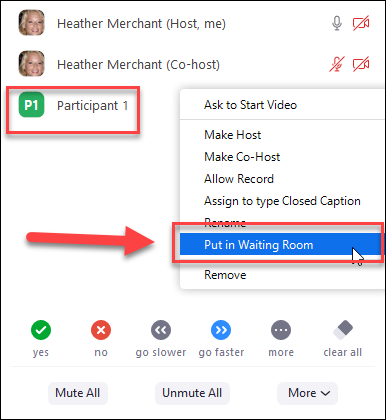
- The manage participants window will open. Hover over the participants name and click
“More.”

- A dropdown menu will open, click on “Put in Waiting Room.”
Enabling and Disabling the Waiting Room During the Meeting
- Click “Manage Participants” in the toolbar at the bottom of your screen. Note: If
you do not see this toolbar, simply hover over the bottom of your screen and it should
appear.
- The manage participants window should open. At the bottom of this window, click “More.”
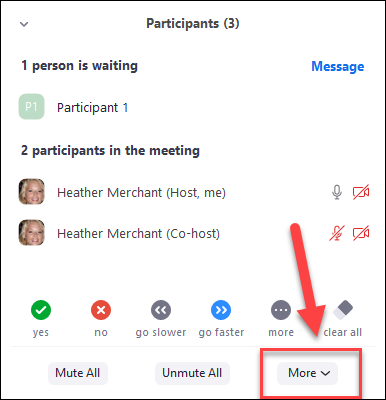
- Click “Put Participants in in Waiting Room on Entry” to enable or disable the waiting room feature.”
