Using Teams for Class Meetings
Microsoft Teams is a great tool for scheduling, holding, and recording class meetings.
NOTE FOR ULTRA USERS: If you would like more information on enabling Teams in your course, which creates a Microsoft Team for your class, see our Teams in Blackboard page. While enabling Teams in your course is not required for holding class meetings in Teams, it has many benefits. Specific training about the Blackboard Teams integration is scheduled for the August 2023 Academic Resources Conference.
Jump to section:
Set up a meeting
There are multiple ways to schedule a Teams meeting for your course. The most direct way is to use the Teams App.
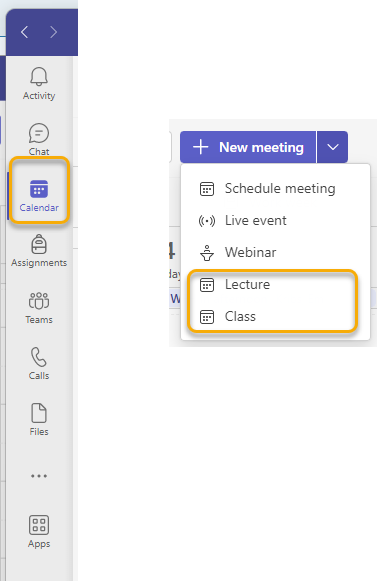
To set up a recurring Teams meeting for your course, open the Teams app, and select "Calendar."
In the top right, you will find a button that says New meeting. Selecting the chevron to the right shows you the options for the types of meetings you can schedule. Each type has its own settings and benefits, but for our purposes, Lecture or Class works best.
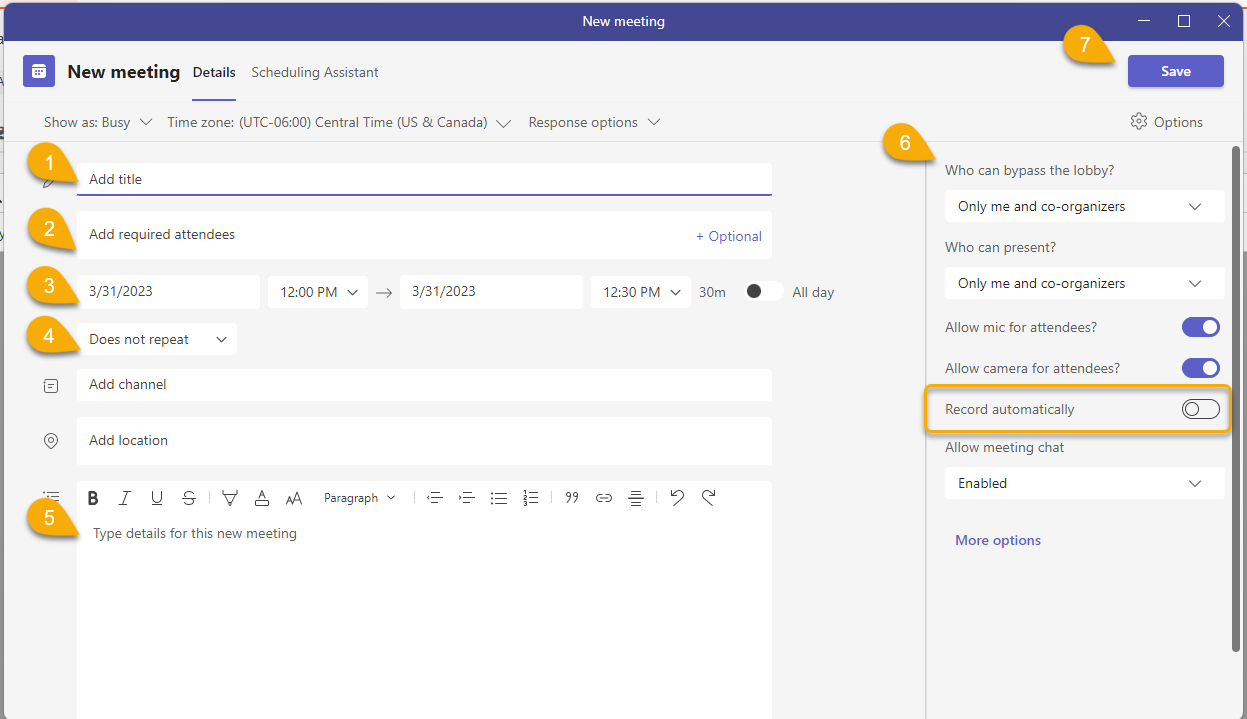
To schedule the meeting:
- Add a title. Because this will be a recurring class meeting, choose a title that will reflect that, like "Bio 101 Class Meeting", or "Class Lecture."
- Since we are sharing a link instead of an email invitation, it is not necessary to type in the names of all of your students. However, in order to create the link, you need to invite at least one person from the course. This could be a co-teacher, a TA, an embedded librarian, or a student in the course.
- Select the date and time of the first meeting.
- Set the recurrence schedule, i.e. Weekly, Monday and Wednesday. Select an end date. You also have the option to create custom recurrence.
- Optional: add details for the meeting
- Look at the side menu to see if there are other options you would like to select or deselect. "Record automatically" is not selected by default, so select here or remember to manually record when you are in the meeting. Note: These settings can be changed after the meeting is scheduled and are also available during the meeting, so if you forget to do something here, don't fret!
- Click the Save button.
Share the class meeting in Blackboard
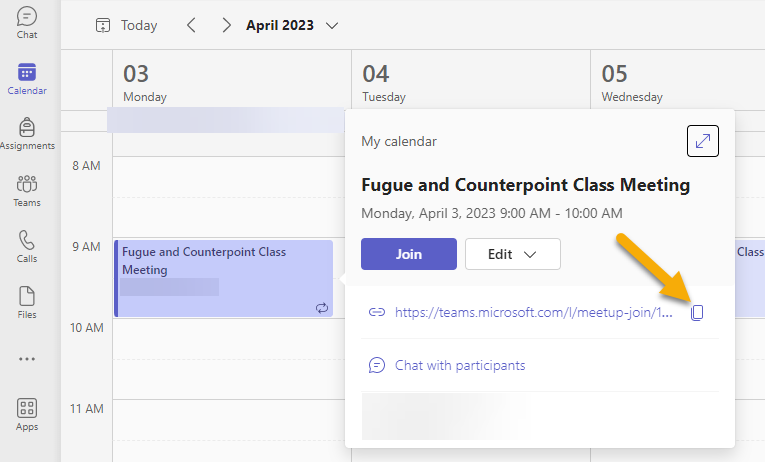
Sharing your class meeting in Blackboard can be as easy as posting the link in your in your Course. Find the link by locating and clicking on the meeting in your Teams calendar.
In Blackboard Original:
Add it to your Course Materials section as a link,
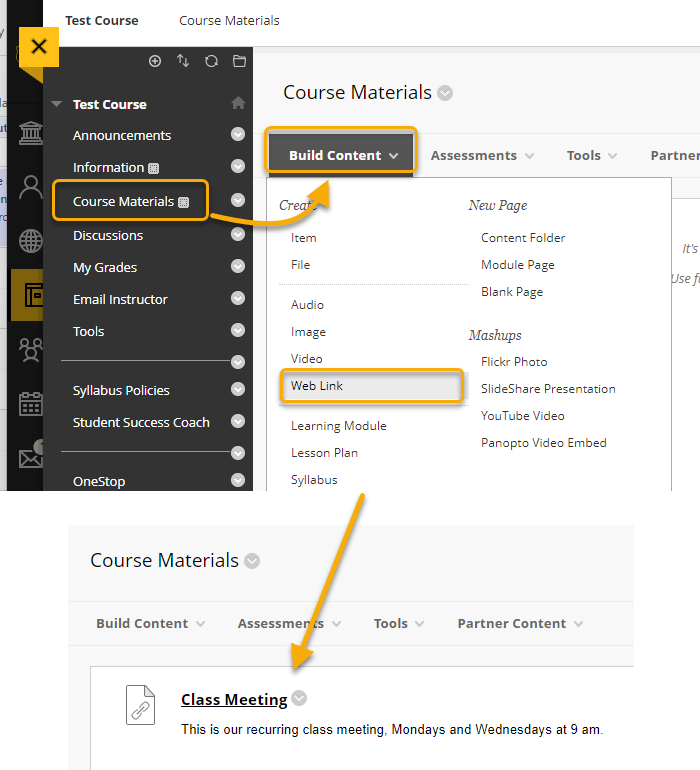
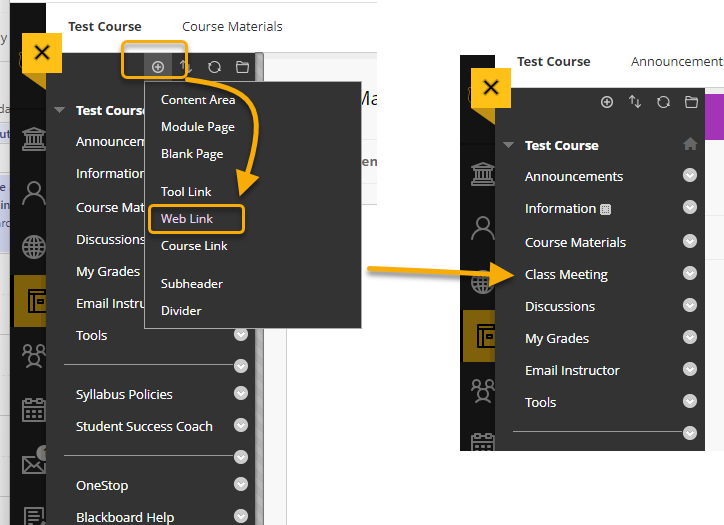
or even create a menu item for it by hovering over the plus sign, and then selecting Web link. The link will show up at the bottom of your menu, but you can move it wherever you want.
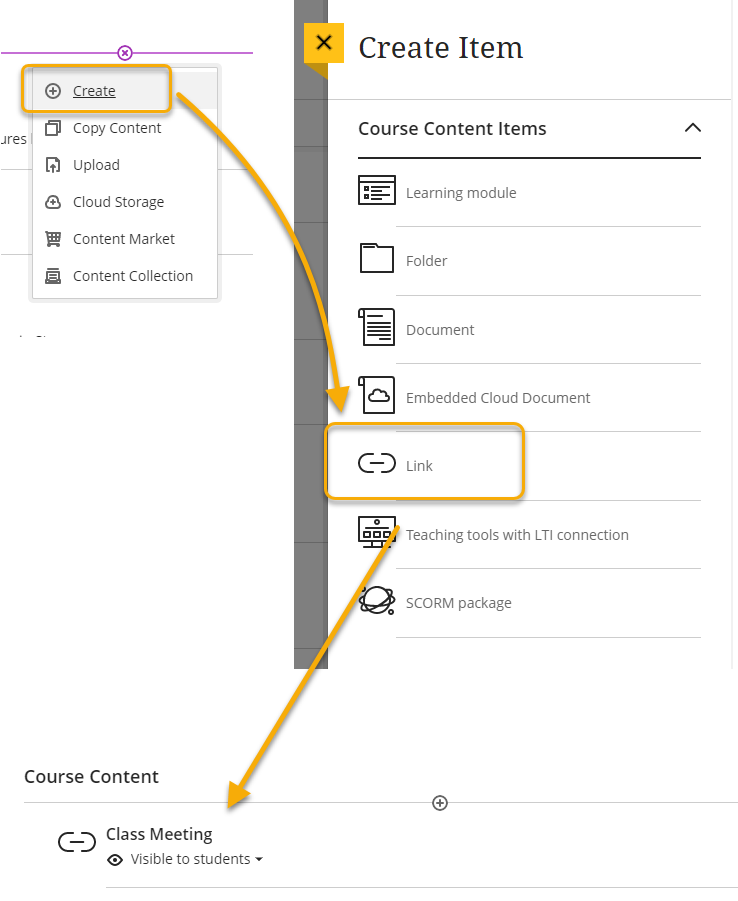
In Blackboard Ultra:
Add it to your Course Content as a link (either on its own or inside a folder),
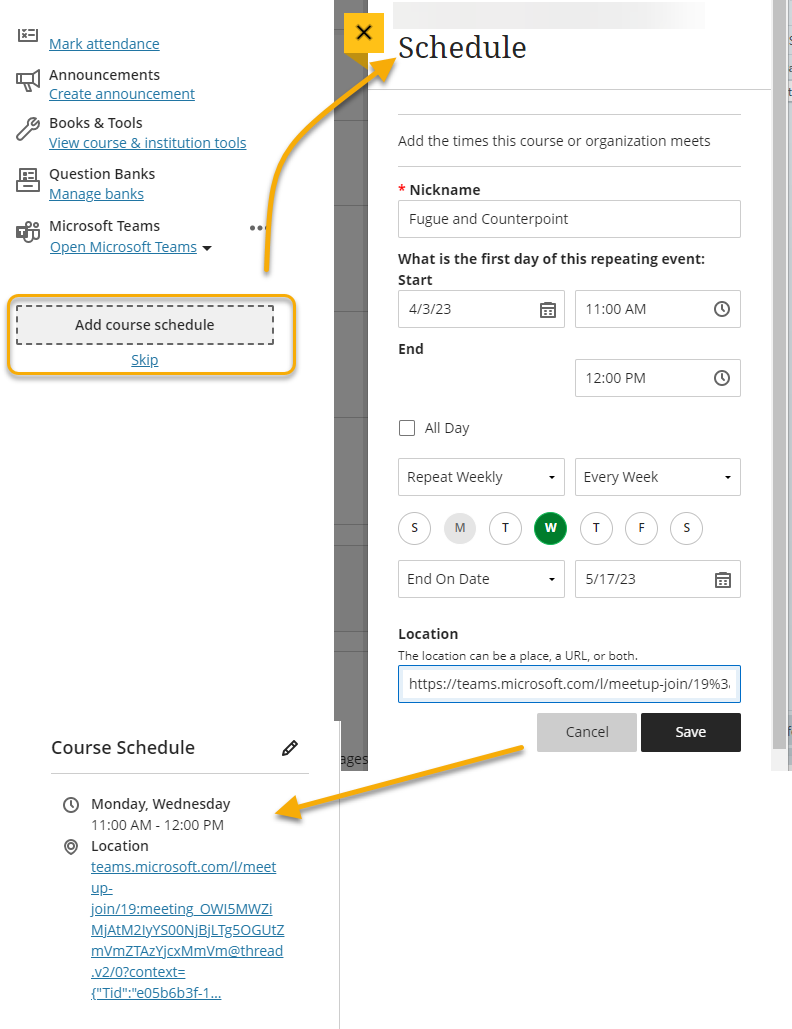
Or Add it to your course schedule. "Add course schedule" should be available at the bottom of your menu; if not, go to the course calendar, select the plus sign and choose "Edit Course Schedule."
Share meeting recording
In order to share a Teams meeting recording, locate it by opening the Teams app and selecting "Chat."
Find the meeting and select it. Here you will find information about the meeting, as well as anything that was entered in the chat area during the meeting. Also found here are links to the meeting transcript, attendance, and meeting recording. To copy the link, select the three dots (the more menu) at the top right of the item. Copy the link, and post it in Blackboard wherever you would like. NOTE: Because this is the same meeting recurring over and over, you will want to choose a more descriptive title for the recording link in Blackboard, i.e. "4/3/2023 Meeting Recording."
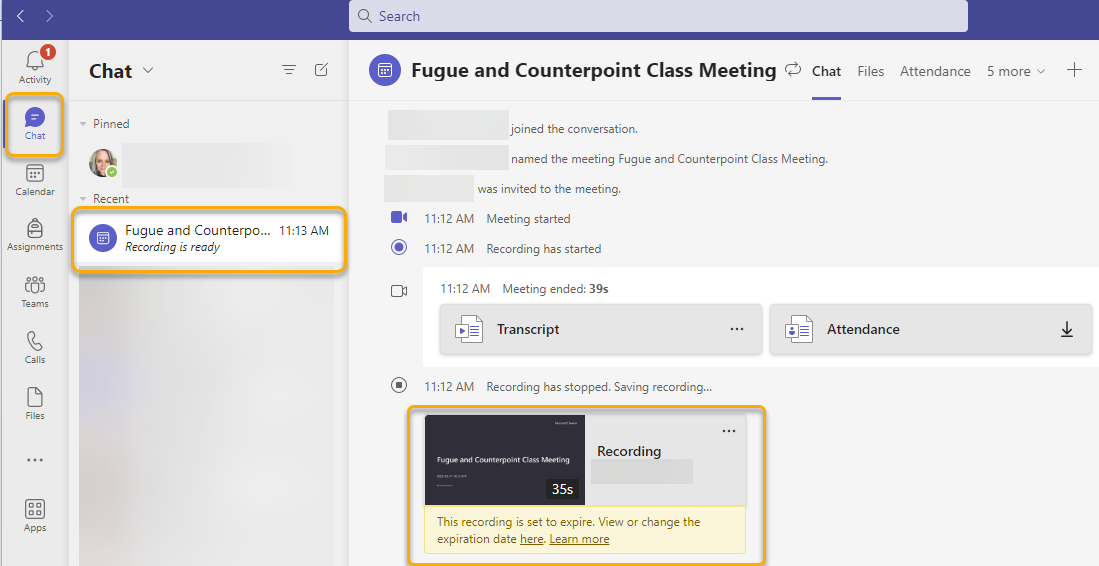
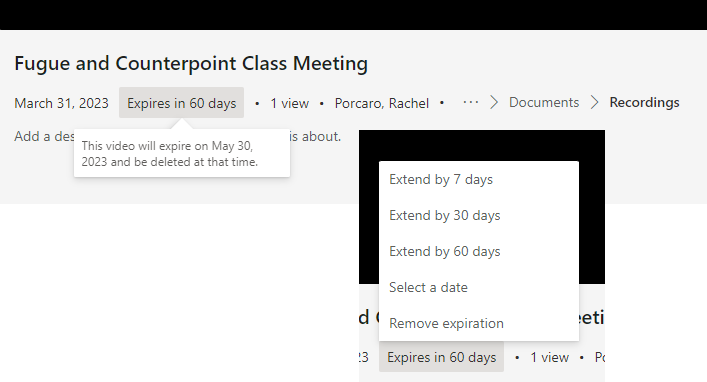
You might notice a warning near the recording that says "This recording is set to expire. View or change the expiration date here." The default retention setting for meeting recordings is 60 days. To change that, click on the link and select the current expiration date to see a menu of options.
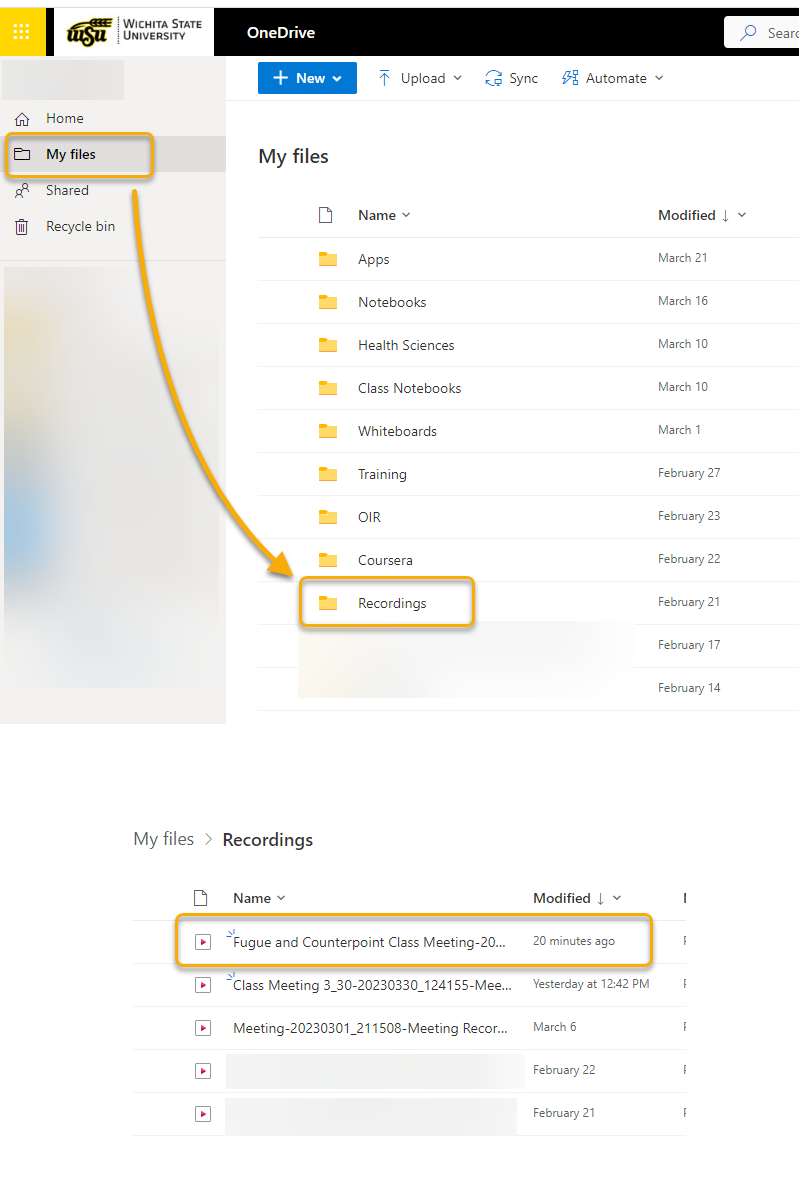
FYI: The recordings for meetings created from your calendar are automatically saved to your One Drive. To locate them, open Microsoft 365 and choose "One Drive" from the waffle menu. From there, select "My Files" and find the "Recordings" folder. Inside the folder you will find a list of all of your Teams recordings, with options to open, share, manage access, and much more.
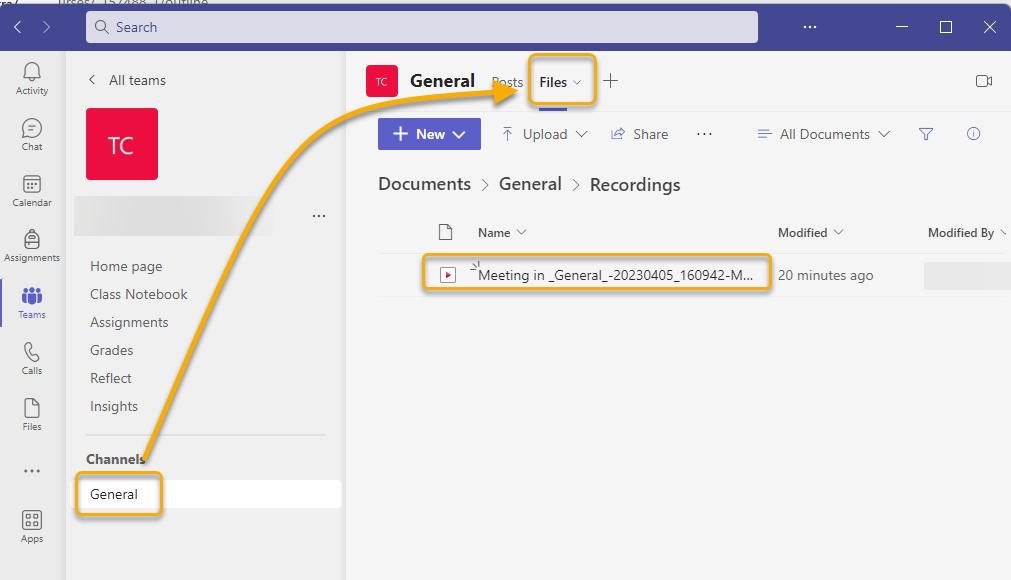
If you are in ULTRA and have enabled Microsoft Teams for your course (see the Teams in Blackboard page for more information), your recording will be available in the Files tab of your class Team, as well as in your class SharePoint site.